Virtual Private Cloud (VPC)
The Virtual Private Cloud (VPC) allows you to isolate the QIE install into its own network with its own security. The following steps walk you through setting up a new VPC for the QIE environment. All the other services used in the guide use this VPC. However, if your organization already has a VPC that they would like to use for QIE, you can just double check that the VPC is configured correctly for QIE and move to the next chapter.
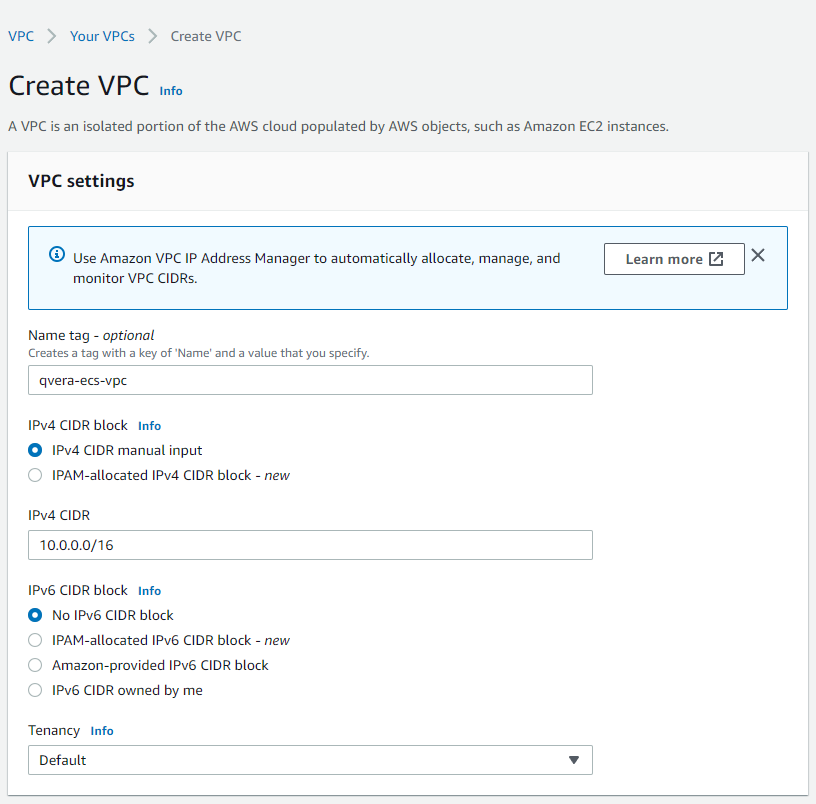
Create New VPC
Navigate to the VPC management page and click on the 'Your VPCs'. Select the 'Create VPC' button on the top-right side of the page.
This guide uses the name 'qie-ecs-vpc' and the IPv4 CIDR Block of '10.0.0.0/16'.
Do not use the IPv6 CIDR block. Leave everything else at the default values.
Note
At the time of writing this document, new VPC's have a default value of 'Enabled' for DNS resolution, but 'Disabled' for DNS hostnames. Both values need to be enabled.
Select the new VPC so that you can enable 'DNS hostnames' for it. From the 'Actions' drop-down, select 'Edit DNS Hostnames'. Check the 'Enable' checkbox and save the changes.
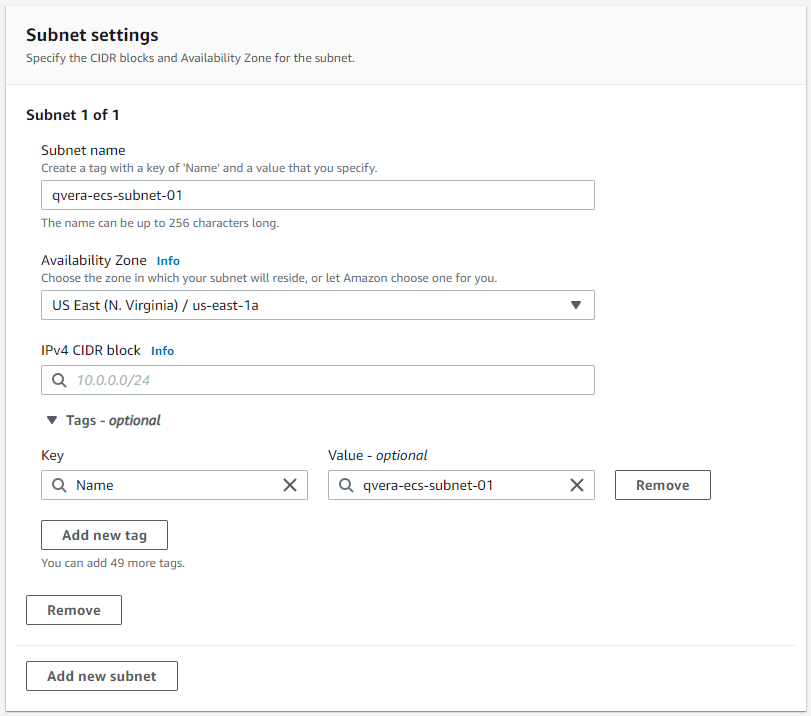
Create Subnets
The Amazon Aurora Serverless database requires that there are at least two different subnets defined in the VPC for the database, so this step creates two different subnets.
From the left menu, select 'Subnets', then select the 'Create Subnet' button in the top right corner of the page.
Select the 'qie-ecs-vpc' from the drop-down. Give the first subnet the name of 'qie-ecs-subnet-01'. Set the first subnet availability zone to 'us-east-1a'. Finally, set the IPv4 CIDR block to '10.0.1.0/24'.
Click on 'Add new subnet' at the bottom of the page, and then create the second subnet. The name is 'qie-ecs-subnet-02', and the availability zone is set to 'us-east-1b'. Set the IPv4 CIDR block to '10.0.2.0/24'.
Click on the 'Create subnet' button at the bottom of the page to create the two new subnets.
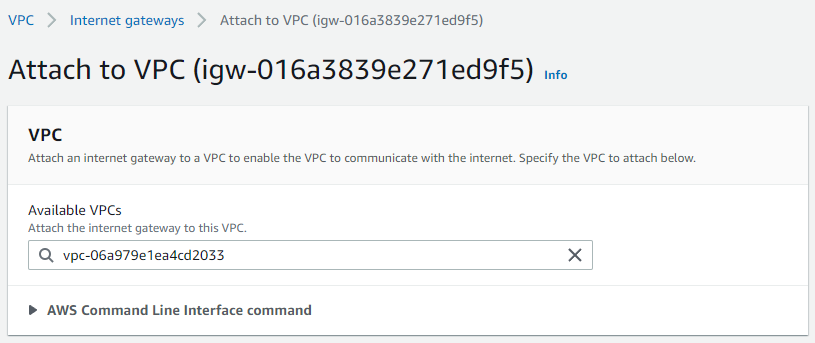
Create Internet Gateway
To allow access to resources in this VPC from the internet, the VPC must have an 'Internet Gateway' defined.
From the left menu, select 'Internet Gateways', then select the 'Create internet gateway' button at the top right corner of the page.
For the name, just use 'qie-ecs-ig'. Click on the 'Create internet gateway' button at the bottom of the page.
Now that the gateway is created, attach it to the VPC. From the details page, select the 'Action' drop down menu and select 'Attach to VPC'. Select the 'qie-ecs-vpc' from the drop-down menu and click 'Attach internet gateway'.
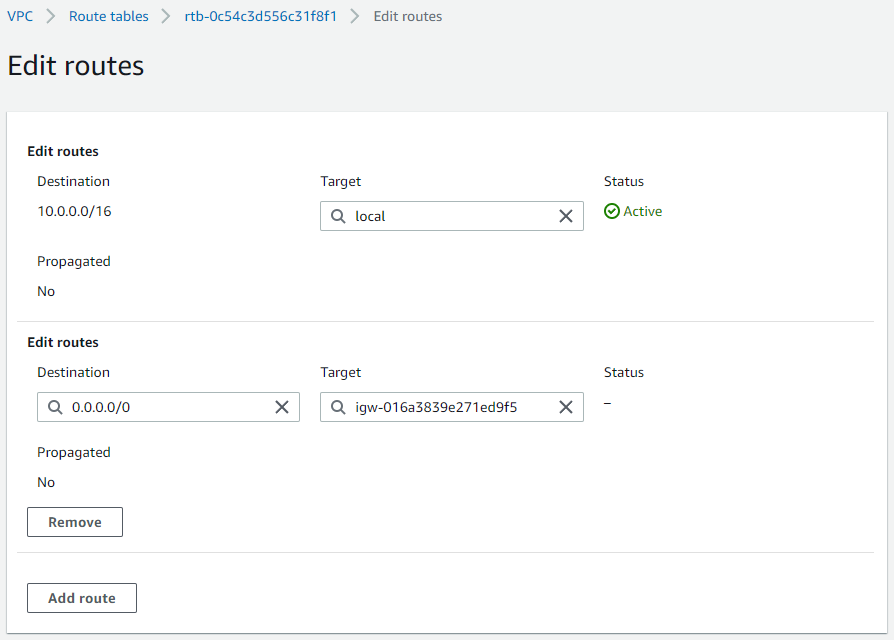
Create Route to Internet
Now that the 'Internet Gateway' is attached to the VPC, create a route so that services in the VPC have access to the internet using this attached gateway.
Select 'Route Tables' from the left menu. Select the 'qie-ecs-vpc' route that was created with the VPC.
On the bottom half of the page, there is a 'Routes' tab. Select the 'Edit routes' button on the top right corner of the tab.
Click on the 'Add route' button. The destination needs to be '0.0.0.0/0' and the target needs to be 'igw-{id}'.
Note
Typing 'igw-' in the 'Target' field converts the field to a drop-down and allows you to select the correct gateway from the drop-down itself without having to know the full gateway ID.
Click on 'Save Changes' and you are brought back to the route table detail view. The 'Route' tab should now have two routes defined.
Create VPC Endpoint
The QIE image needs to access the stored secrets that are set up later in the install guide. The ECS environment needs an endpoint that is accessible for the service.
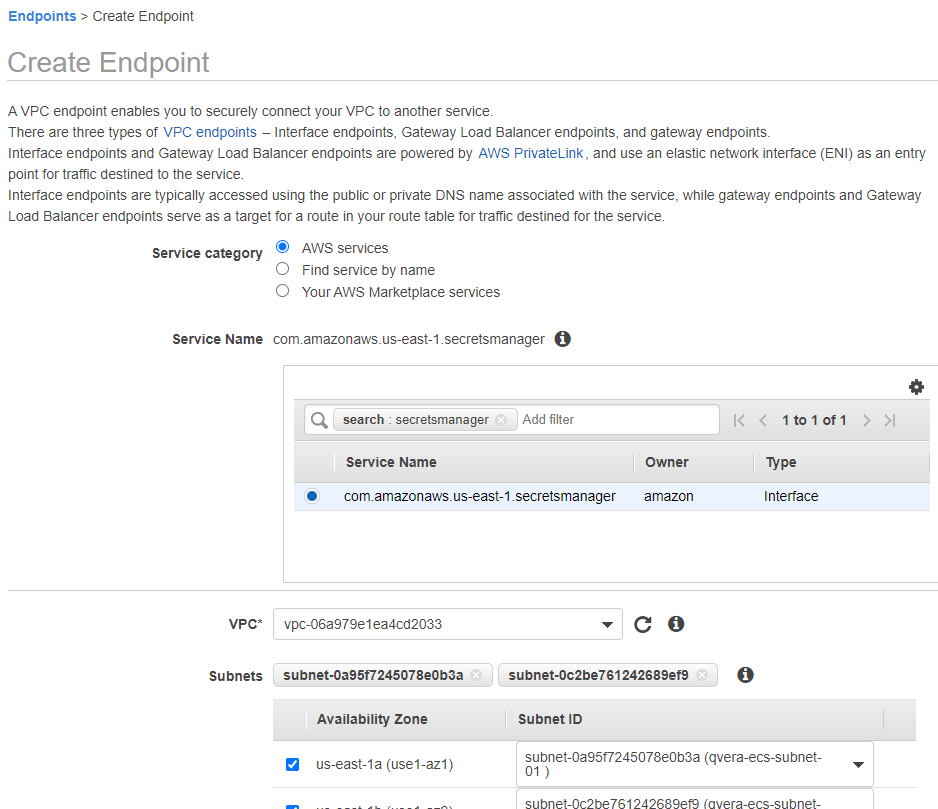
Select 'Endpoints' from the left menu. Select 'Create Endpoint' button at the top of the page.
The 'Service category' is 'AWS service', then from the 'Service Name' box, type in 'secretsmanager' and press the 'enter' key. The service now appears in the selection box. Select the 'secretsmanager' service.
Select the 'qie-ecs-vpc' from the VPC drop-down menu.
Accept the default values for the rest of the options and click on the 'Create endpoint' button on the bottom of the page.