Practice Exercise
Note
This exercise assumes that the QIE server has been installed and configured and that you have been given a QIE username and password with the appropriate privileges to create and modify QIE channel (interface) configurations. Please refer to the QIE installation guide for instructions on how to complete these steps if they have not already been completed.
Note
This exercise also assumes that you have completed the QIE Tutorial and are familiar with basic channel setup.
In the real world, when an interface need arises, the requirements and other information are described to the QIE developer. These requirements are referred to as a problem statement. From this problem statement the QIE developer should be able to start coding and testing an interface without having to think about the JavaScript syntax. The QIE Code Wizard and Auto Code Completion helps the developer focus on the business logic of the interface and not the JavaScript code or syntax.
The following exercise follows this pattern and help the QIE developer to learn the process of developing an interface and apply the JSON knowledge learned in this manual.
Exercise Problem Statement
Convert an HL7 ADT message to a JSON object:
-
Covert the inbound HL7 message type to JSON.
-
Create a JSON object with the following keys and values from the HL7 message.
| Keys | Key Value's Type | Value from HL7 |
|---|---|---|
| sendingApplication | String | MSH-3 |
| receivingApplication | String | MSH-5 |
| dateAndTime | String | MSH-7 |
| messageType | String | MSH-9 |
| messageId | Number | MSH-10 |
| eventTime | String | EVN-2 |
| patientID | String | PID-3 |
| firstName | String | PID-5.2 |
| middleName | String | PID-5.3 |
| lastName | String | PID-5.1 |
| dateOfBirth | String | PID-7 |
| sex | String | PID-8 |
| race | String | PID-10 |
| address | Object | Address is a list of keys. |
| streetAddress | String | PID-11.1 |
| city | String | PID-11.3 |
| state | String | PID-11.4 |
| postalCode | String | PID-11.5 |
| String | PID-13.4 | |
| phoneNumbers | Object/Array | Phone should be an array with two objects within phone, one for home phone and one for work phone. For each object include a key of type and assign the value of one as home and the other as work. |
| usage | String | home |
| value | String | PID-13.1 |
| usage | String | work |
| value | String | PID-14.1 |
| maritalStatus | String | PID-16 |
| ssn | String | PID-19 |
| ethnicity | String | PID-22 |
This exercise uses the following sample ADT message. The message can be saved as a sample message in the channel. This allows you to look up node paths (e.g. EVN-2) and to test the messages in the Test window.
Sample Message
MSH|^~\&|EHR|Test^E IM|Imaging|E IM|20120925173019||ADT^A04|16642134|P|2.3.1|||NE|NE
EVN|A04| 20120925174018
PID|1||661||Chamberlain^Lisa^S||1961-03-01|F||B|6790 Oak St^^Plano^IL^60448^USA||(214) 669-9876^^^lchamb@mbc.com|(214) 669-0123 [123]||M|||237-12-9812|||N
STOP HERE! Before proceeding with the step by step exercise instructions below try to perform the exercise with just the explanation given above. Do not forget to use the "QIE Code Wizard" to help with your code syntax.
Step 1: Create a Basic Channel
In the Default Zone, create a new channel called "ADT >> to JSON".
Select HL7 as the source message format, and File as the source. Set the source file path to C:\QIE\In\.hd.
Load the sample HL7 messages above as a Sample Message.
Set the destination node to File with a path of C:\QIE\Out\.json.
Note
Create a new folder on the C: drive of the Qvera server or your local machine called "QIE" and under that folder two other folders called "In" and "Out" if needed.
Step 2: Under the Mapping Node change the message type to JSON
Note
The following exercise uses the JSON keys noted in the Exercise Problem Statement table shown above.
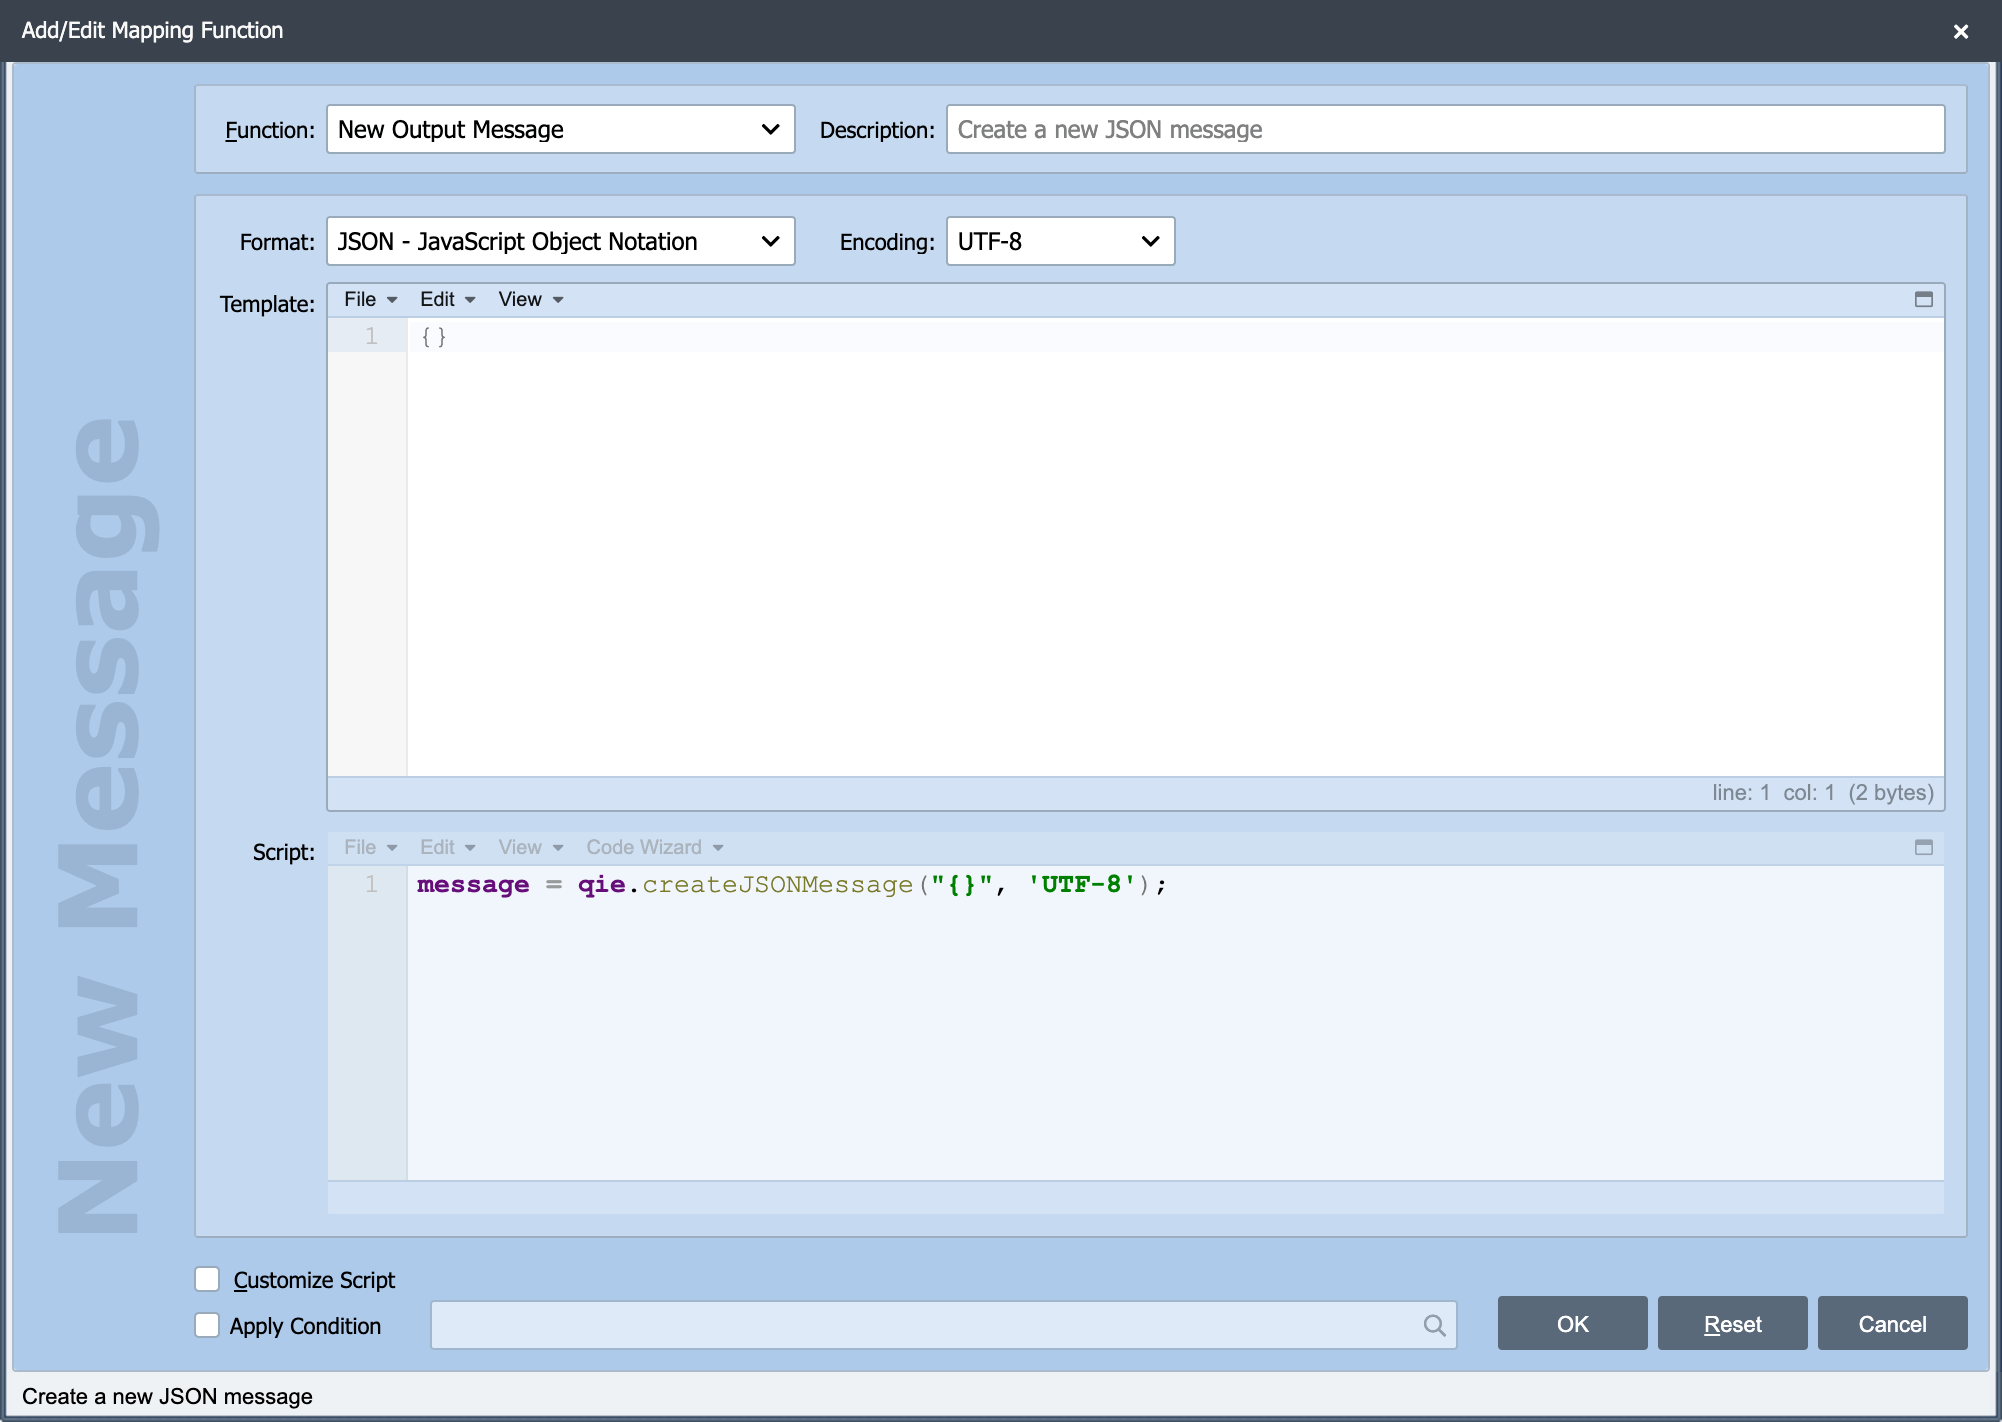
- Select the mapping node from the graphical display of the channel. Click Insert and Change the Function to "New Message" and the Format to "JSON, JavaScript Object Notation".
Step 3: Add 4 Standard mapping functions to create the first 4 JSON keys.
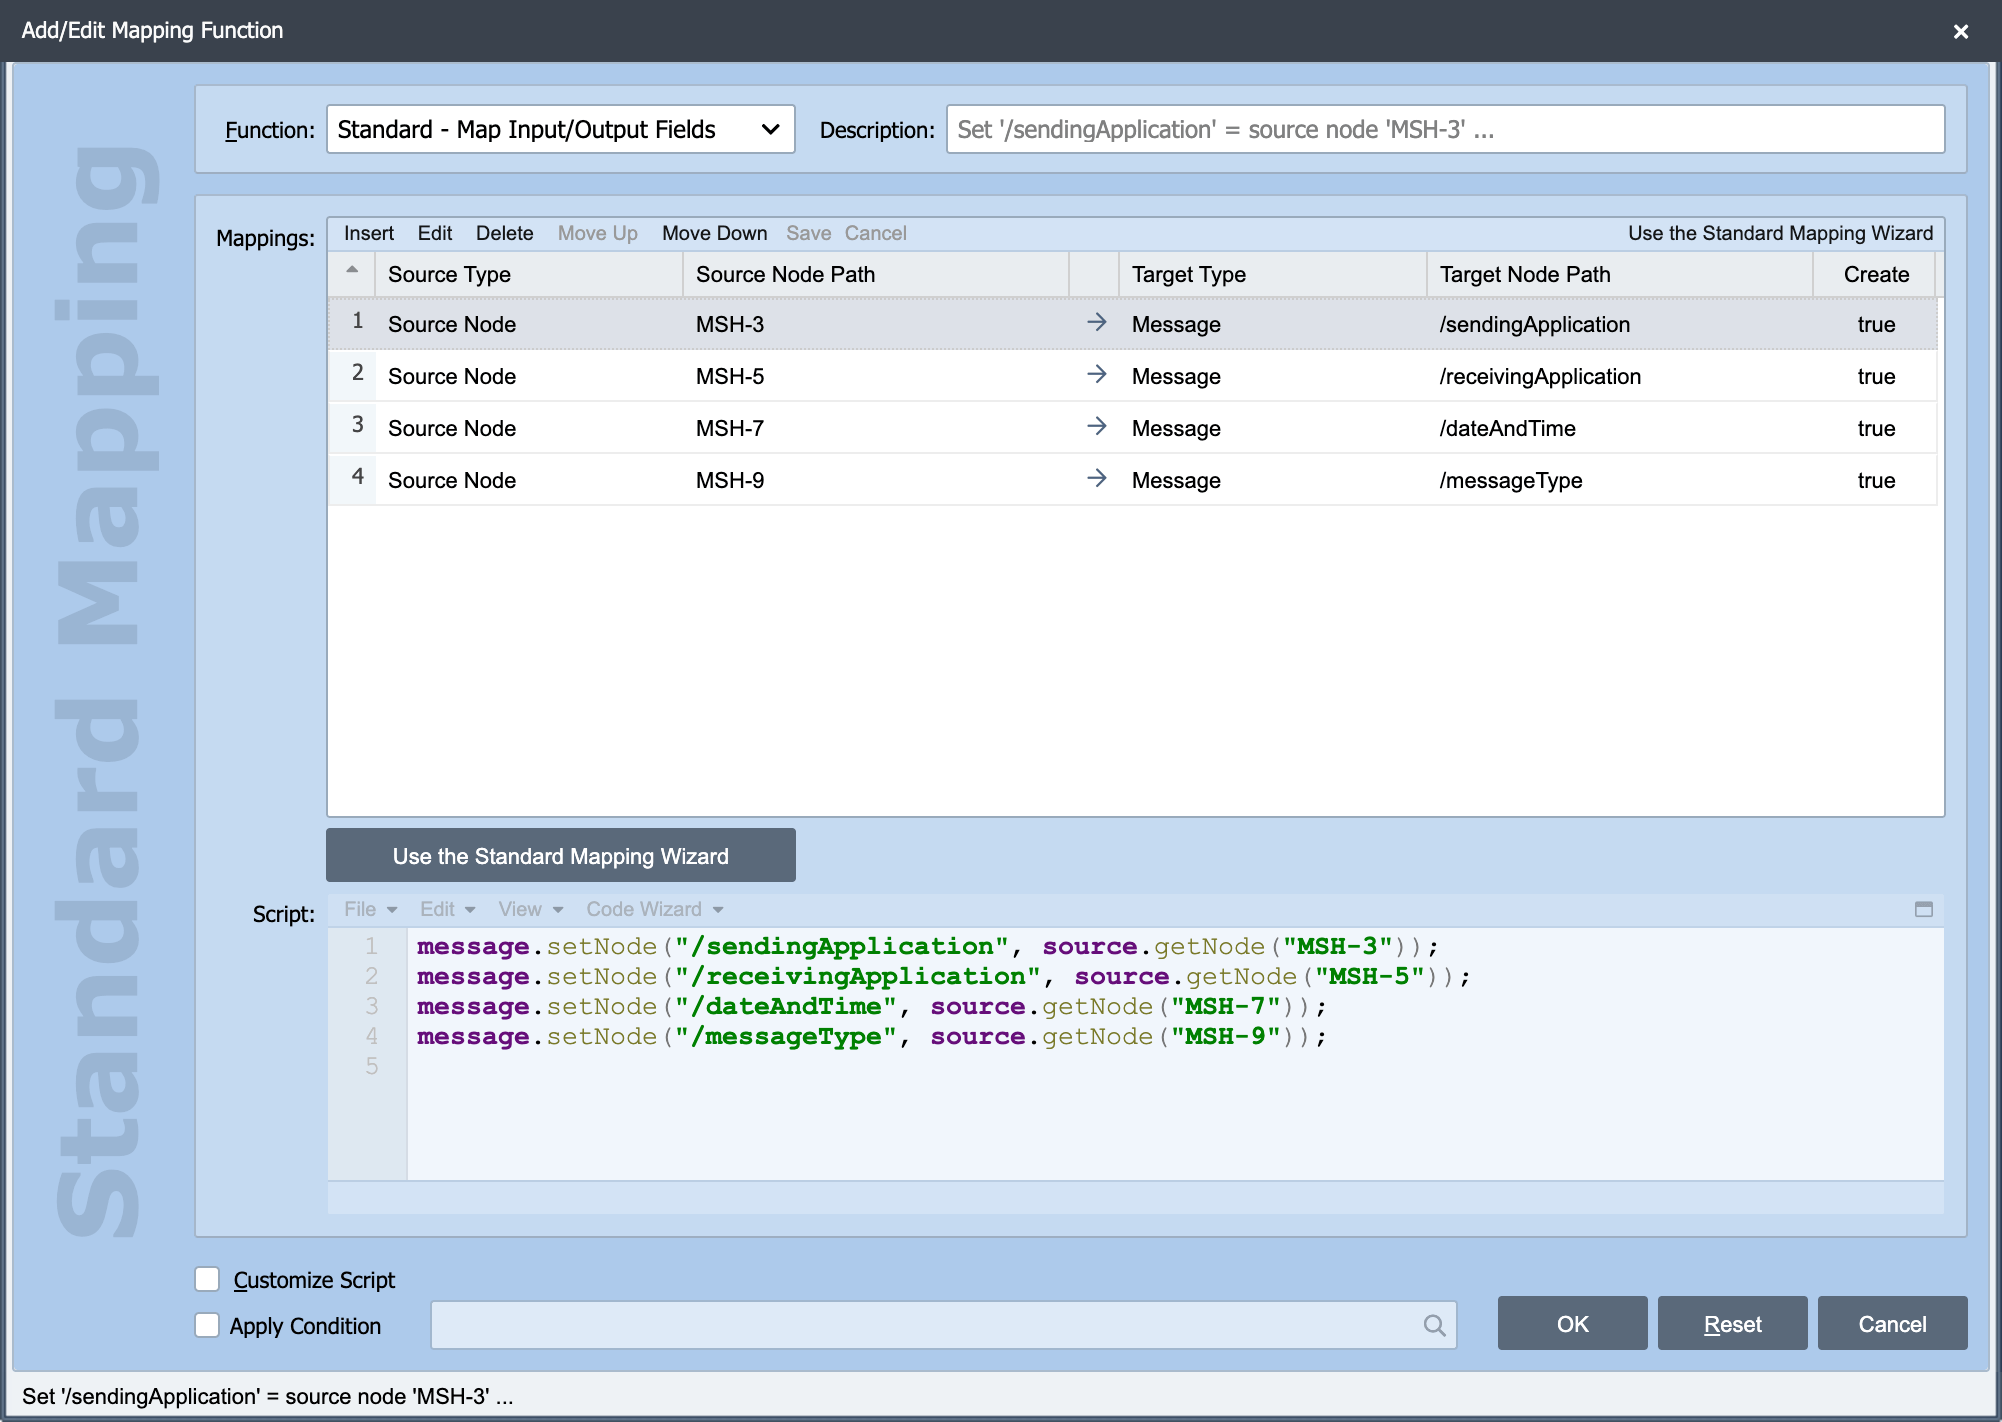
- Select insert to add another new mapping function.
Select "Standard" as the function. Set the Source to "Source Node" and the Node Path as "MSH-3".
For the Target set the Target Type as "Message" and the Target Node Path to "sendingApplication".
Note
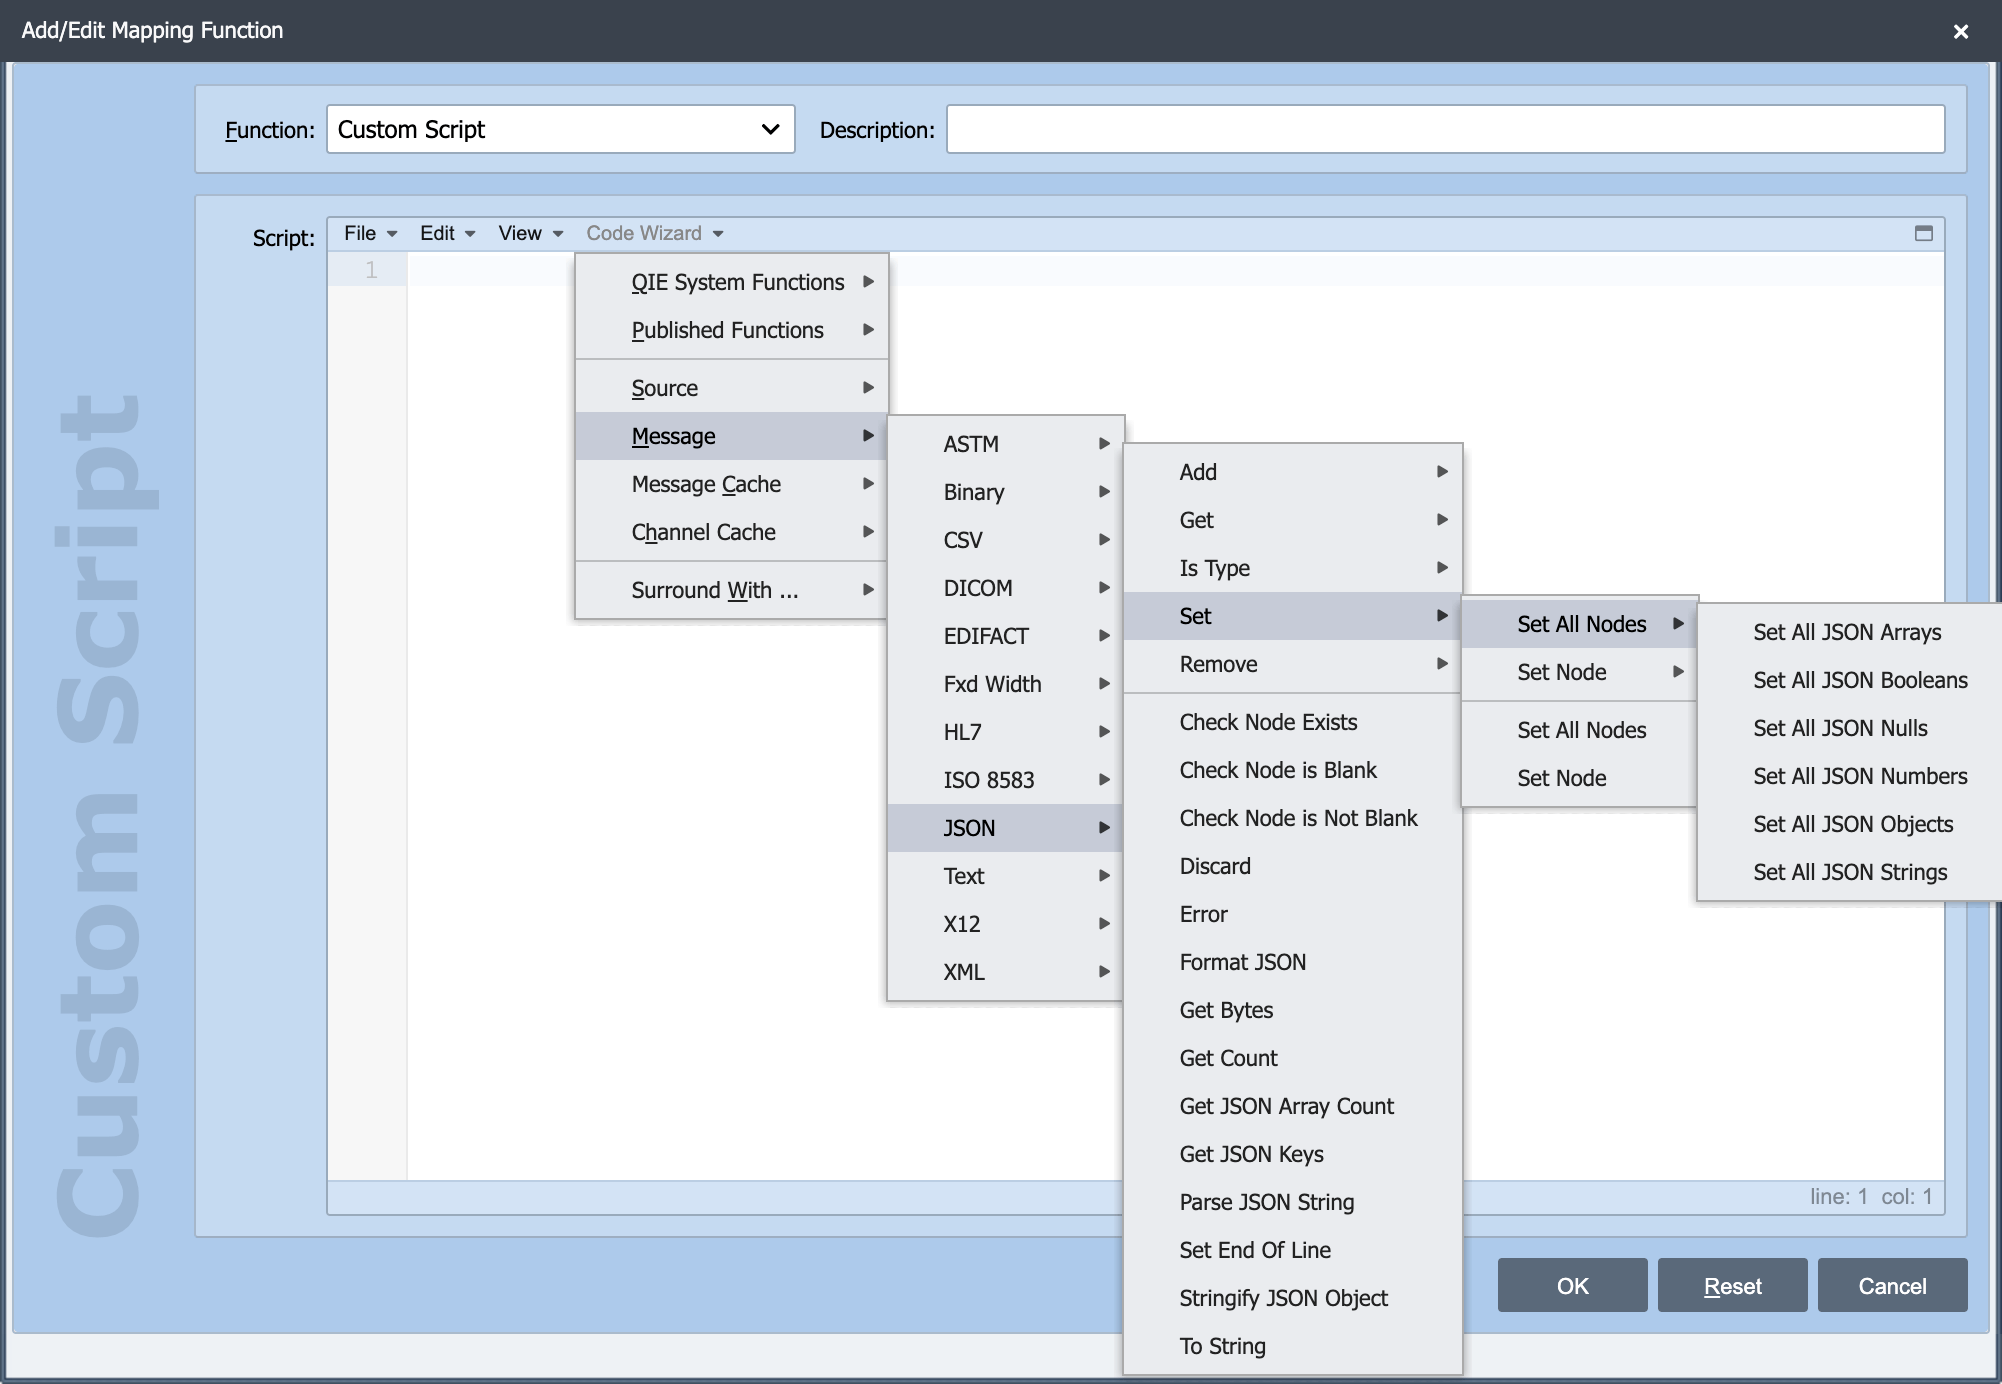
When using the Standard Mapping Function QIE uses message.setNode(), however, in the custom scripting window you can choose to use message.setNode() or message.setJSONString() for setting string values. For JSON types outside of "String" you need to use the JSON type specific functions (e.g. message.setJSONNumber(), message.setJSONBoolean(), etc).
-
Test the code in the Test Window. The expected output should look like:
Congratulations! You have just coded your first JSON object using QIE without having to focus on the syntax as much as the business logic. This is a good thing ☺
-
Repeat steps 1 to 3 above for the next 3 JSON keys (receivingApplication, dateAndTime, and messageType).
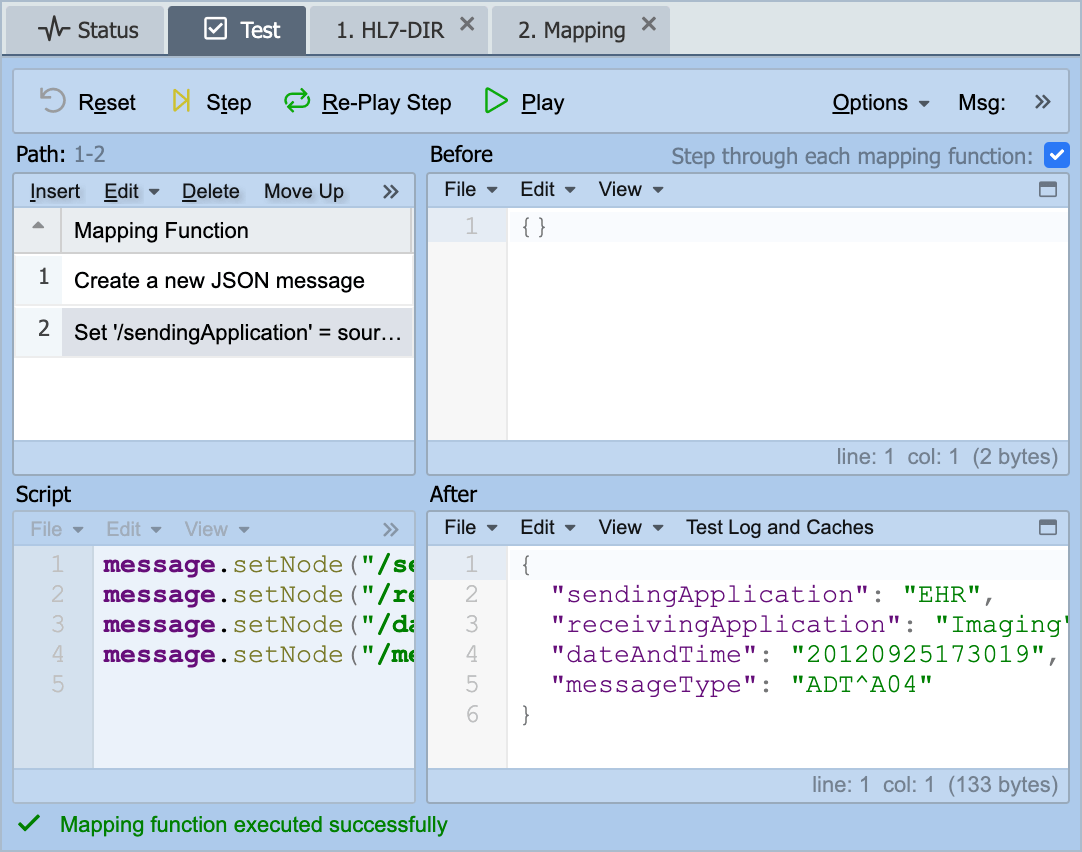
After testing your message, select "Format Code" from the View menu to display your JSON message with each key on its own line and properly indented.
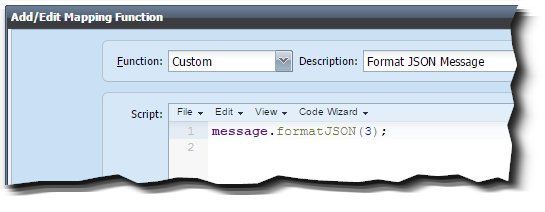
Alternatively, you can add one more custom function to format the JSON message with 3 indents. Making sure to keep that function the last one in the list.
The expected output should look like:
{
   "sendingApplication": "EHR",
   "receivingApplication": "Imaging",
   "dateAndTime": "20120925173019",
   "messageType": "ADT^A04"
}
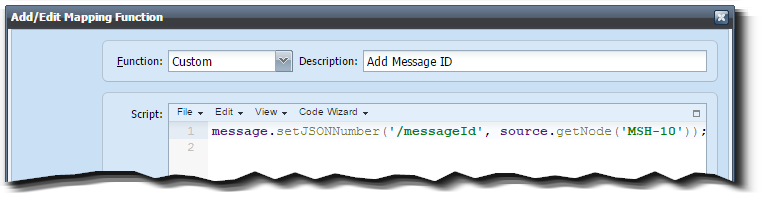
Step 4: Add a new custom mapping to add the messageId key with a type of number.
-
Select Insert to add a new mapping and change the function to type "Custom".
-
Add a description of "Add Message ID"
-
Delete the default line of code and add "message.setJSONNumber('nodePath', number, instance*, forceNode*);" from the Code Wizard. Replace the nodePath prompt with the name of the key (messageId), and number prompt with source.getNode('MSH-10'), and delete the instance and forceNode prompts.
-
Test your code and verify the output is as follows:
{
   "sendingApplication": "EHR",
   "receivingApplication": "Imaging",
   "dateAndTime": "20120925173019",
   "messageType": "ADT^A04",
   "messageId": 16642134
}
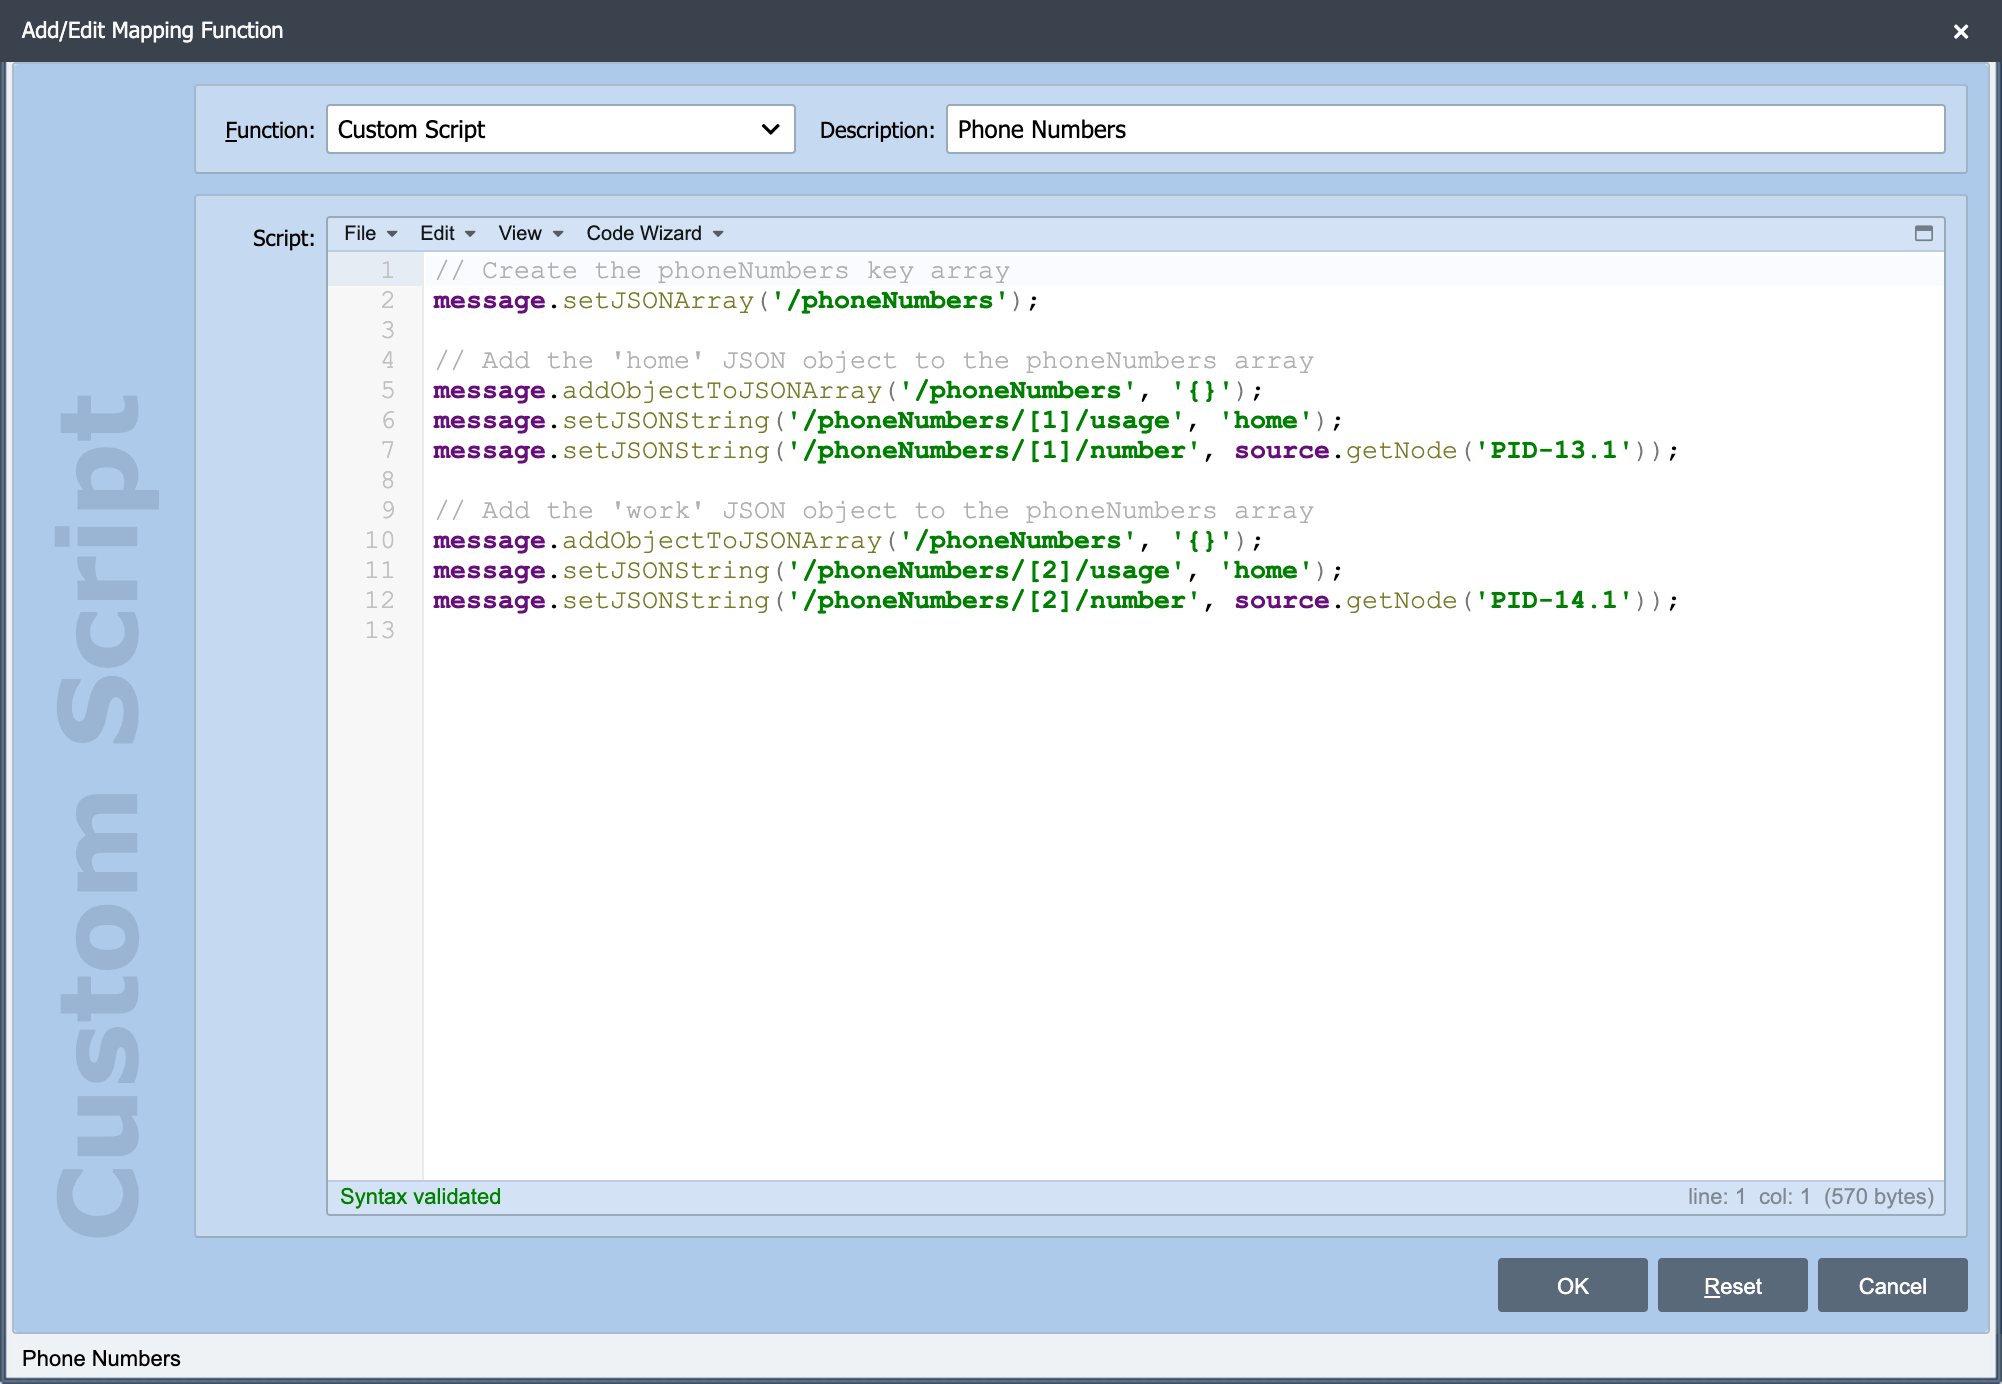
Step 5: Add the Phone Number Array
-
Select Insert to add a new mapping and change the function to type "Custom".
-
Add a description of "Add phone number array"
-
Delete the default line of code and create a phone number key and set it as an array. Calling setJSONArray with the node path of
/phoneNumberscreates the phone number key at the end of the current message even though the phone number key does not yet exist. -
Now that the phone number array has been created it is easy to set the new home and work phone number objects into the phone array, but first create the home phone object as follows:
// Create and add the 'home' JSON object to the phoneNumbers object message.addObjectToJSONArray('/phoneNumbers', '{}'); message.setJSONString('/phoneNumbers/[1]/usage', 'home'); message.setJSONString('/phoneNumbers/[1]/number', source.getNode('PID-13.1')); // Create and add the 'work' JSON object to the phoneNumbers object message.addObjectToJSONArray('/phoneNumbers', '{}'); message.setJSONString('/phoneNumbers/[2]/usage', 'work'); message.setJSONString('/phoneNumbers/[2]/number', source.getNode('PID-14.1')); -
Now test your code and verify the output is as follows:
{
   "sendingApplication": "EHR",
   "receivingApplication": "Imaging",
   "dateAndTime": "20120925173019",
   "messageType": "ADT^A04",
   "messageId": 16642134,
   "phoneNumbers": [
      {
         "usage": "home",
         "number": "(214) 669-9876"
      },
      {
         "usage": "work",
         "number": "(214) 669-0123 [123]"
      }
   ]
}
Step 6: Finish adding the rest of the JSON keys
Now finish adding the rest of the JSON keys using the appropriate JSON type function. Your completed message should look like:
{
   "sendingApplication": "EHR",
   "receivingApplication": "Imaging",
   "dateAndTime": "20120925173019",
   "messageType": "ADT^A04",
   "messageId": 16642134,
   "eventTime": " 20120925174018\t",
   "patientID": "661",
   "firstName": "Lisa",
   "middleName": "S",
   "lastName": "Chamberlain",
   "dateOfBirth": "1961-03-01",
   "sex": "F",
   "race": "B",
   "address": "6790 Oak St^^Plano^IL^60448^USA",
   "email": "lchamb@mbc.com",
   "phoneNumbers": [
      {
         "usage": "home",
         "number": "(214) 669-9876"
      },
      {
         "usage": "work",
         "number": "(214) 669-0123 [123]"
      }
   ],
   "maritalStatus": "M",
   "ssn": "237-12-9812",
   "ethnicity": "N"
}
This completes the JSON tutorial exercise. Hopefully, this has been a helpful way to start to understand how to use JSON in QIE by leveraging the tools that the interface engine provides. Happy coding!