OpenID Connect (OIDC) Authentication
Use OIDC
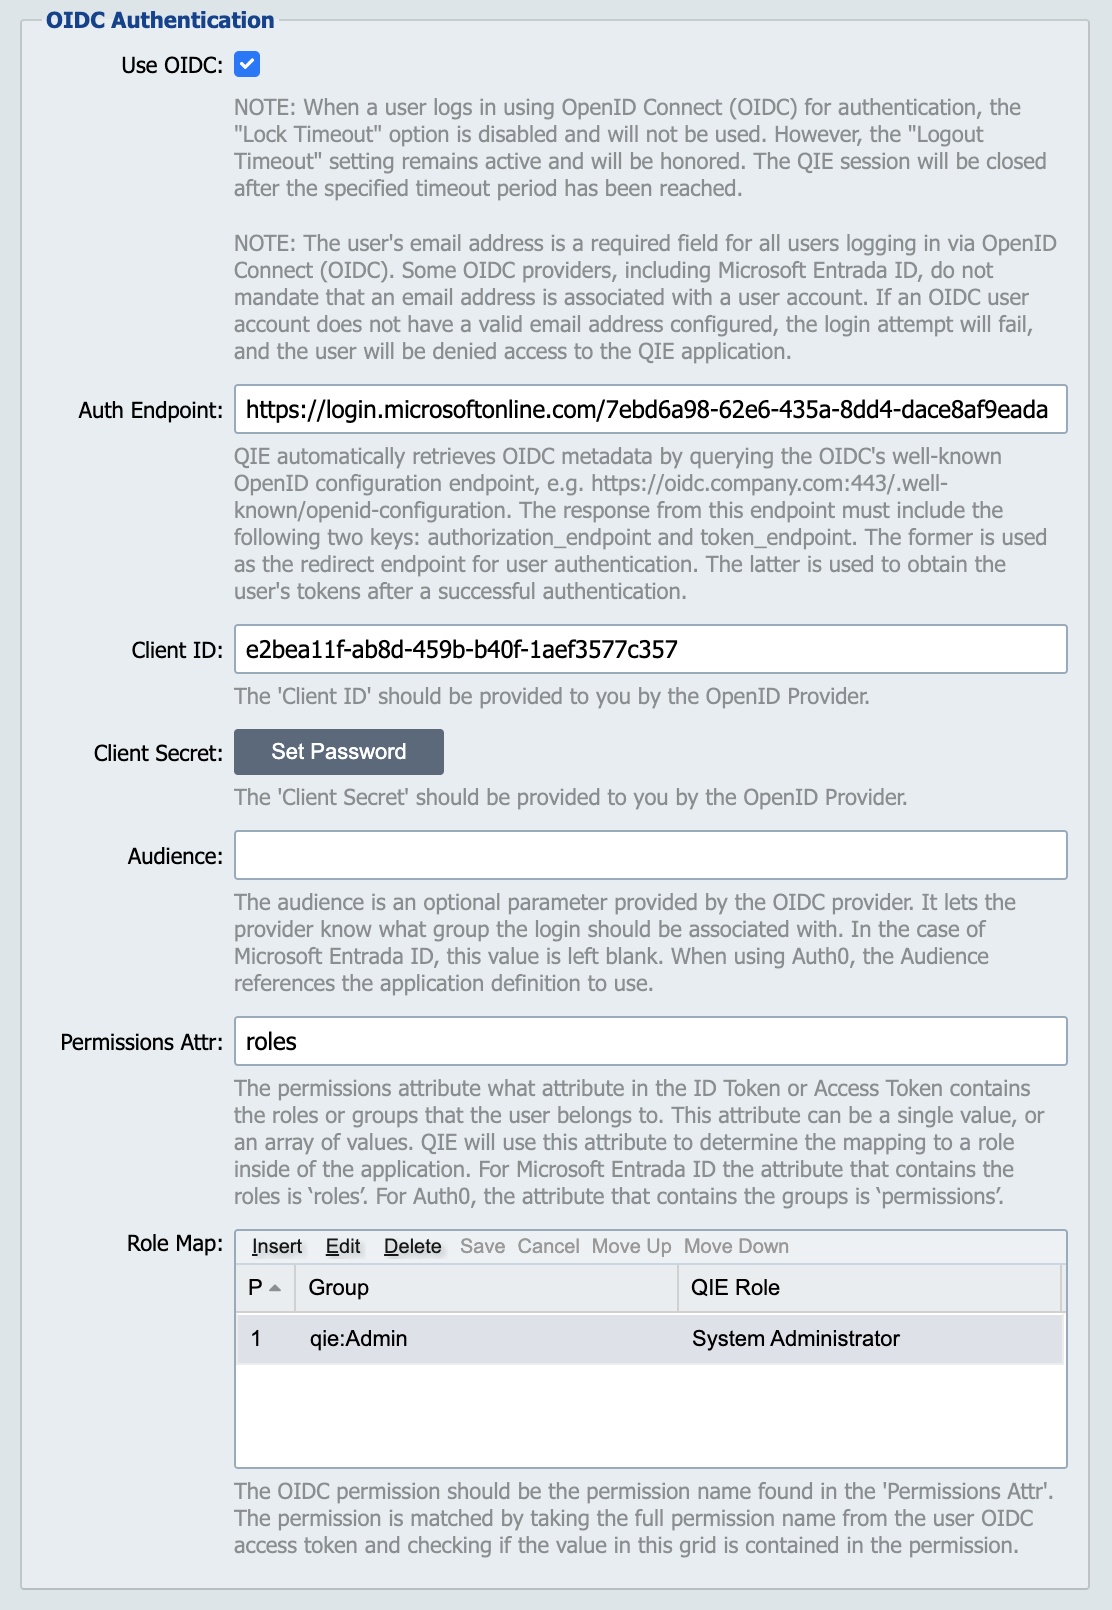
Enabling this option tells QIE to authenticate user logins using the configured OIDC identity provider.
Note
When a user logs in using OpenID Connect (OIDC) for authentication, the configured Lock Timeout option is disabled and is not used. However, the Logout Timeout setting remains active and is honored. The QIE session is closed after the specified timeout period has been reached.
Note
The user's email address is a required field for all users logging in via OpenID Connect (OIDC). Some OIDC identity providers, including Microsoft Entra ID, do not mandate that an email address is associated with a user account. If the OIDC user account does not have a valid email address configured, the login attempt fails, and the user is denied access to the application.
App Registration
Prior to enabling OIDC in QIE, the QIE service must be registered with the OIDC Provider. The registration process requires that you provide the OIDC Provider with the redirect endpoint used when logging into QIE. This endpoint is the URL that is used to log into the QIE service. For example, if you log into https://qie.qvera.com/qie/console.html, you replace console.html with oidcResponse.html. So, the registered redirect endpoint would then be https://qie.qvera.com/qie/oidcResponse.html. If you are logging into the service using an IP address, on port 8443 your console URL would be https://10.10.10.2:8443/qie/console.html and you would register https://10.10.10.2:8443/qie/oidcResponse.html as the redirect URL. The URL must be https://{serverName or IP address}:{port number if not 443}/qie/oidcResponse.html as no other endpoint works.
The OIDC Providers require the redirect URL to be https:// and do not allow http:// to be used. This means the QIE service must be configured to use a secure console before the OIDC registration can be completed.
Once QIE has been registered with the OIDC provider, the OIDC provider gives you a client_id and client_secret that are used to configure the service with the OIDC provider.
Auth Endpoint
QIE automatically retrieves OIDC metadata from the authentication endpoint, https://{host_or_ip} (e.g. https://oidc.company.com or https://oidc.company.com). The application queries the well-known configuration endpoint, /.well-known/openid-configuration, to get this information.
For instance, it queries https://oidc.company.com/.well-known/openid-configuration. The response from this endpoint must contain the following two key URLs:
- authorization_endpoint: Used as the redirect endpoint for user authentication.
- token_endpoint: Used to obtain the user's tokens after successful authentication.
If the check_session_iframe url is found, it is used to create an iframe in the console that checks the state of the user session. If the user logs out of the OIDC provider, a QIE logout is triggered.
Client ID
The client_id is provided by the OIDC provider when the QIE service is registered. This is then used to identify the QIE service with the OIDC provider.
Client Secret
The client_secret is provided by the OIDC provider when the QIE service is registered. This is then used to prove the identity of the QIE service with the OIDC provider.
Audience
The audience is an optional parameter provided by the OIDC provider. It lets the provider know what group the login should be associated with. In the case of Microsoft Entra ID, this value is left blank. When using Auth0, the Audience references the application definition to use.
Permissions Attr
The permissions attribute is what attribute in the ID Token or Access Token contains the roles or groups that the user belongs to. This attribute can be a single value, or an array of values. QIE uses this attribute to determine the mapping to a role inside of the application. For Microsoft Entra ID the attribute that contains the roles is roles. For Auth0, the attribute that contains the groups is permissions.
Microsoft Entra ID needs additional configuration to send the roles in the id_token. By default, the roles are not included unless this is enabled in the configuration. The Microsoft help documentation provides instructions for including the roles with the id_token.
Auth0 does not include permissions by default. To include the permissions in the id_token or access_token, additional actions must be added to the post-login trigger. The Auth0 help documentation provides instructions for including the permissions with the access_token or id_token.
Role Map
To bridge the gap between the OIDC configuration and the QIE zone permissions, each OIDC user that logs in needs to be mapped to a Role inside of QIE. This map is used to assign the OIDC user permissions inside of QIE. The order of the mapping is the order in which QIE searches for users belonging to the group.
QIE uses a case-sensitive "string contains" approach to determine if a match is found, i.e. QIE checks if the permission attribute contains the "Group" column's value. For example, if the user OIDC permissions attribute has "qie:frontendDeveloper" or "qie:backendDeveloper" and the QIE User Map group column value is "Developer", QIE matches the group to both permissions attributes.
Logging
QIE logs information to the oidc.log file to help with troubleshooting and login issues. Consult this log to identify potential problems when a user is unable to log into the QIE service using the OIDC Provider.