Managing Errors
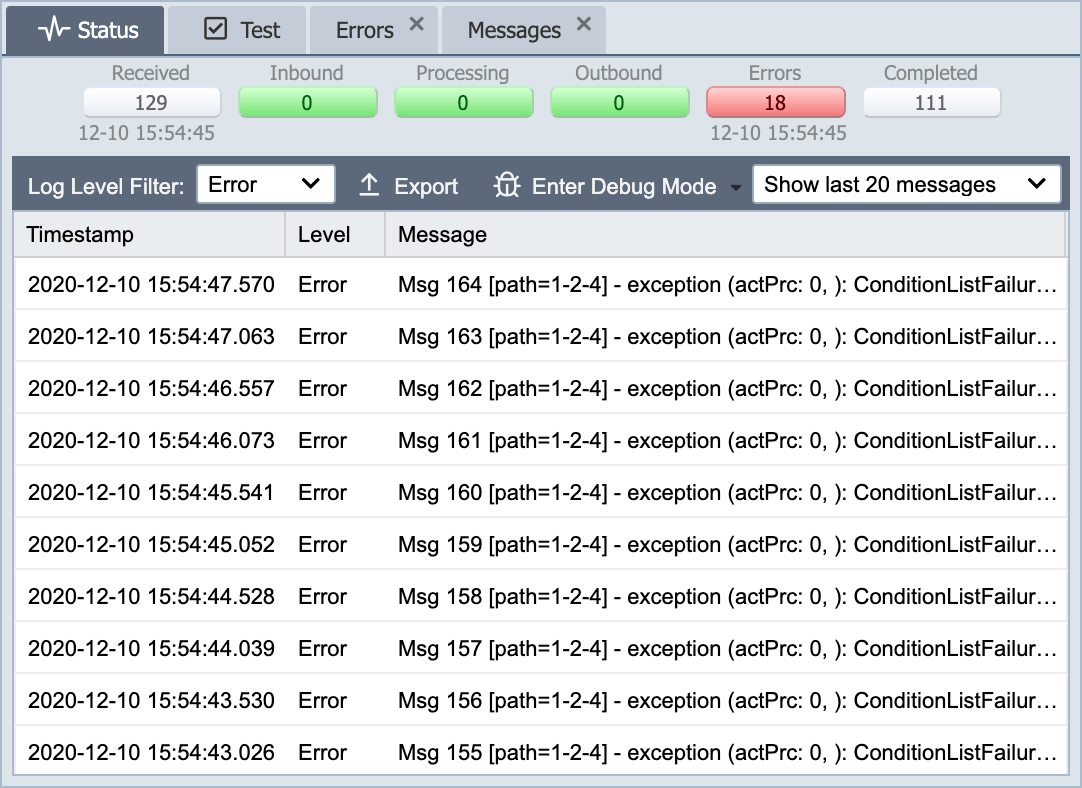
When a message fails to process correctly through a channel, an error or exception is logged, and the message is sent to the error queue.
The number of messages in the error queue is displayed in the channel status tab.
Error messages are accessed by clicking on the error count, or by selecting the Errors tab.
Channel Errors Tab
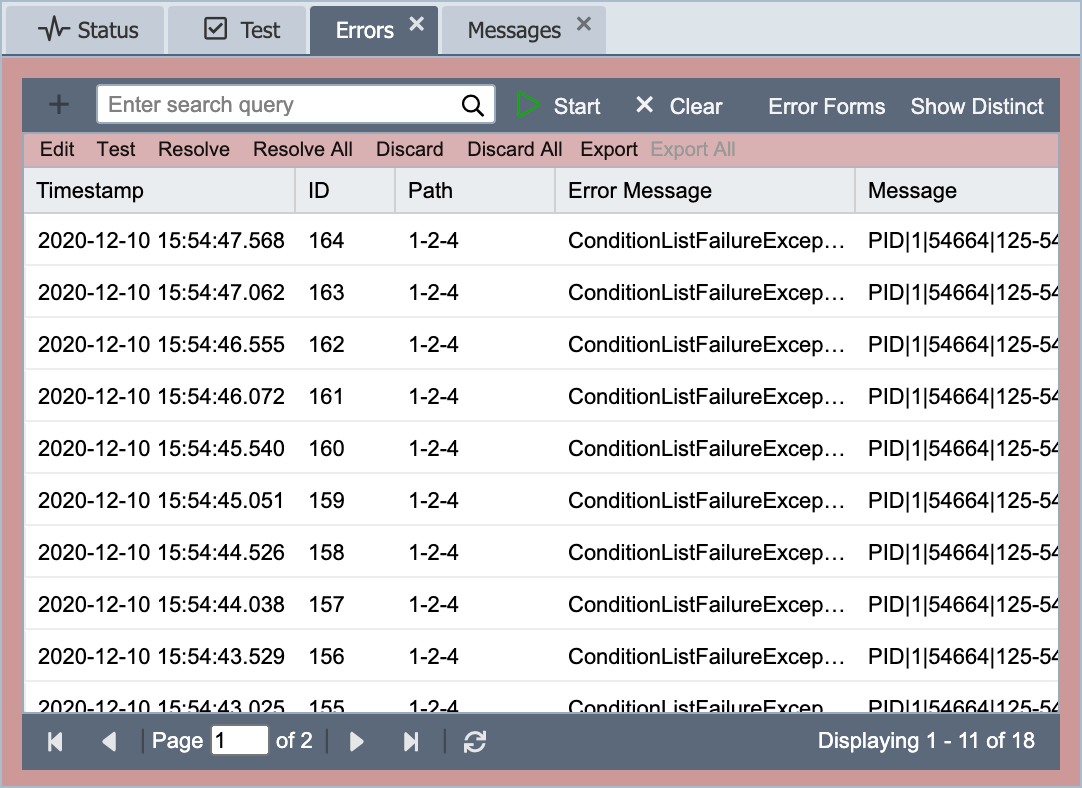
The Channel Errors tab lists every message currently in the channel's error queue, with the most recent error at the top. From this tab you can review individual errors, replay messages back through the channel (Resolve), discard messages without reprocessing (Discard), or export errored messages for analysis.
Errors remain in the queue until they are explicitly resolved or discarded, or until they age out per the channel's Days to Retain Errors setting (whichever comes first).
Buttons
The buttons on this screen allow the user to complete tasks quickly without having to open the error message or search for errors.
Edit
Opens the Message Detail Dialog to view the error and message detail.
Test
Opens the message in the Test window.
Resolve/Resolve All
Selecting the Resolve or Resolve All button sends the selected erred message(s) back to the inbound queue to be processed through the channel again.
Discard/Discard All
Selecting the Discard or Discard All button causes the selected erred message(s) to be marked as completed and removed from the error queue without being reprocessed. Discarded error messages are still accessible from the Message History Tab.
Export/Export All
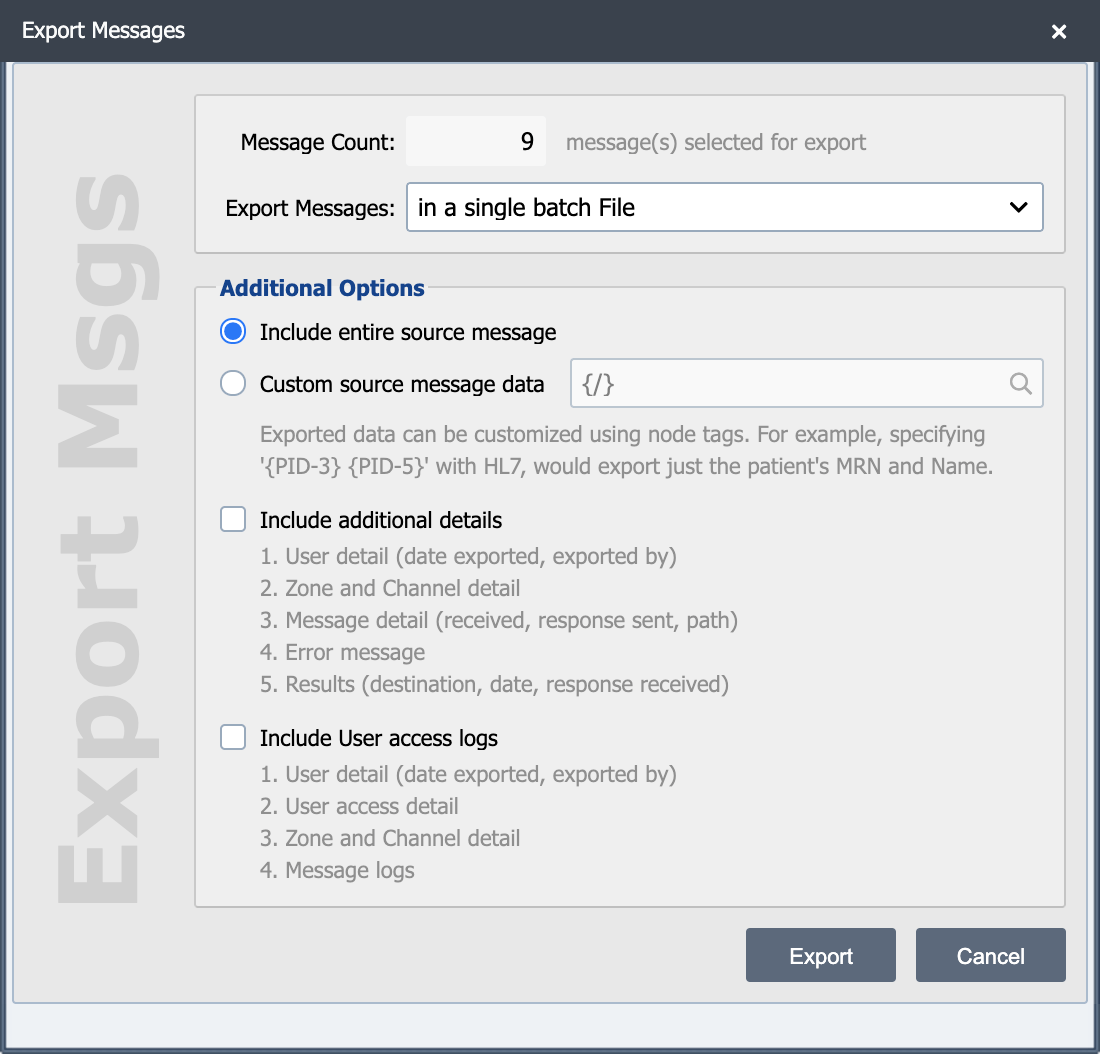
Selecting the Export or Export All button opens the Export Messages dialog.
Message Count
Displays the number of messages selected to be exported.
Export Messages
Messages can be exported in a single batch file or as individual files. If they are exported as individual files, the user can choose to use the original filenames.
Include entire source message
Select this checkbox to include the entire source message in the export.
Custom source message data
Select this checkbox to include specific data from the source message in the export. When using this option one or more node tags must be specified for pulling the required data from the source message.
Include Additional Details
Select this checkbox to include additional detail in the export.
Include user access logs
Select this checkbox to include detail pertaining to message access.
Opening the Message Detail Dialog
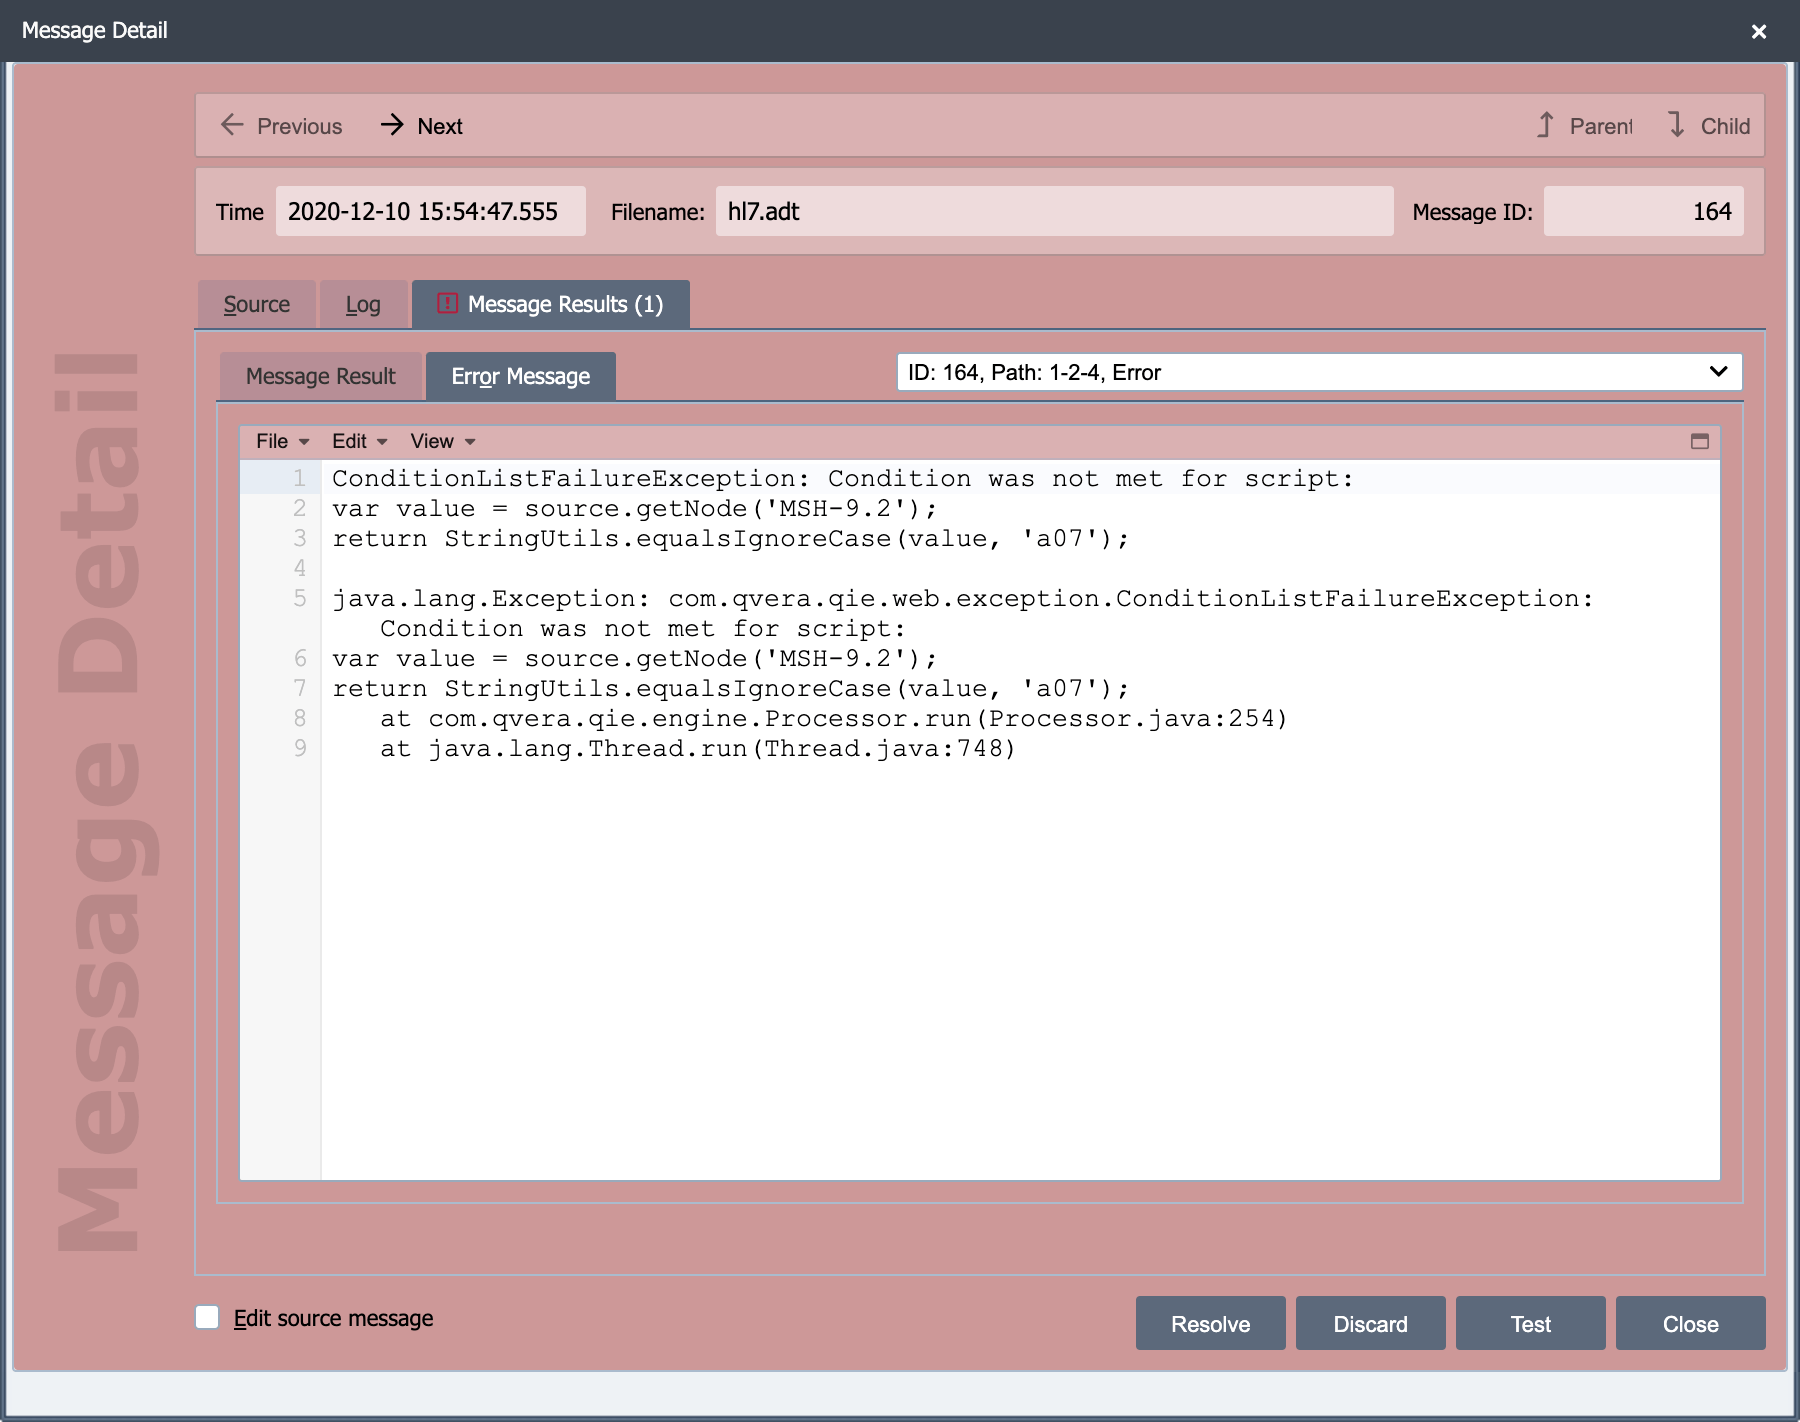
Double-click an erred message in the list (or select it and click Edit) to open the Message Detail Dialog. Opened from the Error tab, the dialog has a red background, defaults to the Error Message view, and exposes the Resolve, Discard, Test, Edit source message, and Close action buttons. Resolve and Discard are visible only when the dialog is opened from this tab. They are not shown when the dialog is opened from any other tab.
See Message Detail Dialog for the header fields, view drop-down, and full button reference.
Searching for Errors
Search Query
Enter a search string and click Start. As QIE searches, the bottom right corner of the screen displays the progress of the search in % searched and the number of messages found. When the search is complete only the messages matching the search criteria are displayed. Resolve All and Discard All process only those messages displayed based on the search criteria. Once a search is started, the start button becomes a stop button; this allows the user to stop the search and clear the criteria.
After an initial search has completed clicking the plus symbol next to the search query field allows performing a search within the current search result.
Search Messages Dialog
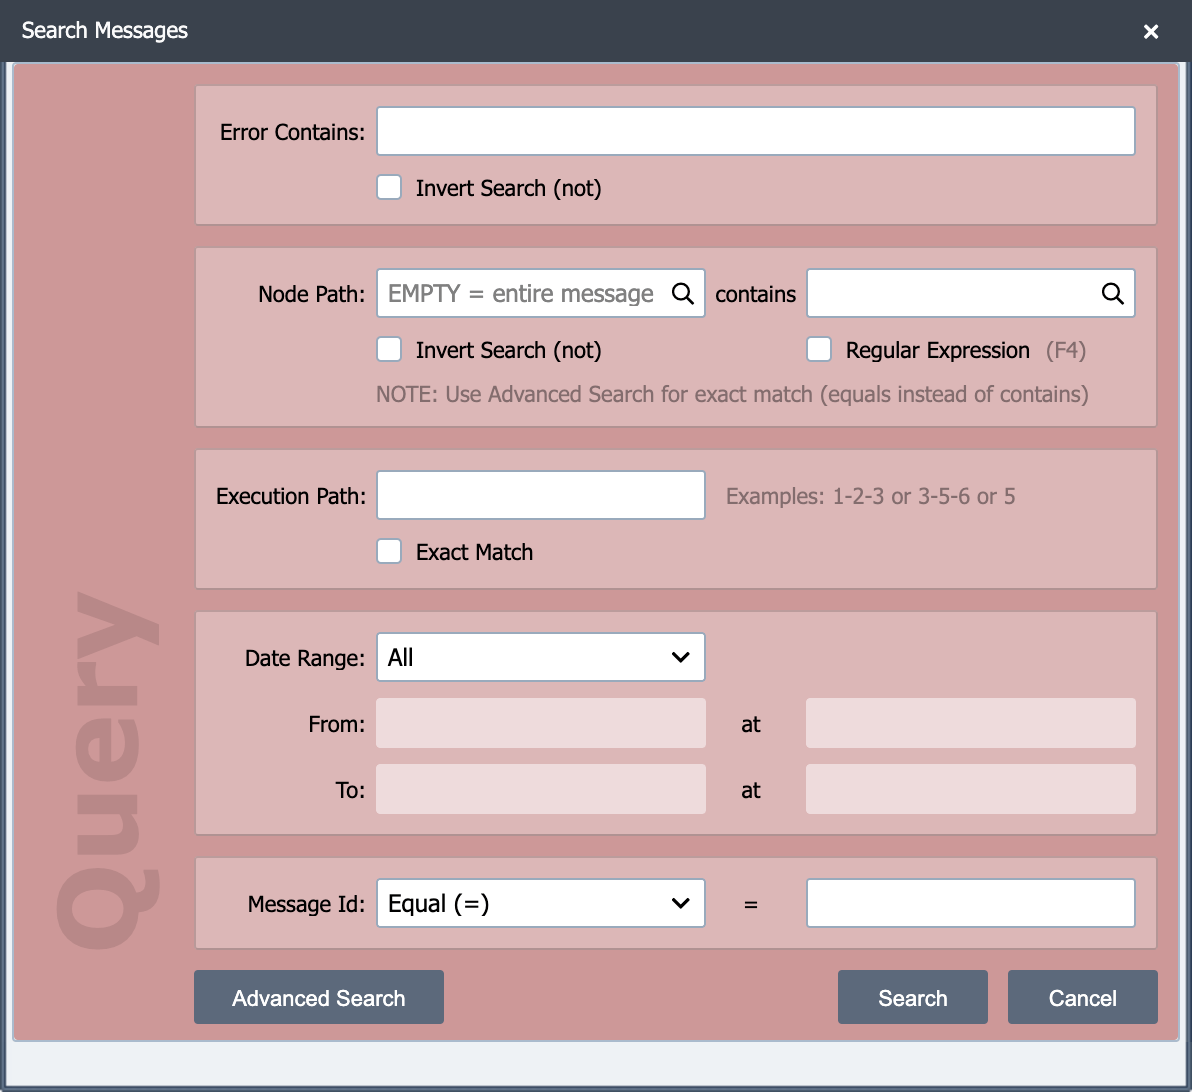
The Search Messages Dialog is accessed by selecting the ellipses next to the Search Query box. None of the fields in the dialog are required but using these parameters can make it easier to find a specific error.
Error Contains
Enter the error text to search for in the error messages. This can be copied from an error and pasted here.
Invert search(not)
Select this checkbox if the error should not contain the value entered.
Node Path
Type a node path, press the F2 key or click the icon. Leave blank to search the entire message.
Value
Enter the value to search for in the node path.
For example, to find all errored messages for a specific patient, set Node Path to PID-3 and Value to the patient's MRN. To narrow errors to a specific ADT event, set Node Path to MSH-9 and Value to A04.
Invert search(not)
Select this checkbox if the node path should not contain the value entered.
Execution Path
Enter a channel node-path expression to filter messages by the path they took through the Visual Channel Editor. The path is a dash-separated list of node IDs from the channel diagram. The match is a substring contains, so you can enter:
- a full sequence of nodes (e.g.
1-2-3) - a partial sequence anywhere in the path (e.g.
2-3) - a single node ID (e.g.
5) to match any path that passed through that node
The same field also appears on the Search Messages Dialog opened from the Processing, Outbound, and Completed tabs. On the Completed tab, Execution Path is the most direct way to filter to strictly-successful messages: enter the node ID of an end destination, because errored messages that were resolved or discarded only show the partial path up to the node where they errored.
Date Range
Select a date from the drop-down or enter a custom date range.
Operator
Select from the drop-down list. The single-value operators are equal (=), not equal (!=), greater than (>), greater than or equal to (>=), less than (<), and less than or equal to (<=). Two multi-value operators are also supported: In (id1, id2, id3 ...) matches any message whose ID is in a comma-separated list, and Between (id1 and id2) matches any message whose ID falls in the inclusive range.
Message ID
Enter the message ID(s) to search for. The input changes based on the selected operator: a single field for the six single-value operators, a comma-separated list for In, and two range fields for Between. The corresponding search-query strings render as SOURCE_ID=IN(567,568,569) and SOURCE_ID=BETWEEN(567,572).
Error Forms
QIE has functionality to create a form that can facilitate error management. The form can be configured for a channel and a specific type of error. It can also be configured to email a specified user and include the error form in the email message with all of the detail. The user can then log into QIE and resolve the error using the form.
Show Distinct
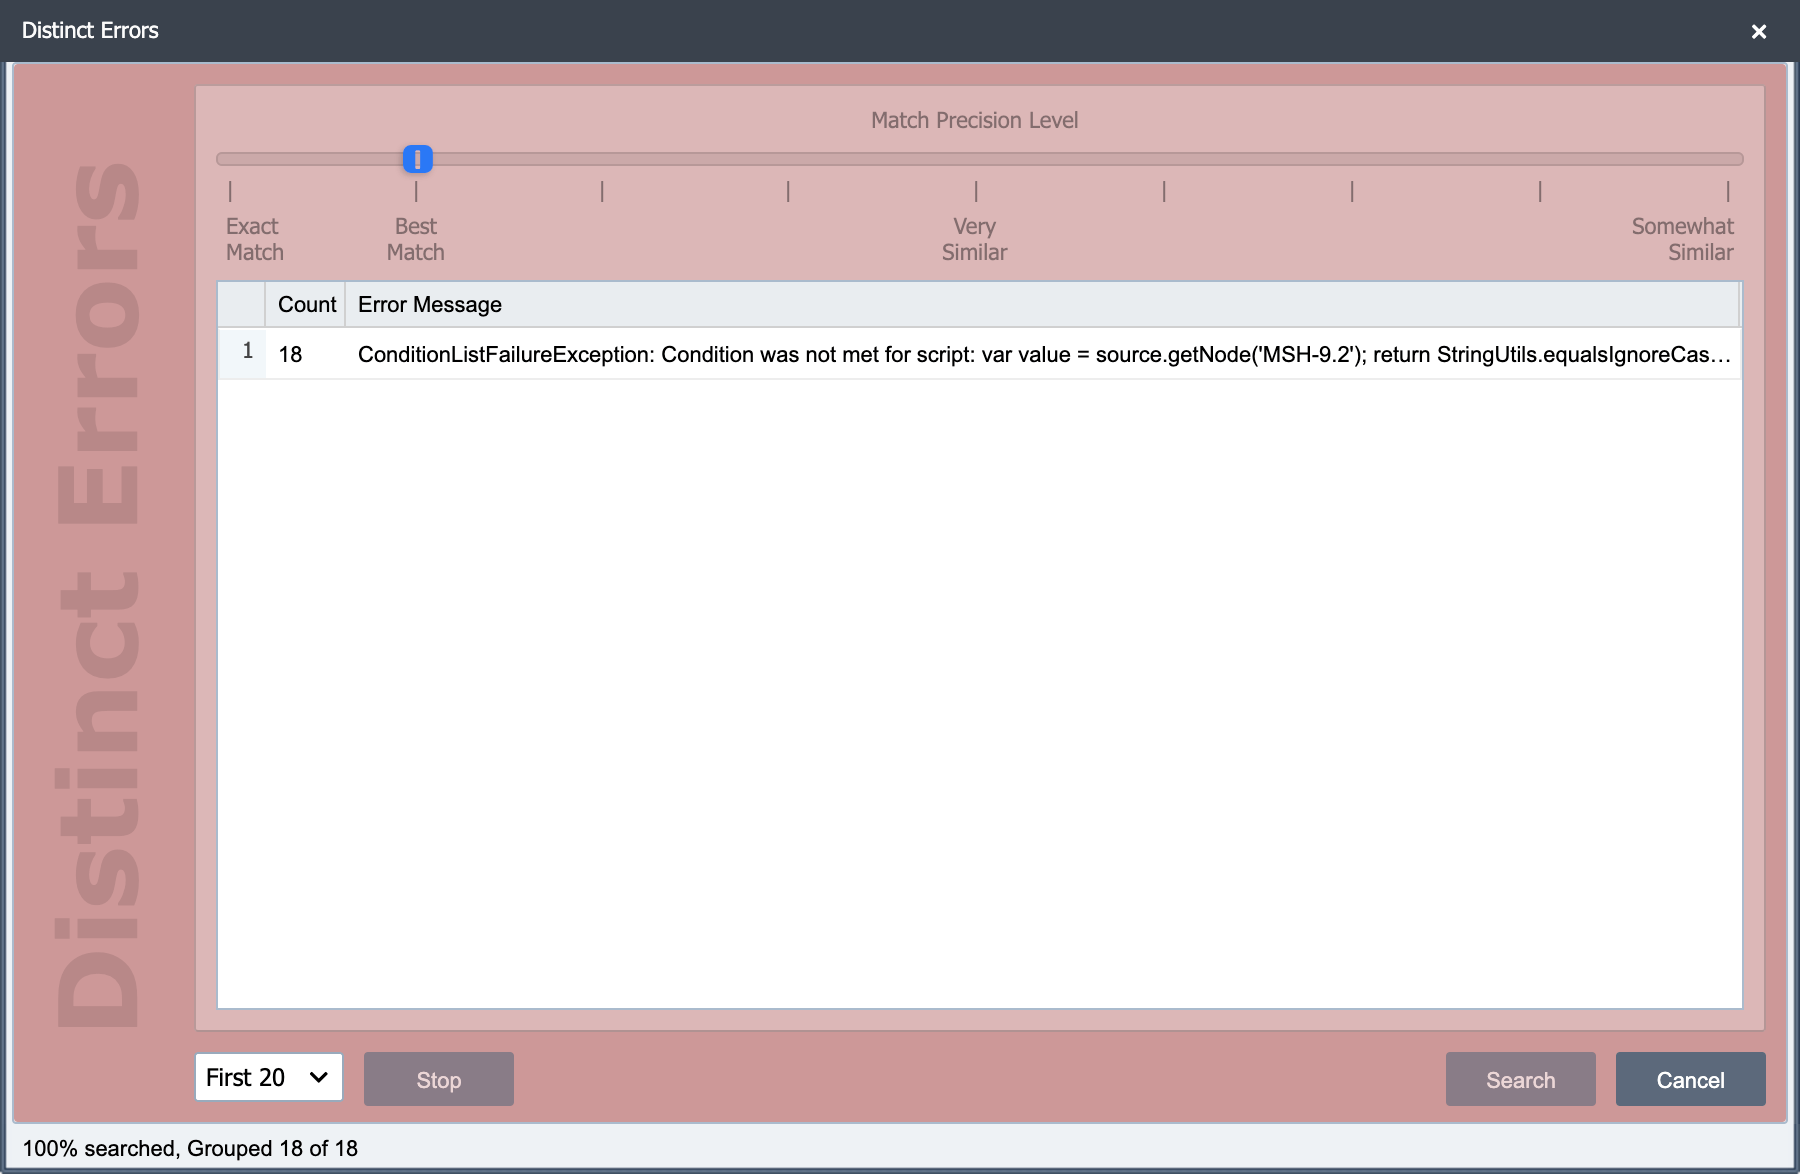
If there are a large number of errors in the error tab, it can be difficult to work through them. QIE facilitates this process with the Distinct Errors dialog. To access this dialog, select the Show Distinct button. This dialog allows the user to group error messages based on the error text. It is an easy way to group like messages so that they can be resolved or discarded. When the grouping process is complete, select the group from the list and click the Search button to view the grouped messages.
Match Precision Level
Use the slide to select precision levels from Exact Match to Somewhat Similar.
Count
The number of messages included in the group.
Error Message
This field displays the text from the error message that was used to form this group.
Limit
Select the number of groups to create from the drop-down list.
Automating error remediation
For high-volume channels where the same kind of error recurs (a downstream that briefly went offline, a partner whose schema needs a tweak), automate the discard/retry workflow from a Scheduled Script using the errorManager binding. See Automating Error Queue Remediation with Scheduled Scripts.