Creating Your First Channel in QIE
This chapter describes, step by step, how to create a basic channel in QIE. After completing the steps outlined in this chapter you should have a working channel. It monitors an input directory for HL7 files (messages), performs one or more basic mapping functions on the message, and deposits the modified HL7 file in an output directory.
Step 1: Navigate to the QIE server using your web browser
Open your compatible browser and navigate to the QIE server by typing 'http://' and then the server name (e.g. 'http://localhost').
Note
If the QIE server has been configured to run on a port other than port 80 you must include the port number in the URL (e.g. 'http://localhost:8080').
Note
If this is the first time you have launched QIE you may be prompted with a notification indicating that the pop-up window has been blocked.

If this happens click the Options button if you are using Firefox or the Pop-up blocked icon if you are using Chrome and choose the appropriate Allow pop-ups option.
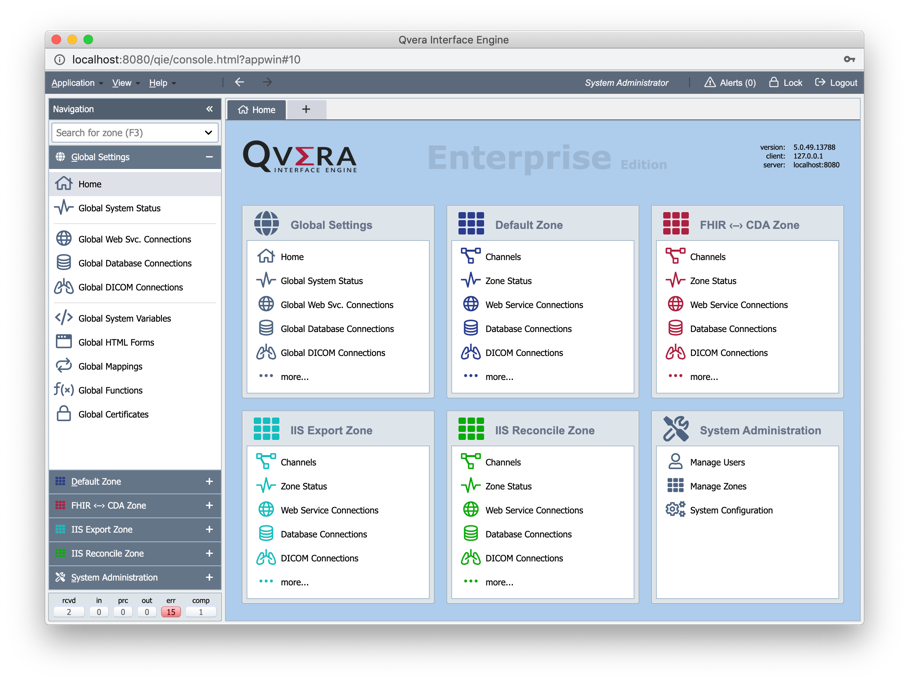
Step 2: Login to QIE and navigate to the Channels page
Login to QIE using your assigned username and password and navigate to the Channels page in the Default Zone.
Note
If this is the first time anyone has logged into QIE after being installed, you should use the default username 'admin' and default password 'admin'. Upon logging in using the default username and password, you are prompted to change the default password.
Step 3: Create a new channel and give it a name
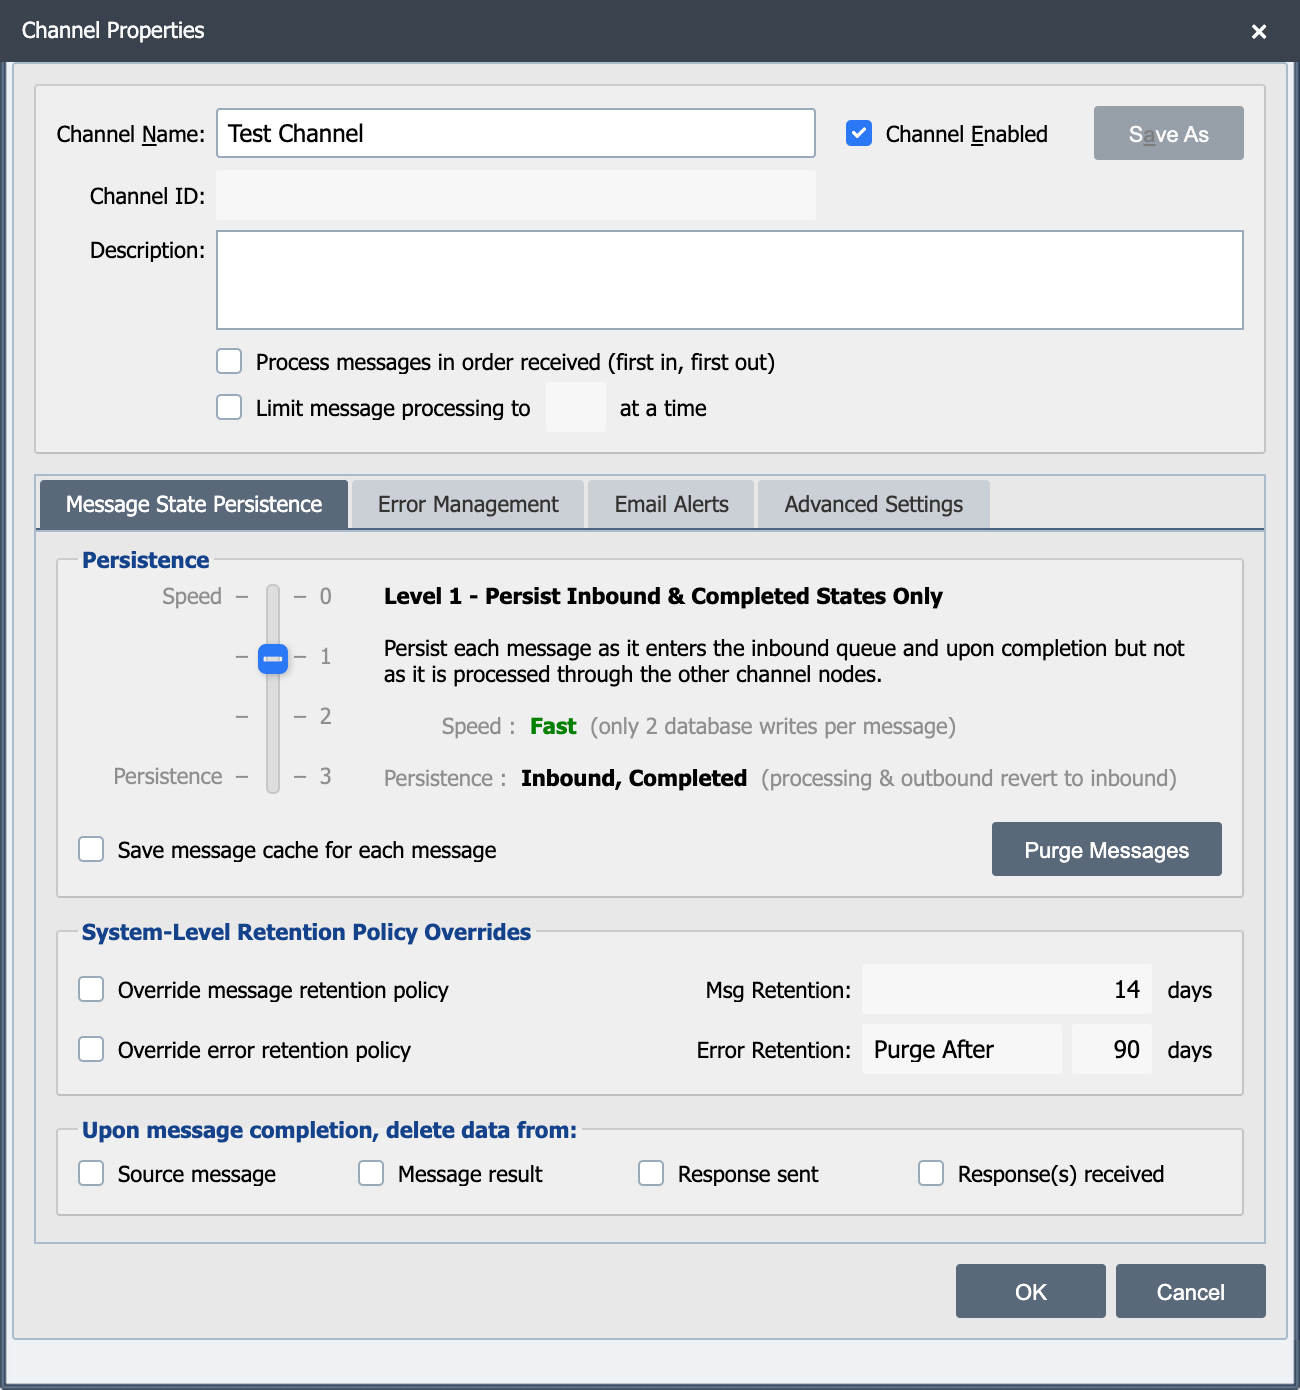
Click the New button on the channel page. This opens the Channel Properties dialog.
Give your channel a name and click OK.
Step 4: Configure the channel format and source
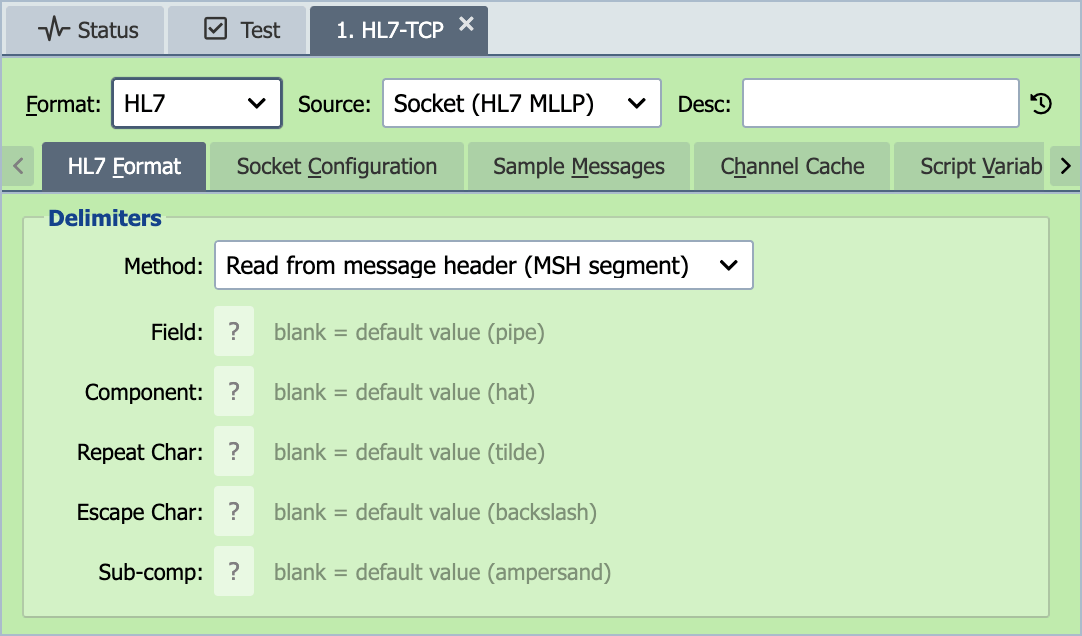
Select the source node (green) labeled 1. Source.
Select HL7 from the Format drop-down and accept the default settings.
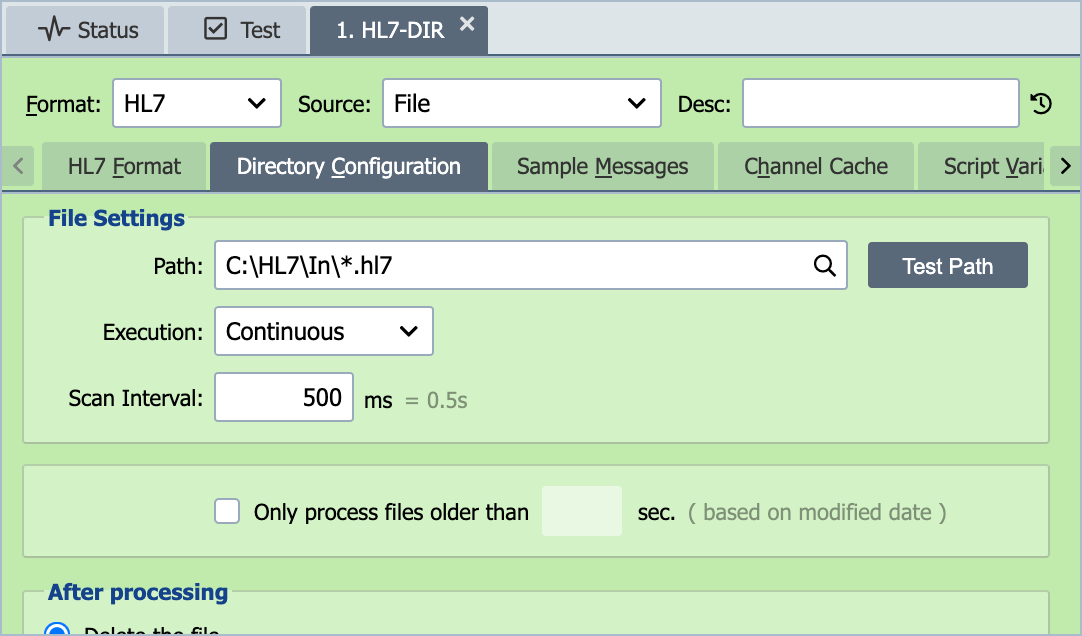
Select File from the Source drop-down.
Enter a path to a test folder on the QIE server.
Verify that you have entered a valid path by clicking the Test Path button.
Be sure to include a file name filter in the path (e.g. 'C:\HL7\In\.hl7'), otherwise QIE processes all files in the specified directory.
Note
The path you enter for a File source is relative to the QIE server, not the workstation you are working from. If the QIE server is running on your local machine, then the path you enter is a path to a folder on your local machine. If the QIE server is running on a separate machine, then the path you enter is a folder on the QIE server or a network share that can be accessed from the QIE server.
Step 5: Add a sample message to the channel
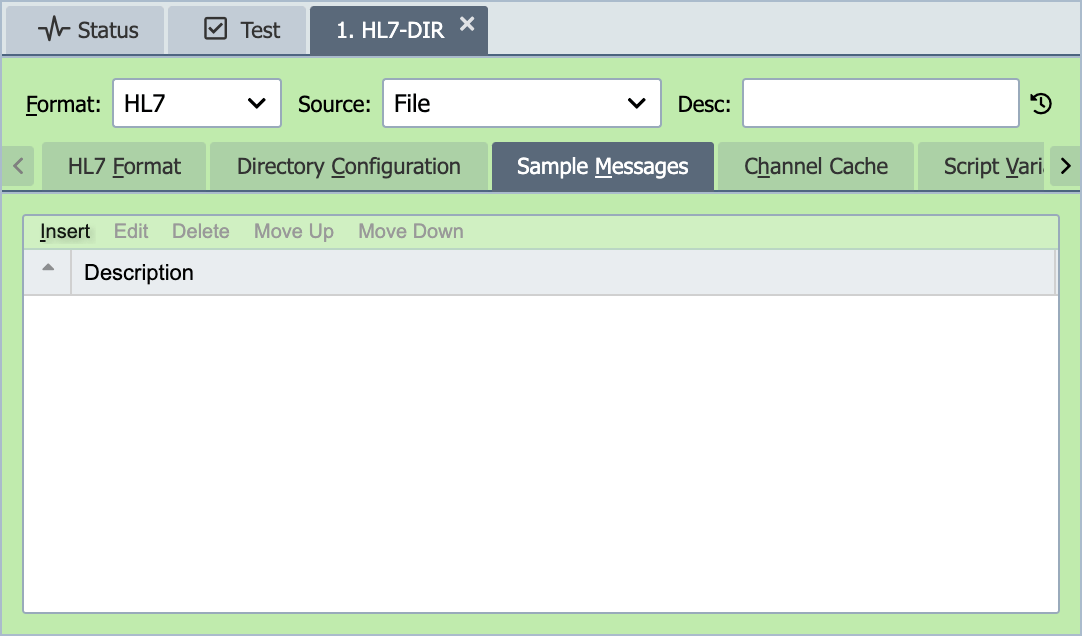
Sample messages are used in the Node Path Lookup dialog. They are also used when testing your channel.
With the source node (green) still selected, select the Sample Messages tab and click Insert to open the Sample Message dialog.
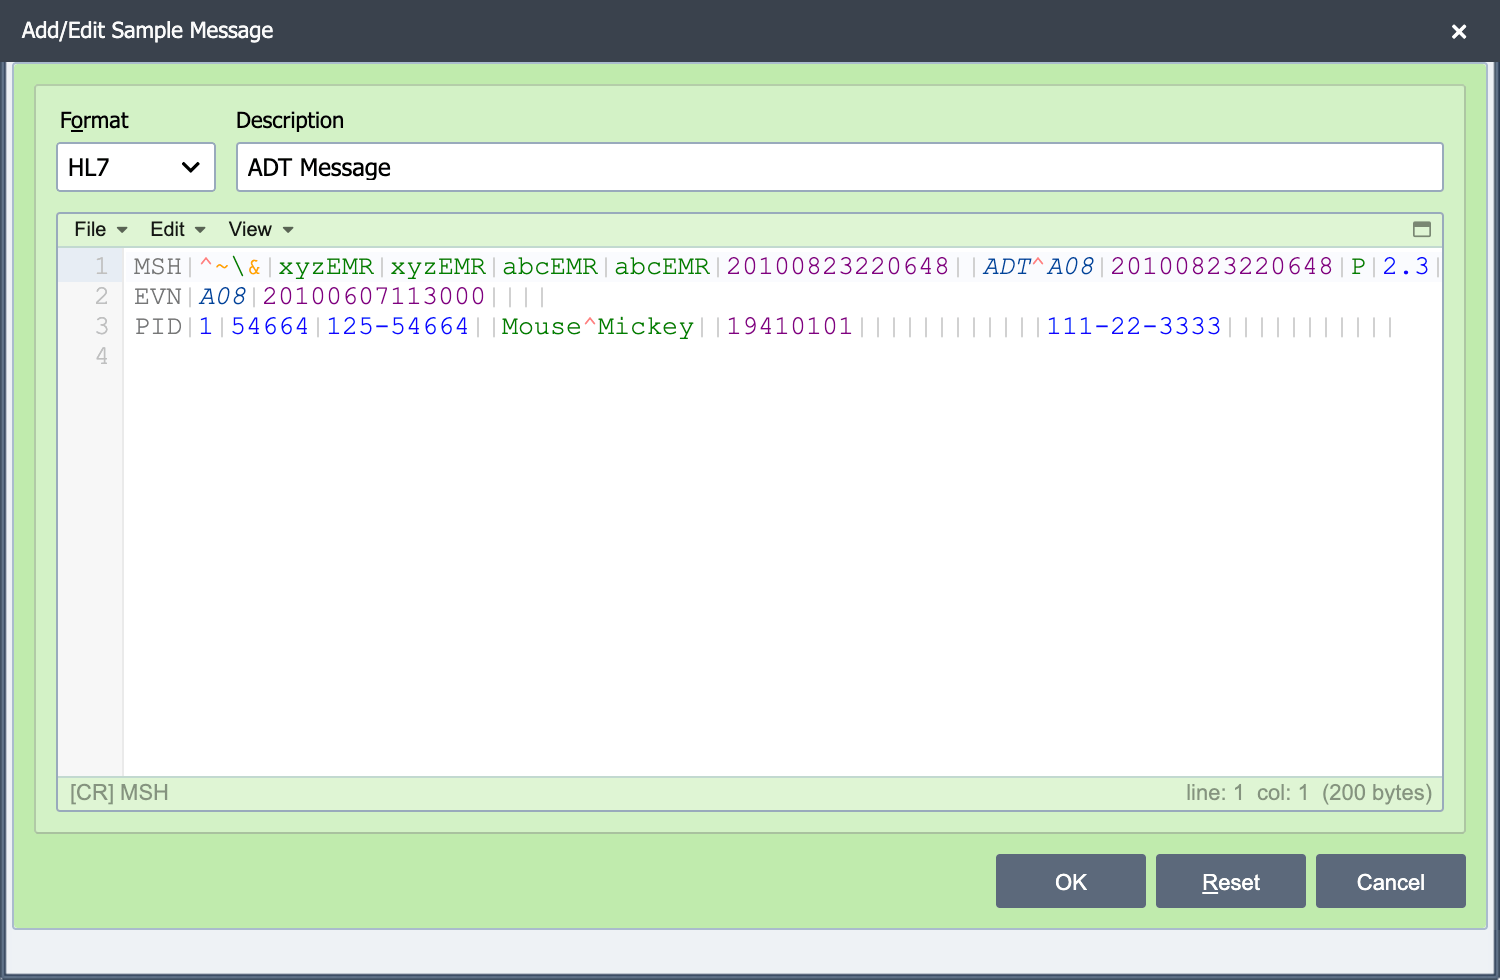
Enter 'Sample ADT Message' as the message description.
If you have an existing sample HL7-ADT message you would like to use, you can import it using the File -> Import option from the editor menu.
If you need a sample HL7 message you can download this sample message as an .hl7 file and import it with File -> Import, or copy and paste the tutorial sample below.
Click OK to close the sample message dialog.
Note that as you move the cursor around in the HL7 editor, the current node-path is displayed in the status bar of the editor (e.g. 'PID-5.1', 'MSH-9', etc.). Also note that string values are displayed in green text, number values are displayed in blue text and date values are displayed in purple text. The HL7 editor has been optimized to make navigating and managing HL7 files intuitive and easy.
Tutorial Sample:
MSH|^~\&|xyzEMR||abcEMR||20100823220648||ADT^A08|20100823220648|P|2.3|||NE|NE
EVN|A08|20100607113000|
PID|1|54664|125-54664||Mouse^Mickey||19410101||||||||||||111-22-3333||
Step 6: Add a mapping function
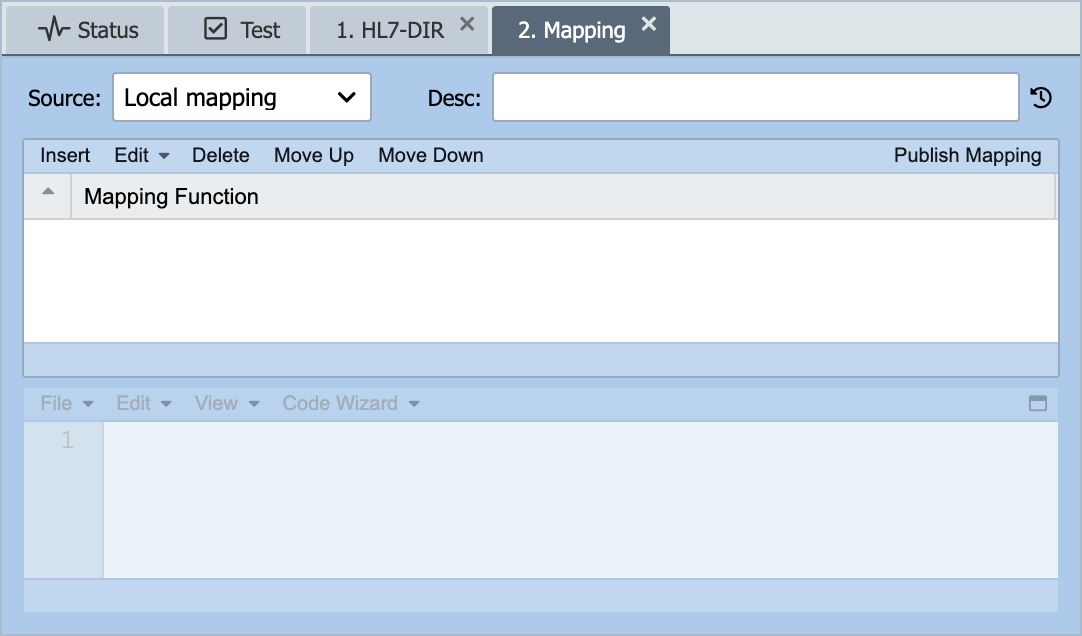
Select the mapping node (blue) labeled 2. Mapping.
Click Insert in the mapping editor to open the Mapping Function dialog.
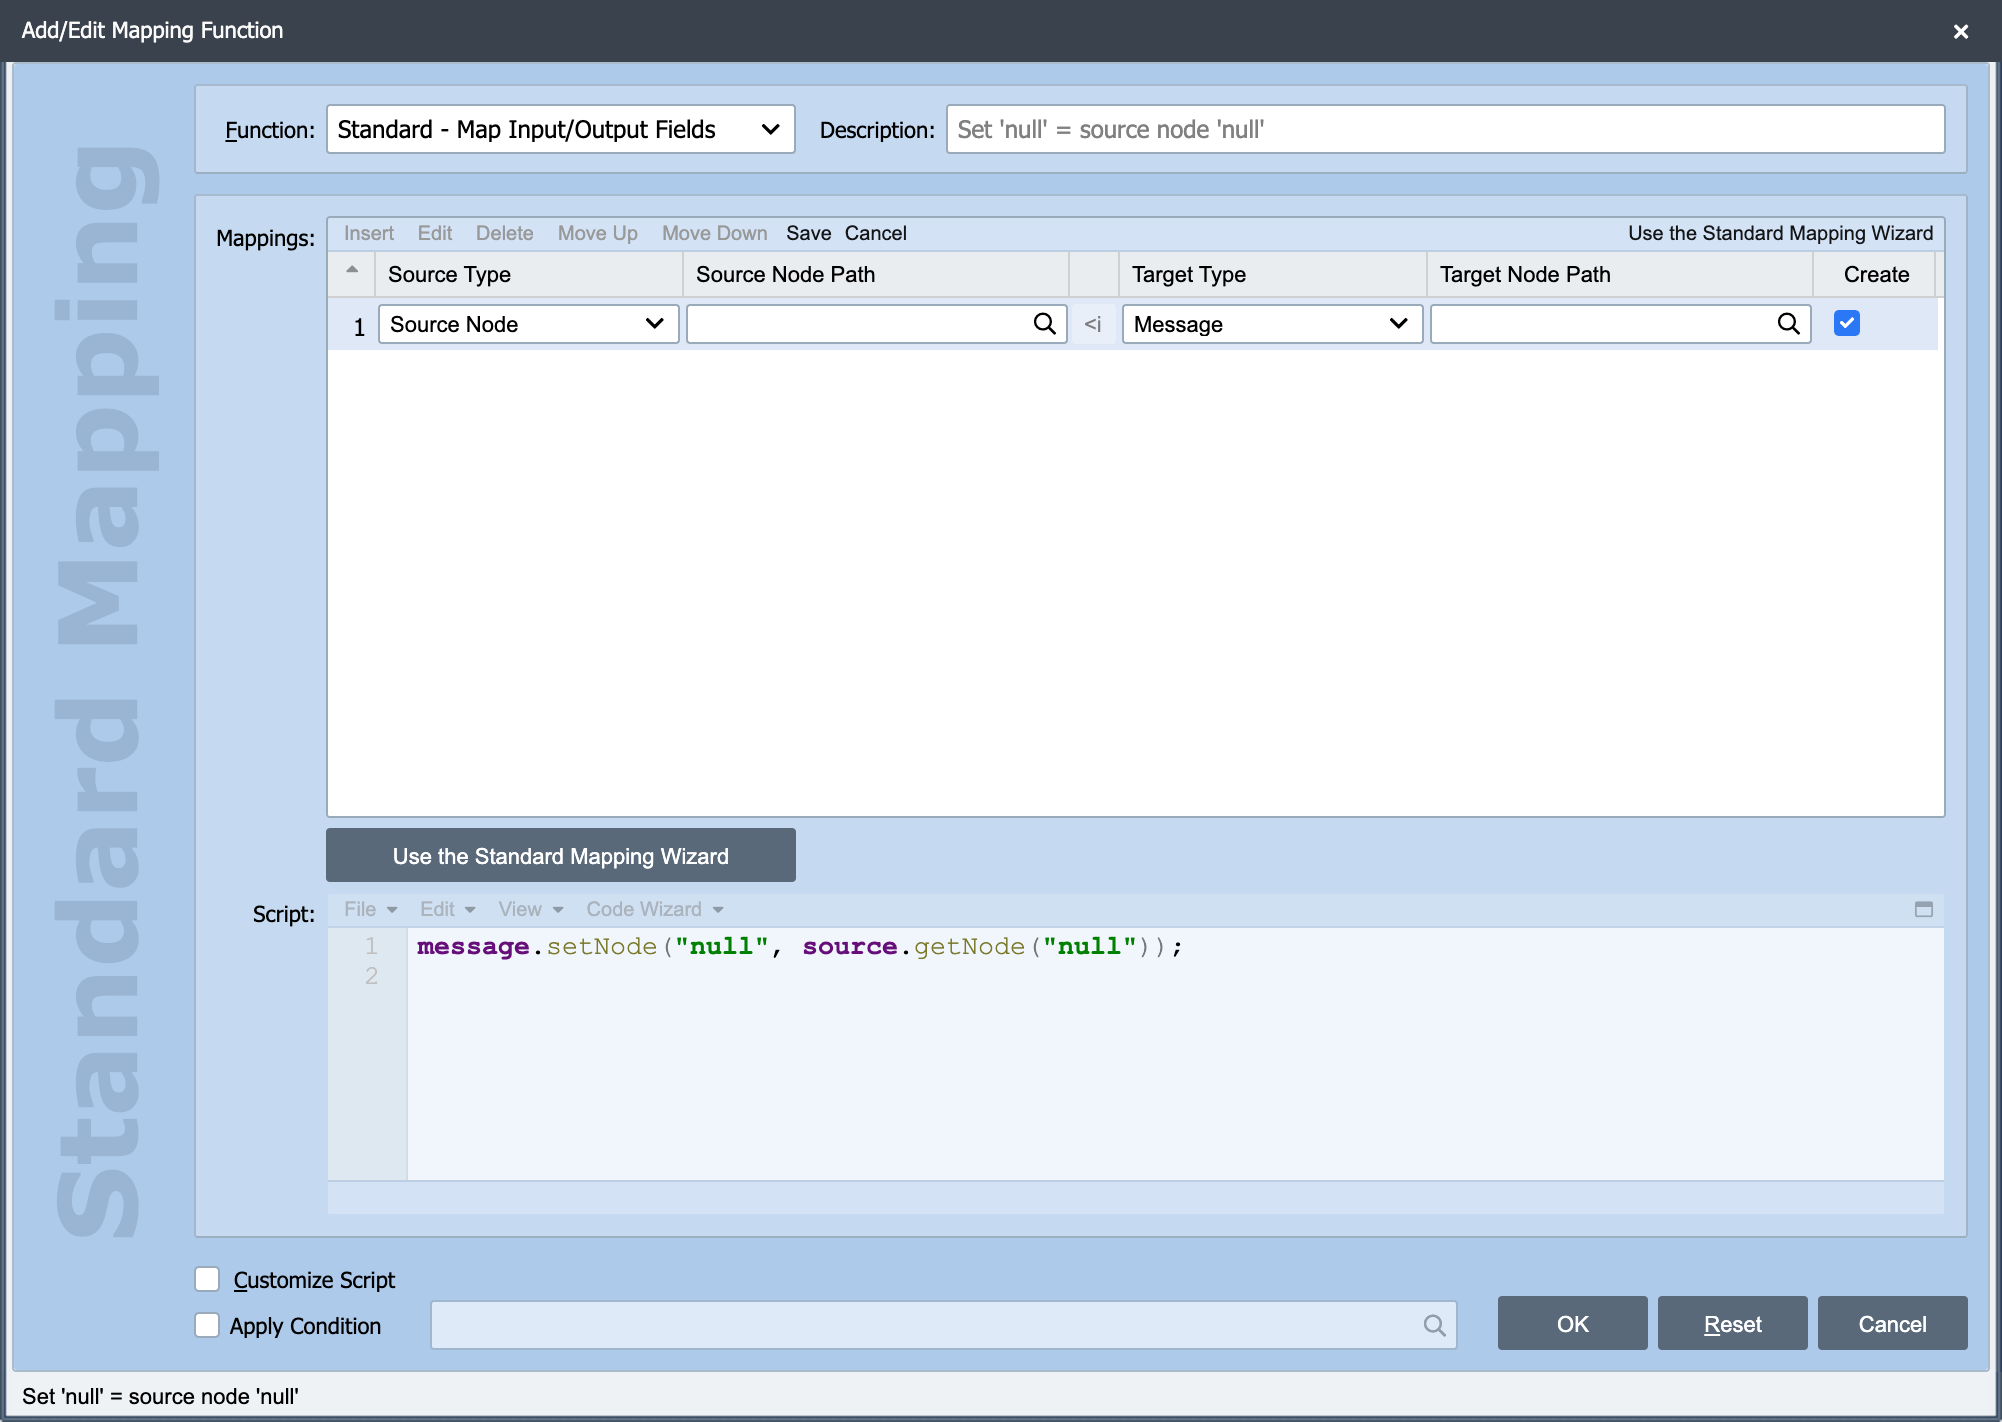
In this example, field 'PID-2' (Internal ID) is mapped to field 'PID-4' (Alternate ID). To do this:
Select Standard from the Function drop-down.
Click the Node Path lookup button to open the Node Path Lookup dialog.
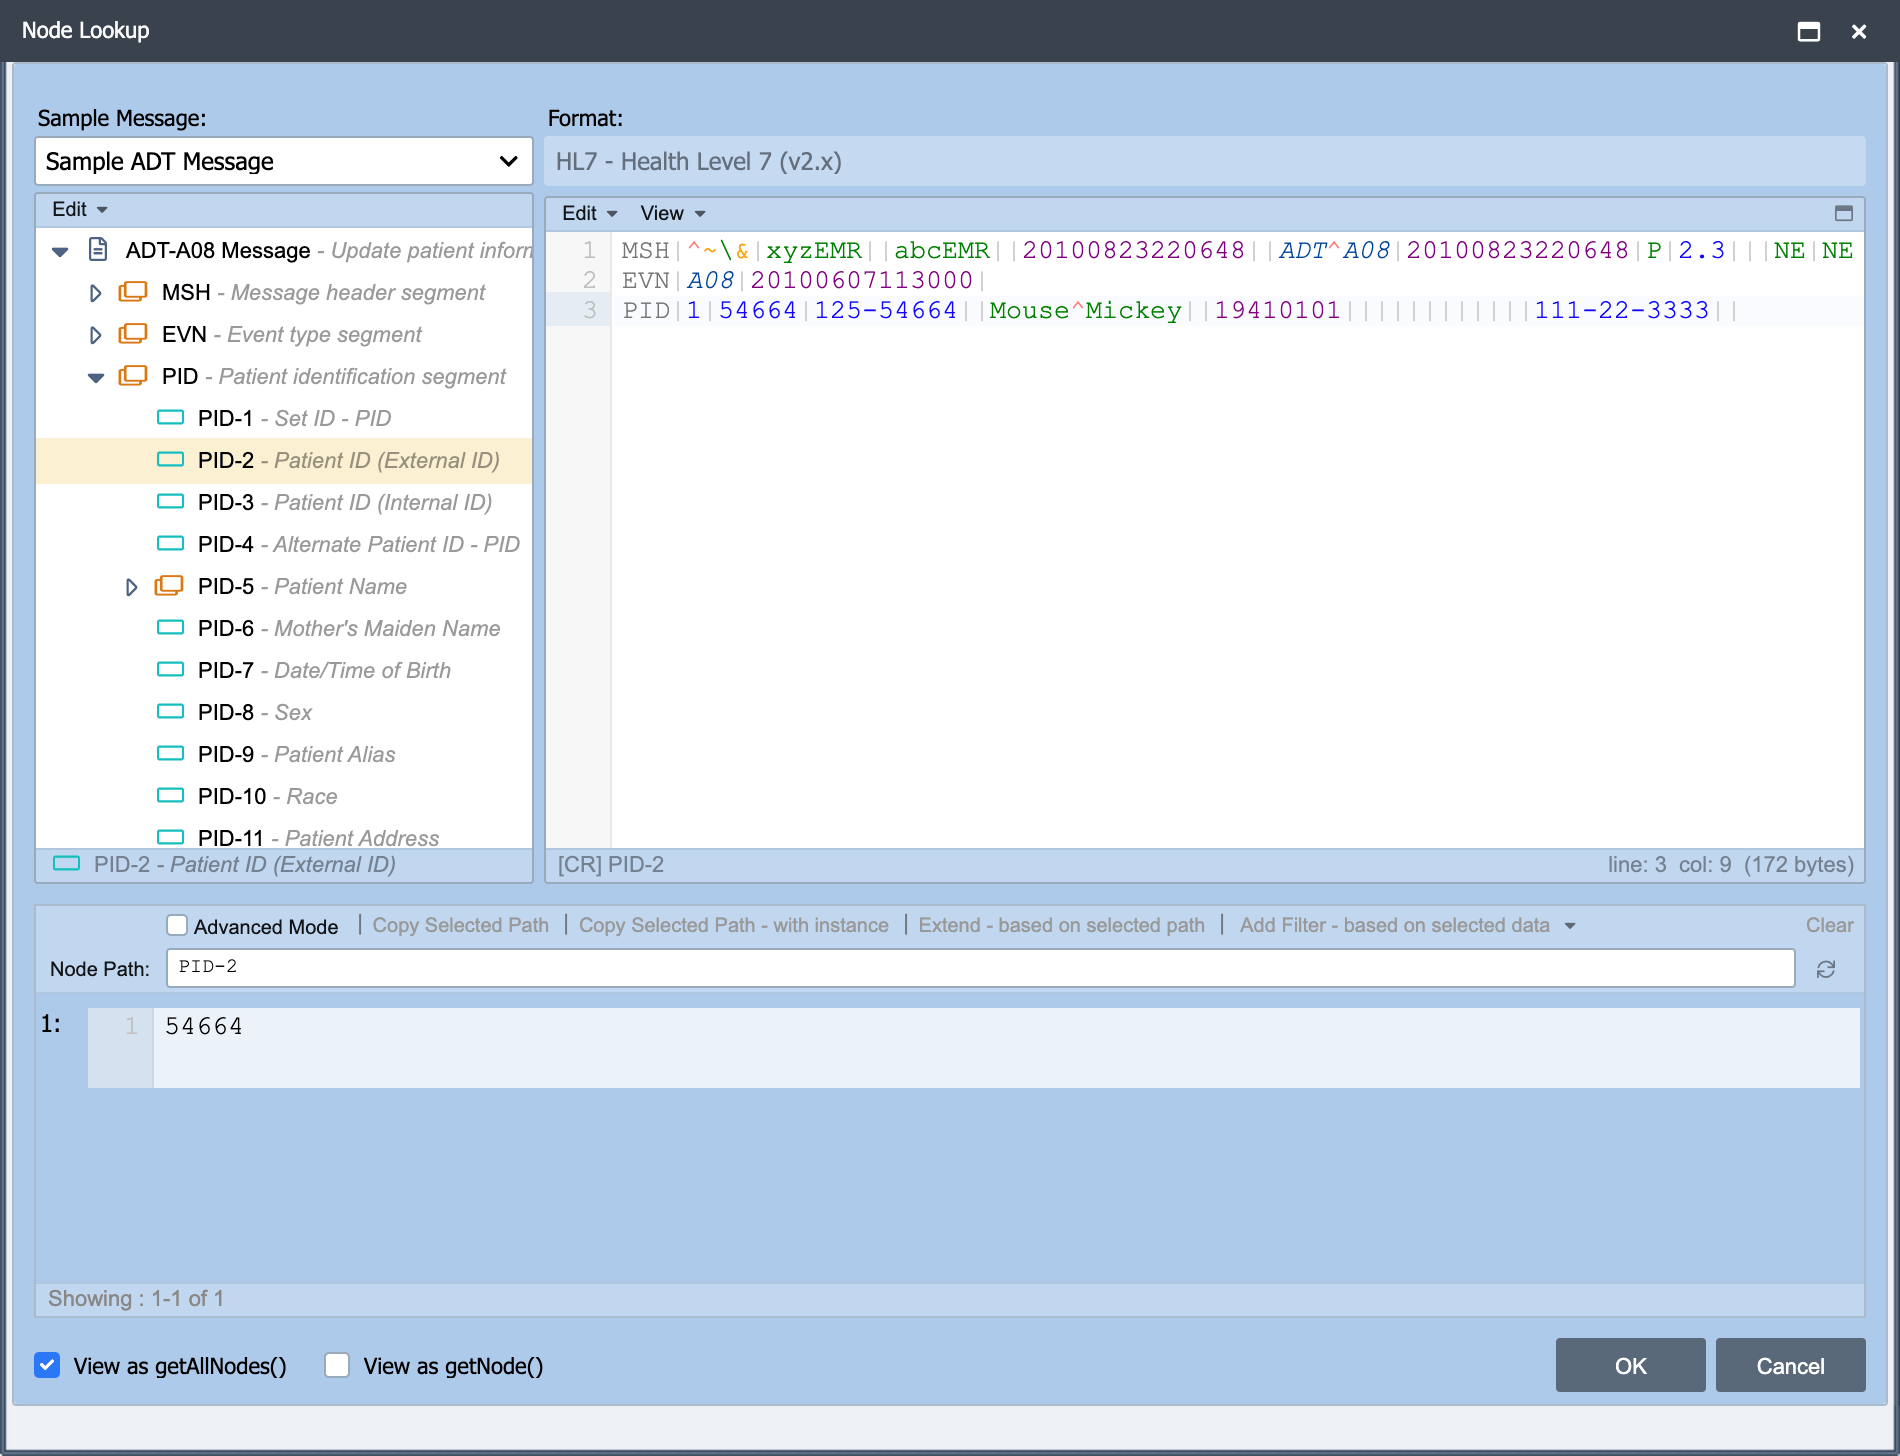
Note
The sample message which was added in step 5 is displayed in the Node Path Lookup dialog.
Click anywhere in field PID-2 to select that node.
Click OK to close the Node Path Lookup dialog.
Click the Target Node Path lookup button to open the Node Path Lookup dialog again.
Click anywhere in field PID-4 to select that node.
Click OK to close the Node Path Lookup dialog.
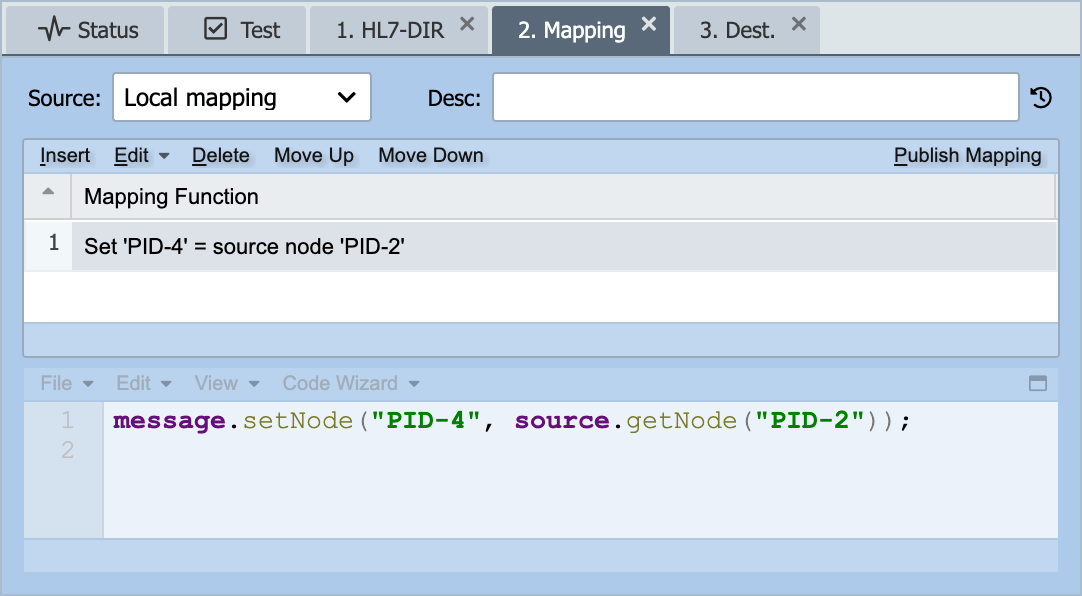
Click OK on the Mapping Function dialog to close the dialog and save the mapping function.
At this point, you should have a mapping node with a single mapping function which takes the value from field PID-2 and puts it in field PID-4.
Step 7: Configure the channel destination
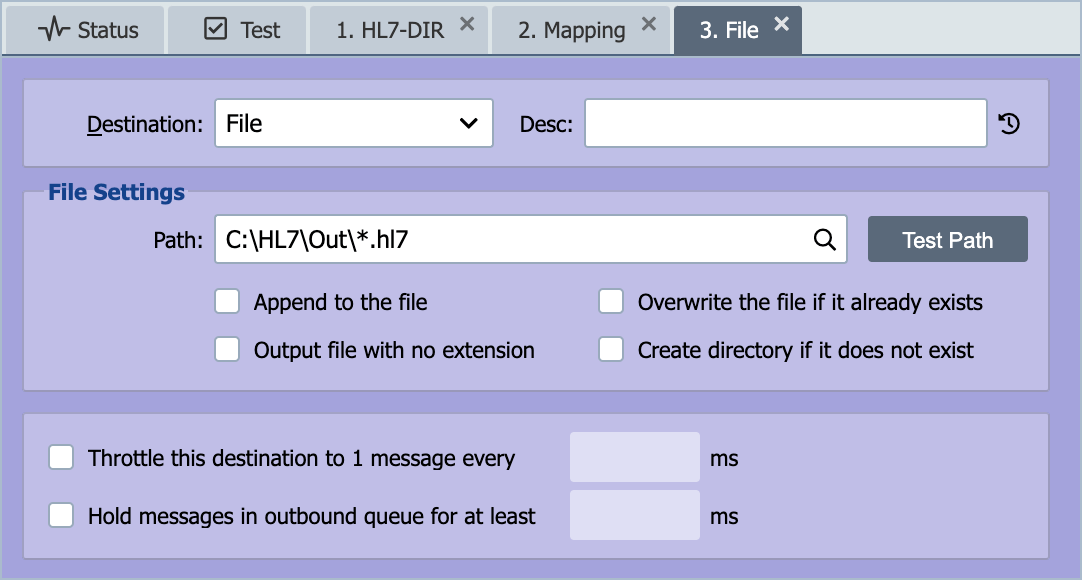
Select the destination node (purple) labeled 3. Dest.
Select File from the Destination drop-down.
Enter a path to a test folder on the QIE server.
Verify that you have entered a valid path by clicking the Test Path button.
Be sure to include a file name filter in the path (e.g. 'C:\HL7\Out\.hl7').
Note
The path you enter for a File destination is relative to the QIE server, not the workstation you are working from. If the QIE server is running on your local machine, then the path you enter is a path to a folder on your local machine. If the QIE server is running on a separate machine, then the path you enter is a folder on the QIE server or a network share that can be accessed from the QIE server.
Step 8: Save and test the channel
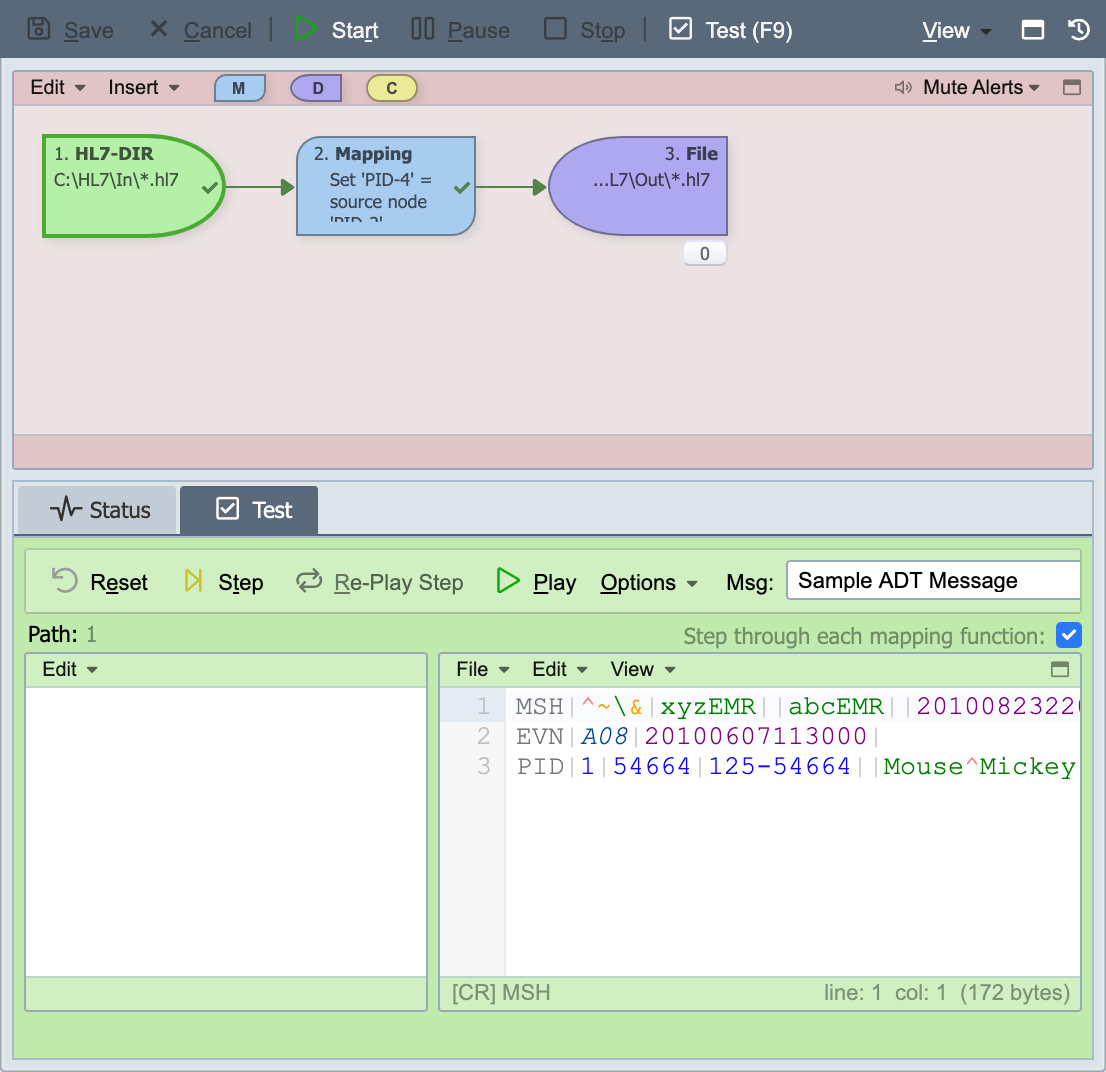
Click the Save button to save the newly created channel.
Click the Test button to open the test panel.
Click the maximize button on right side of the tool bar to maximize the center panel.
You can also maximize or restore the center panel by double-clicking anywhere inside the channel editor.
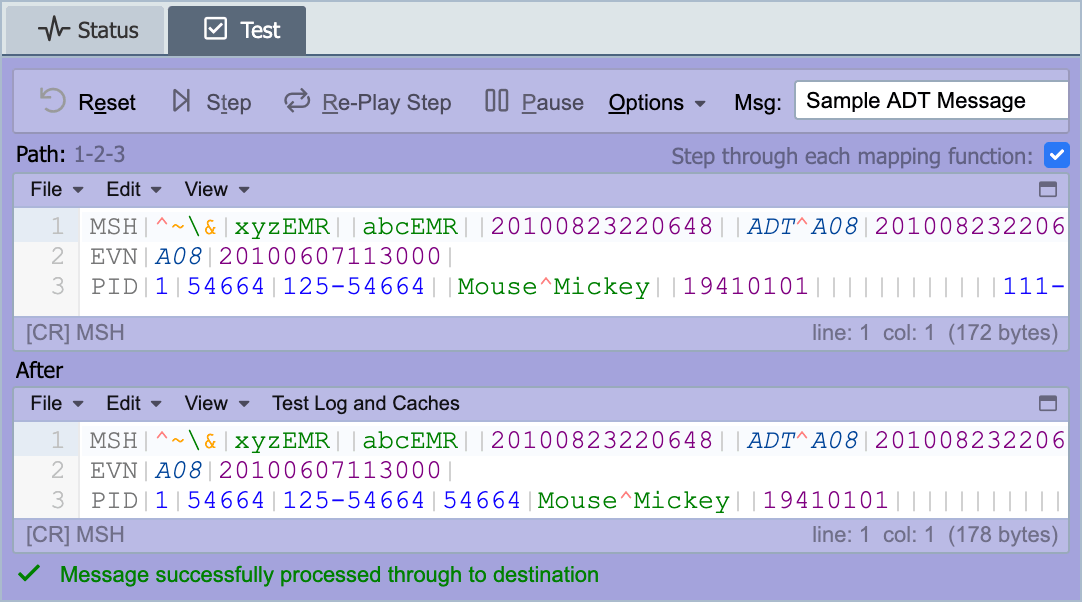
Click the Play button in the Test panel to play the sample message through the channel and test your configuration.
Note that as the message flows from one node to the next, the active node is outlined in green in channel node editor and the test panel changes color to match the active node.
Once the message reaches the destination node, the original message appears in the top panel and the mapped message in the bottom panel. Note that in this example field PID-2 has been copied to field PID-4 using the mapping function defined in step 6 of this tutorial.
Step 9: Start the channel and process a file
Now it is time to start the channel and process a message.
First restore the center panel by clicking the restore button on the right side of the toolbar or by double-clicking inside the channel editor.
Now start the channel by clicking the Start button.
Note that the channel editor background color changes to green to indicate that the channel is now running. You should also see an entry in the channel log indicating the date and time that the channel was started.
Place a sample HL7 file in the source directory configured in step 4 above. Be sure to give the sample file the correct extension, also configured in step 4 above (e.g. 'Tutorial Sample.hl7').
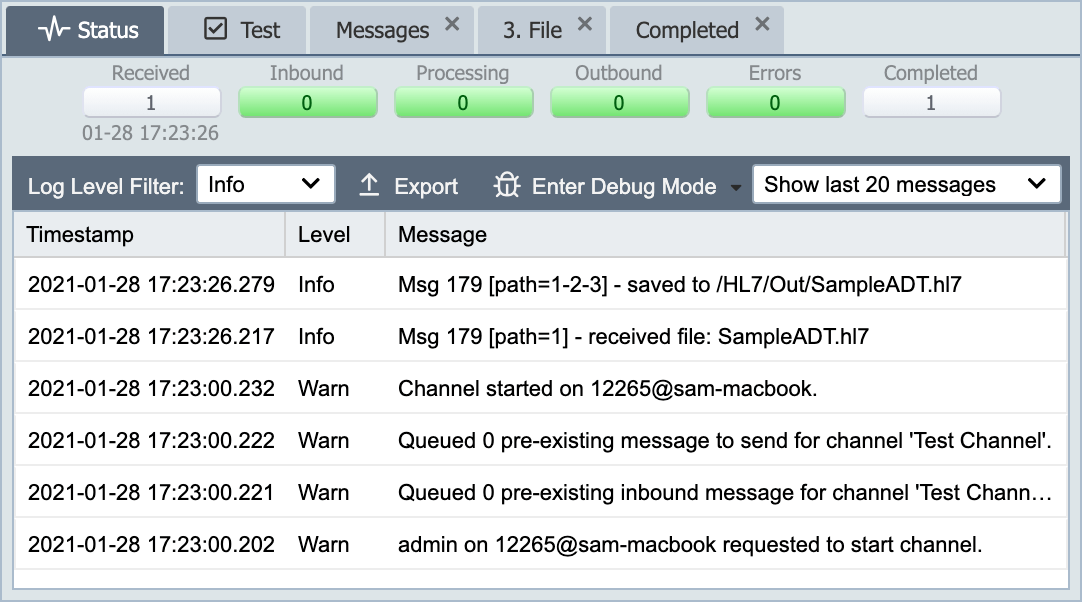
Once the file has been processed by QIE, the received and completed counts should both read '1'. There are also entries in the channel log associated with the processed file.
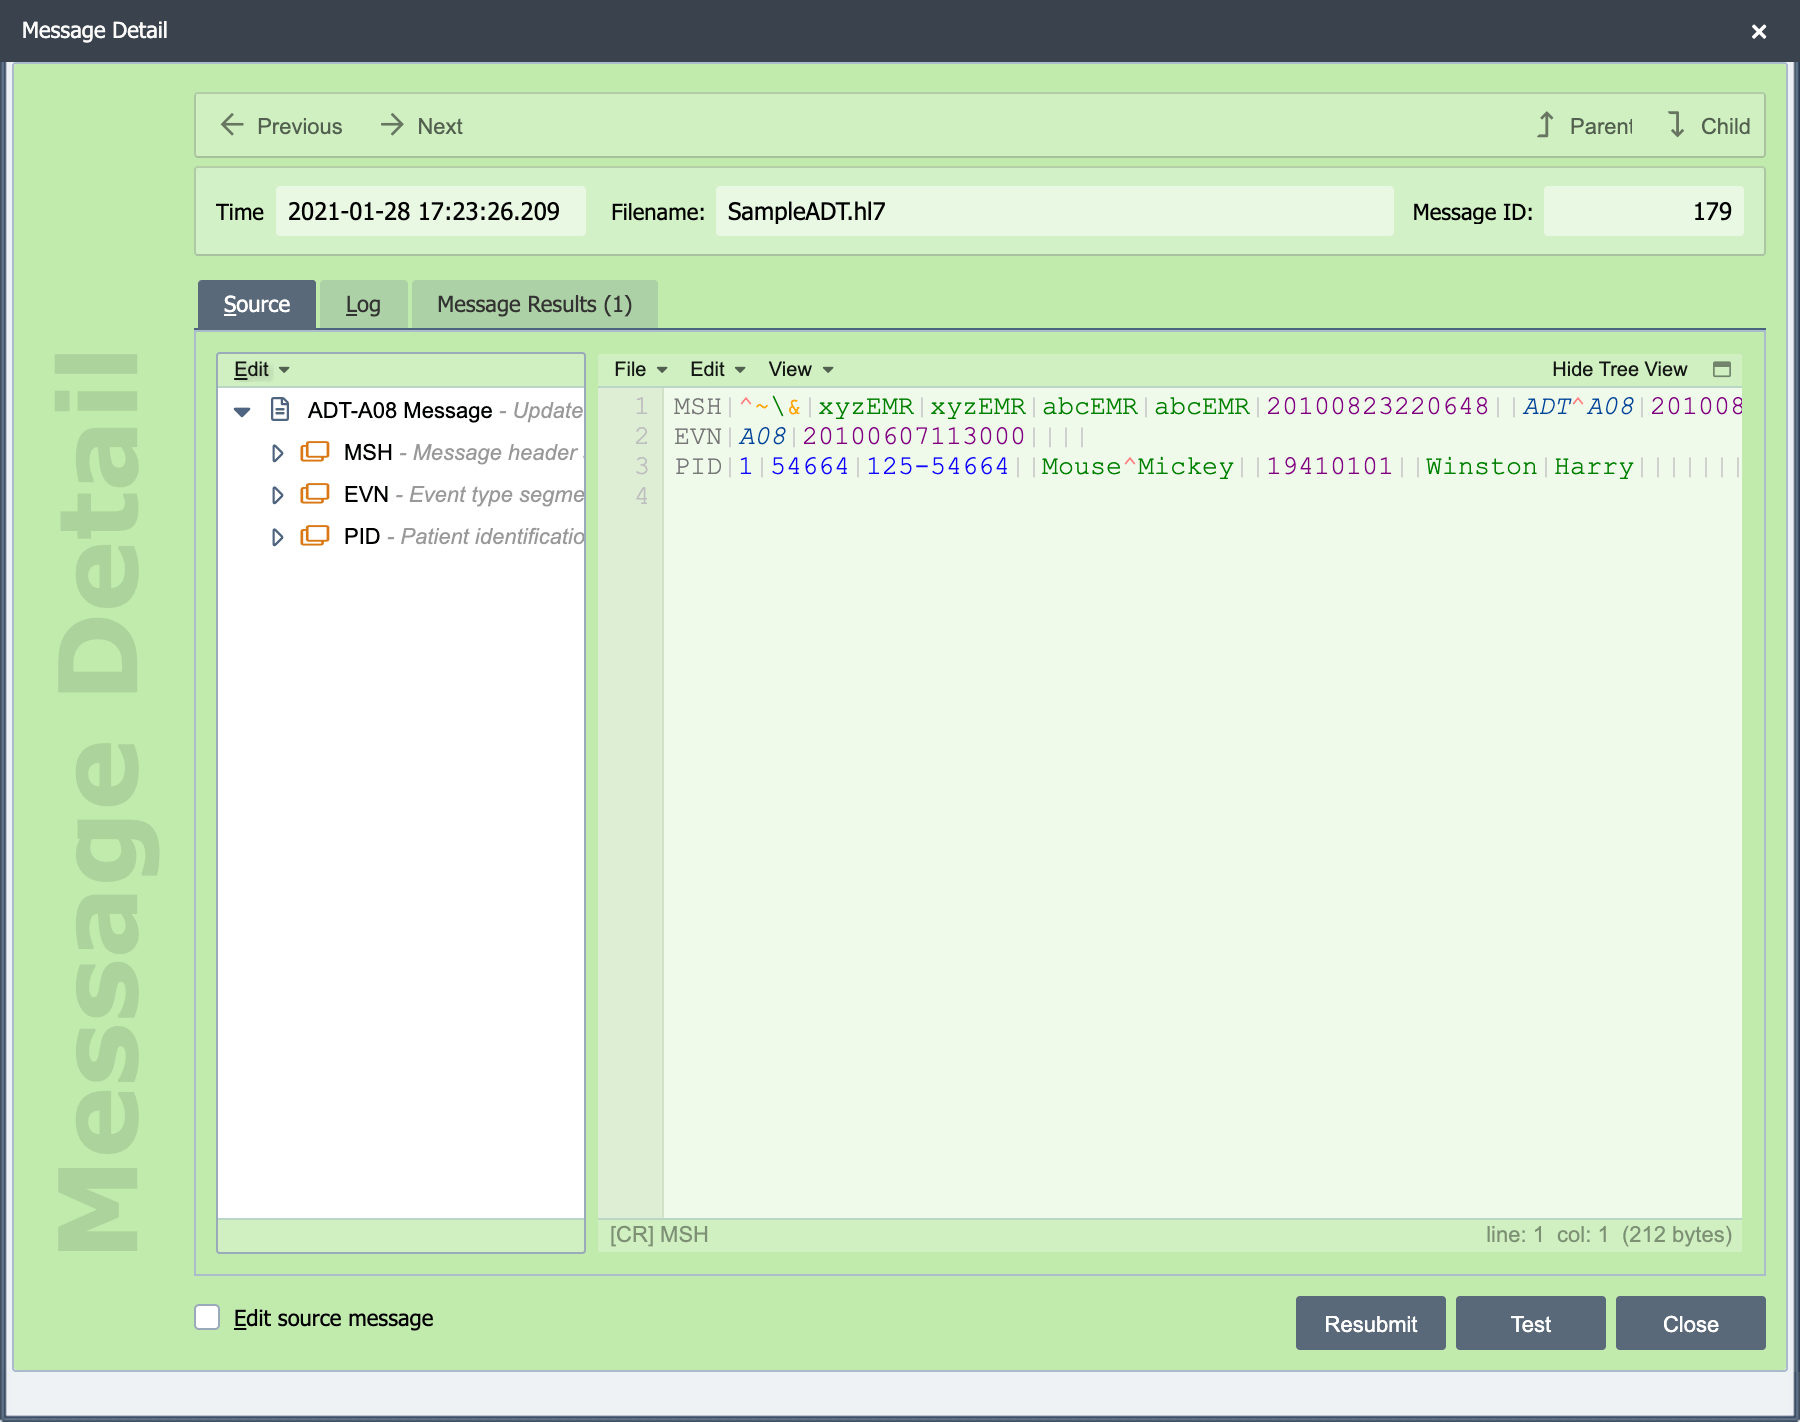
To view the message that was just processed, click the Messages tab and then double click the newly processed message. This opens the Message Detail dialog.
The tabs allow you to change what part of the message you are viewing in detail. The Source tab shows the message as it was received by the channel.
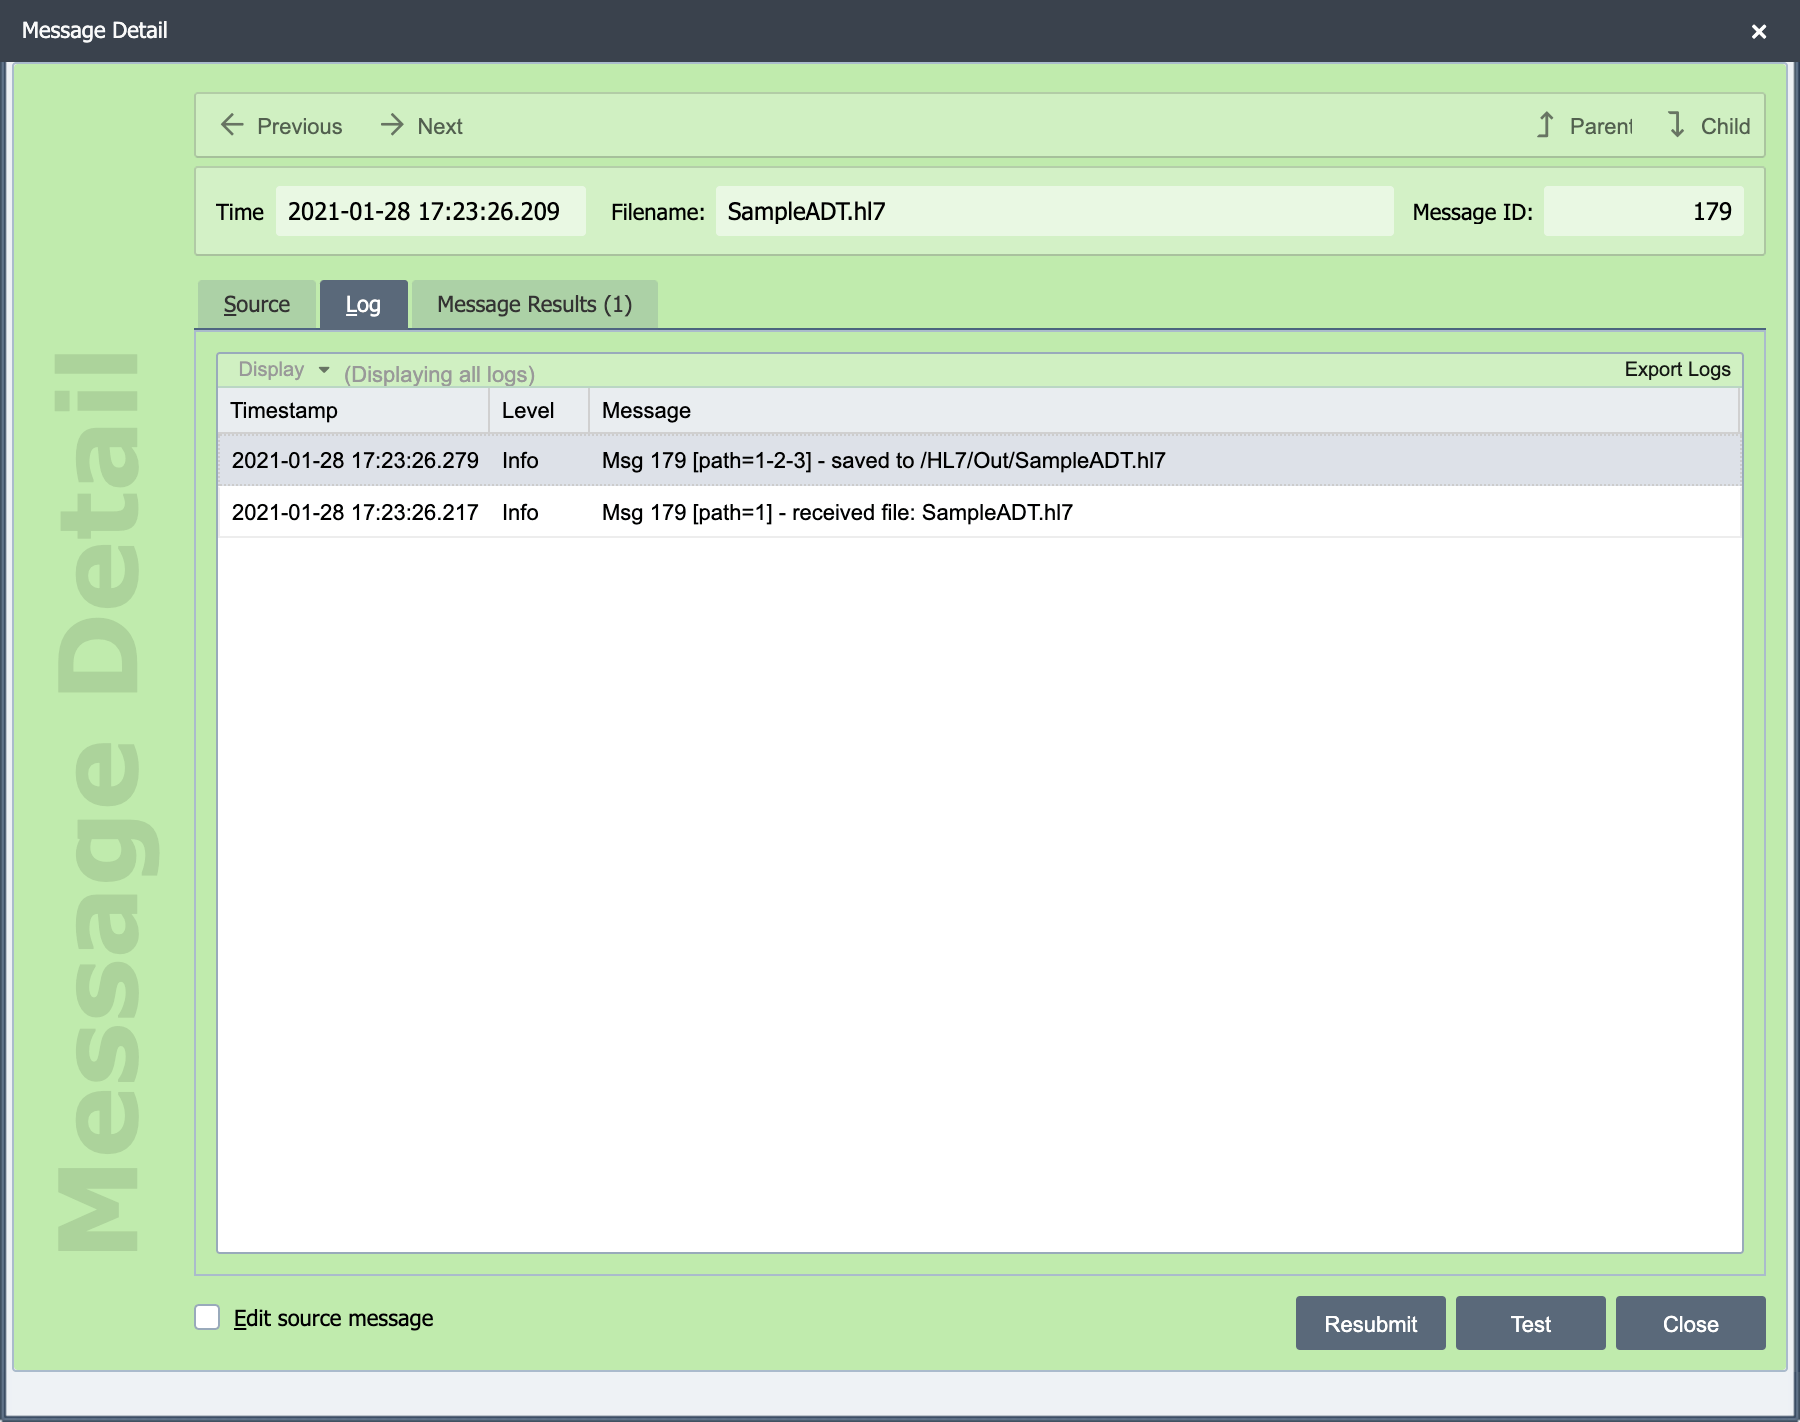
The Log tab shows all log entries associated with the message.
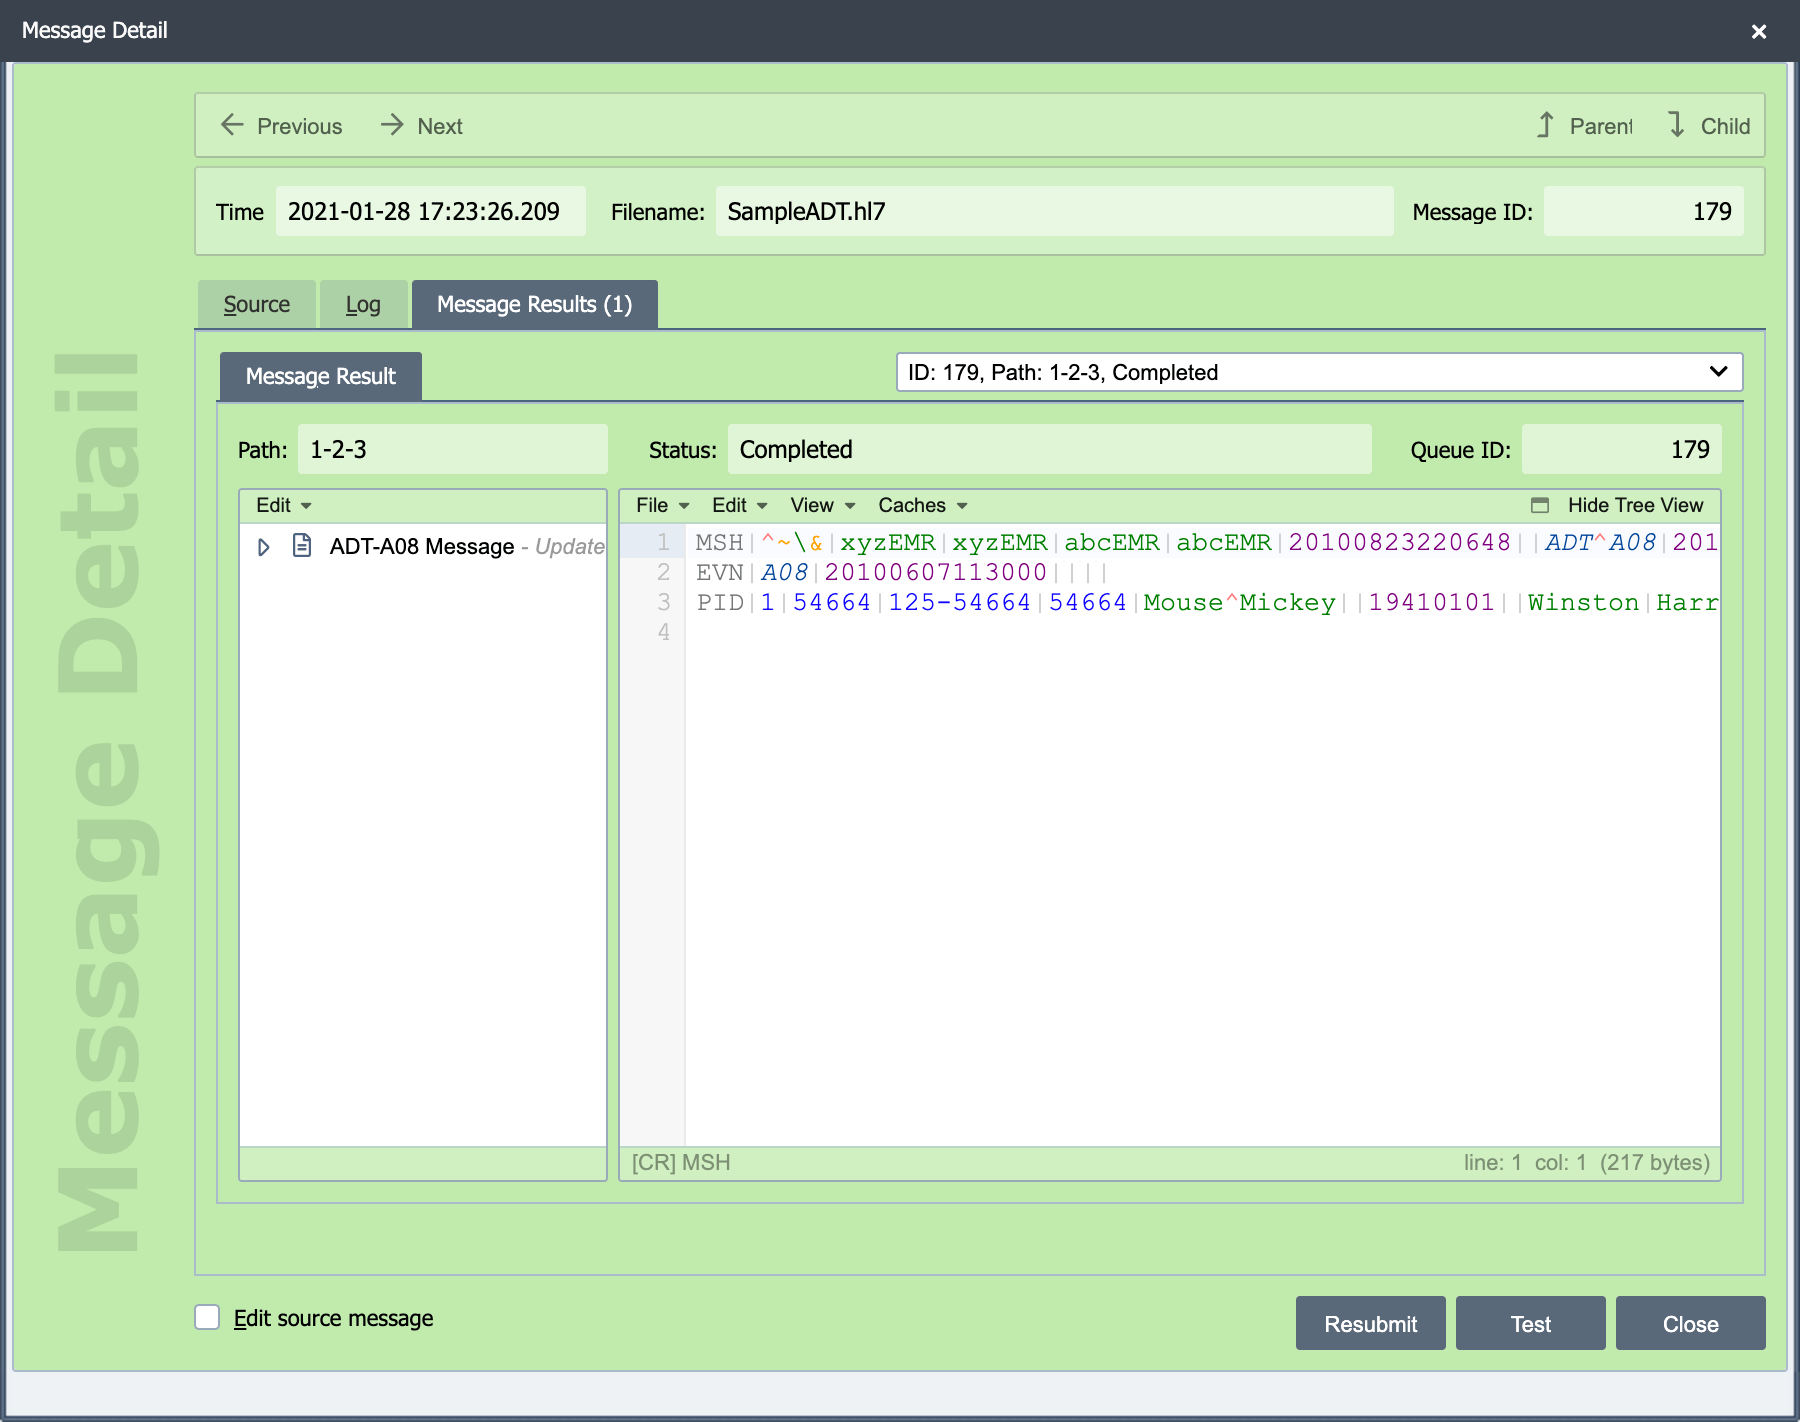
The Message Result(s) option shows the mapped message that was sent to the destination.
Congratulations! You have successfully created your first channel in QIE. The next section shows how to customize your mapping function using the Code Wizard.