Creating Your First DICOM Channel
This chapter walks step by step through building a passthrough channel that receives DICOM messages on a configured AE Title and port and forwards them to a second DICOM endpoint. After completing the steps in this chapter you should have a working channel that demonstrates the end-to-end DICOM flow through QIE.
Step 1: Navigate to the Channels page
Log in to QIE and navigate to the Channels page in the zone where you want to create the new channel.
Step 2: Create a new channel and give it a name
Click the New button on the channel page. This opens the Channel Properties dialog.
Give your channel a name (for example, DICOM Passthrough) and click OK.
Step 3: Configure the source node
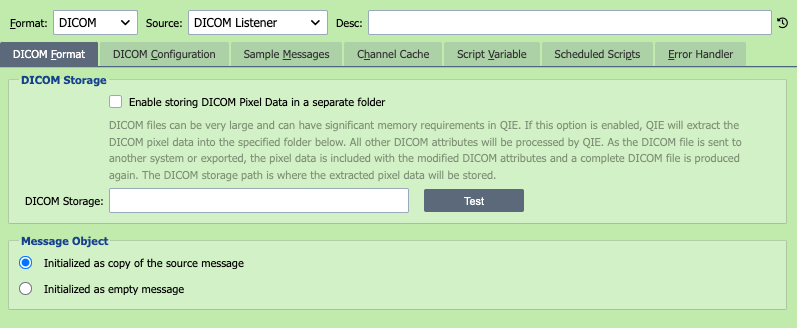
Select the source node (green) labeled 1. Source.
Select DICOM from the Format drop-down and accept the default settings.
Select DICOM Listener from the Source drop-down. The source-node configuration panel updates to show the DICOM-specific fields.
Step 4: Enter the Local AE Title and Port
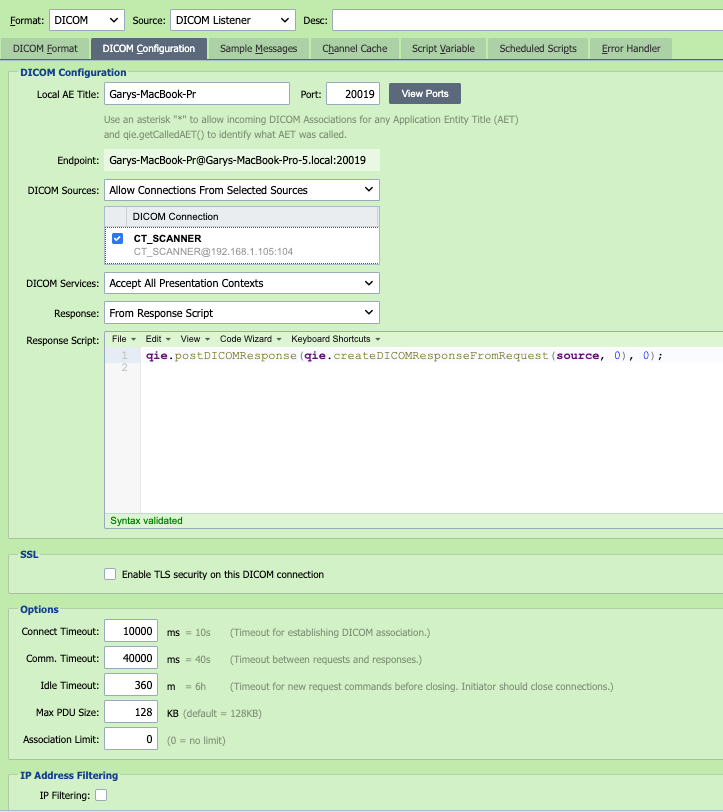
Enter the Local AE Title you chose in the previous chapter (for example, QIE_LISTENER).
Enter the Port the listener should listen on (for example, 11112).
Note
The AE Title must match the value the sending DICOM device is configured to send to. AE Titles are case-sensitive, are limited to 16 characters, and may contain only A-Z, 0-9, and the underscore character.
Step 5: Configure DICOM Services
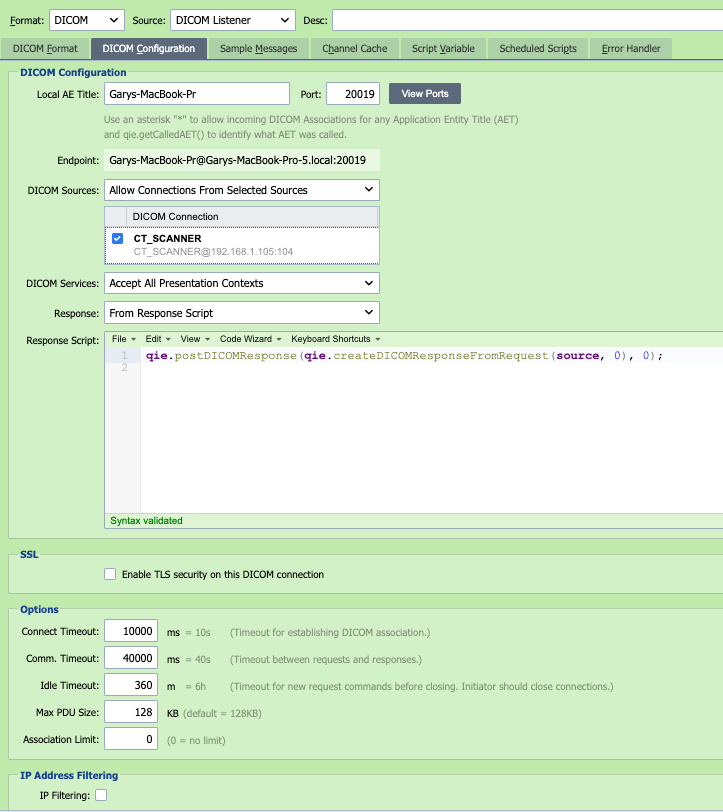
In the DICOM Services section, select the services this listener should accept. For a passthrough channel that handles storage requests, select C-STORE. Add additional services if your sending device uses them.
For each service, choose the transfer syntaxes the listener supports. Most modern senders use Explicit VR Little Endian and Implicit VR Little Endian, so include both unless you have a specific reason not to.
Step 6: Add a sample DICOM message
With the source node still selected, click the Sample Messages tab and click Insert to open the Sample Message dialog.
Enter a description (for example, Sample CT Image).
Use File -> Import in the editor menu to import the sample DICOM file you prepared in the Before Running chapter.
Click OK to close the sample message dialog.
The sample message is used by the Node Path Lookup Dialog when you write mapping scripts, and by the Test Window when you test the channel.
Step 7: Add the DICOM destination
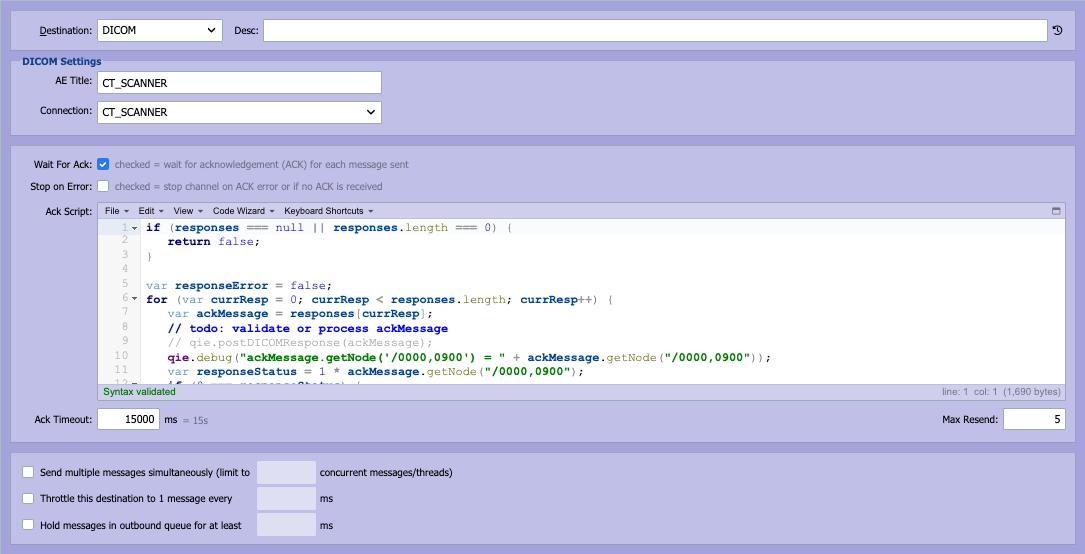
Select the destination node (purple) labeled Destination.
Select DICOM Sender from the Type drop-down.
Step 8: Configure the DICOM connection
A DICOM Sender uses a DICOM Connection resource that holds the destination host, port, AE Title, and TLS settings. You can either select an existing connection or create a new one.
Click the edit icon next to the Connection field to open the DICOM Connections editor.
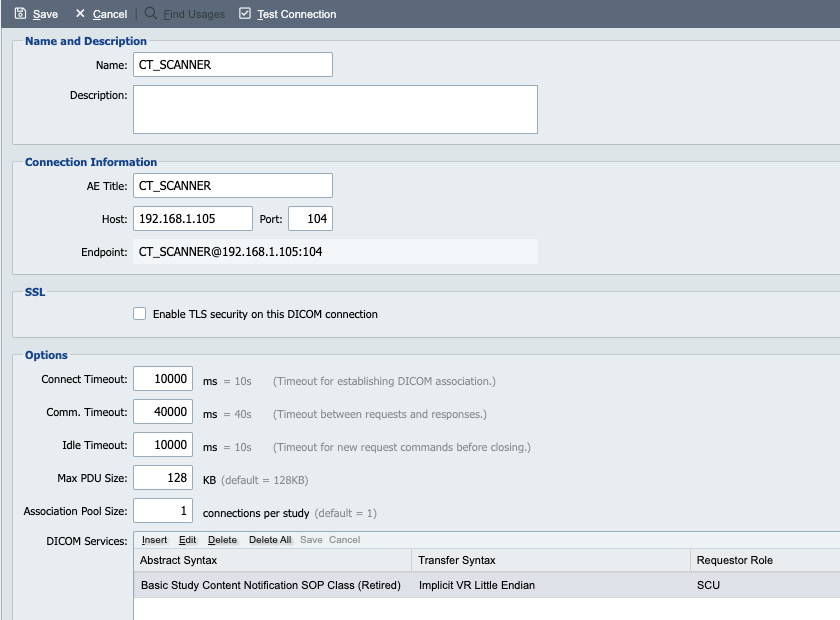
Click New to create a new connection. Enter the following:
- Name: a friendly name for this destination (for example,
Tutorial PACS). - Application Entity Title (AE Title): the AE Title of the destination device.
- Host: the hostname or IP address of the destination device.
- Port: the port the destination device is listening on.
- SSL: check this if the destination requires TLS.
- DICOM Services: list the services the destination supports (typically C-STORE for storage forwarding) along with the transfer syntaxes.
Click OK to save the connection, then select the new connection from the Connection drop-down on the destination node.
Step 9: Save the channel and start it
Click Save to persist the channel configuration.
Right-click the channel on the Channels page and select Start from the context menu. The status indicator should turn green to show the listener is up.
Note
If the channel fails to start with a port-in-use error, another process on the QIE server is already bound to the port you chose. Stop that process or pick a different port.
Step 10: Test the channel
You can test the channel two ways:
-
From the QIE Test Window: open the channel and click Test. QIE feeds the sample DICOM message you saved in Step 6 through the channel as if it had arrived from a real sender, and shows you the result at each node.
-
From a real DICOM sender: point the sending device at the QIE server's hostname or IP, the Port you configured in Step 4, and the Local AE Title from Step 4. Trigger a send and watch the channel queue on the Channels page.
If the message reaches the destination successfully, you have a working DICOM passthrough.
What You Should Have Now
- A channel named
DICOM Passthroughconfigured with a DICOM Listener source and a DICOM Sender destination. - A DICOM Connection that points at your second DICOM endpoint.
- A sample DICOM message saved on the source node for testing.
- A working flow that receives a DICOM message on QIE's listener port and forwards it to the destination AE.
The next chapter shows how to deidentify patient information in the message before it is forwarded.