Message History Tab
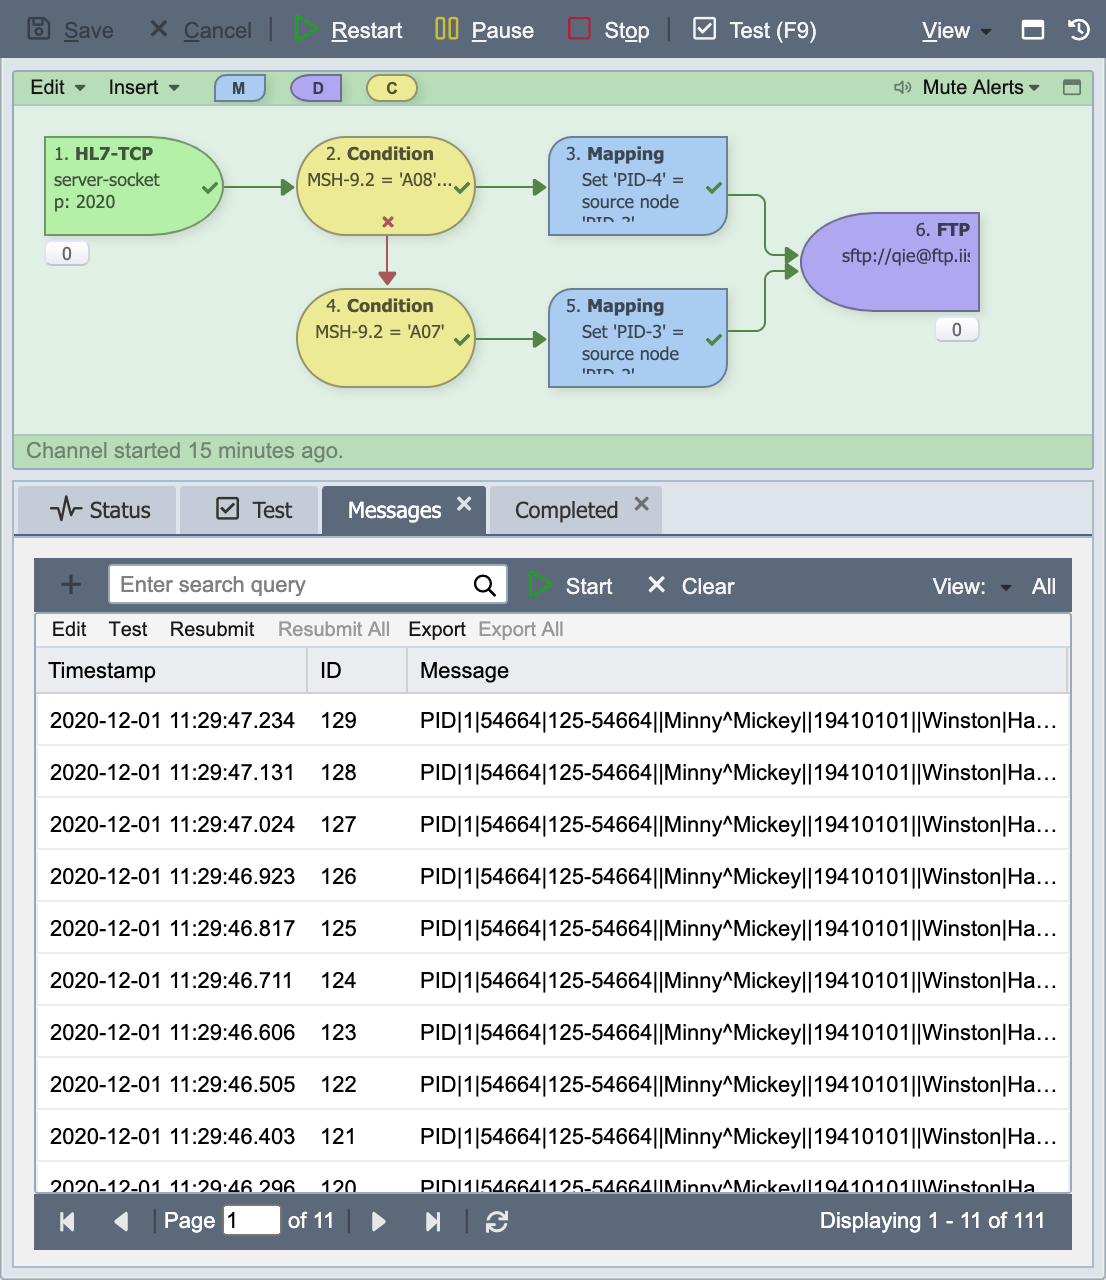
The message history tab displays a list of the most recent messages processed by the channel. The list is continuously updated as new messages are processed. The sum of all of the messages retained in the message history is controlled by the number of days specified on the Message Retention Policy under the System Configuration Settings.
Message Search
Search Messages Dialog
Clicking on the ellipses next to the search query field opens the Search Messages dialog box.
Node Path
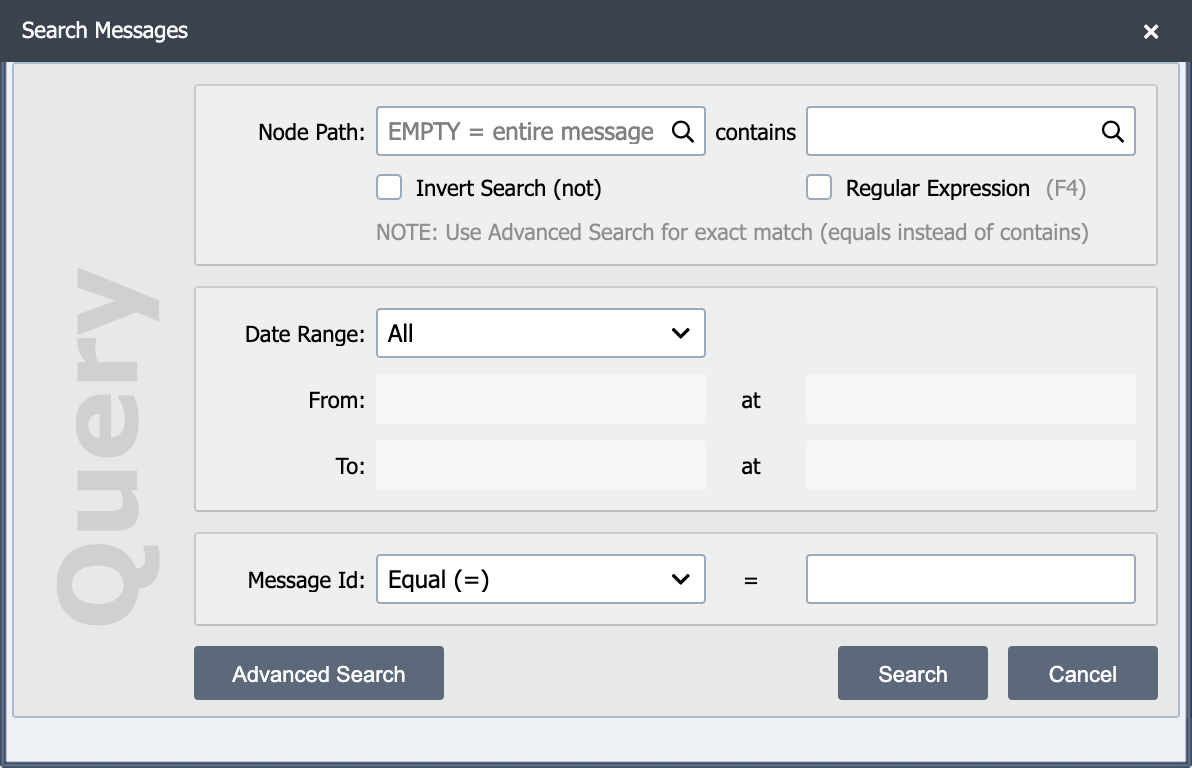
Type a node path or press F2 to display the node path lookup dialog.
Contains
Enter a value to search for in the specified node path.
For example, to find all ADT^A08 update messages, set Node Path to MSH-9 and Contains to A08. To find all messages for a specific patient, set Node Path to PID-3 and Contains to the patient's MRN.
Regular Expression
Check Regular Expression to interpret the Contains value as a Java regular expression instead of a literal substring. For example, with Node Path = PID-5.1 and Contains = (?i).*john.*, the search matches any patient whose last name contains "John" (case-insensitive).
The same behavior is available directly in the search field's raw query: write PID-5.1=regex:/(?i).*john.*/ (the regex:/ prefix and trailing / flag the value as a pattern).
Date Range
Select a date range from the drop-down list or enter a custom date range.
Message ID
Select an operator and enter the desired message ID(s).
- Equal (=), Not equal (!=), Greater than (>), Greater or equal (>=), Less than (<), Less or equal (<=), enter a single ID.
- In (id1, id2, id3 ...): enter two or more IDs separated by commas (spaces are optional); matches any message whose ID is in the list.
- Between (id1 and id2): enter a low ID and a high ID; matches any message whose ID falls in the inclusive range.
The corresponding search-query strings render as SOURCE_ID=IN(567,568,569) and SOURCE_ID=BETWEEN(567,572).
Advanced
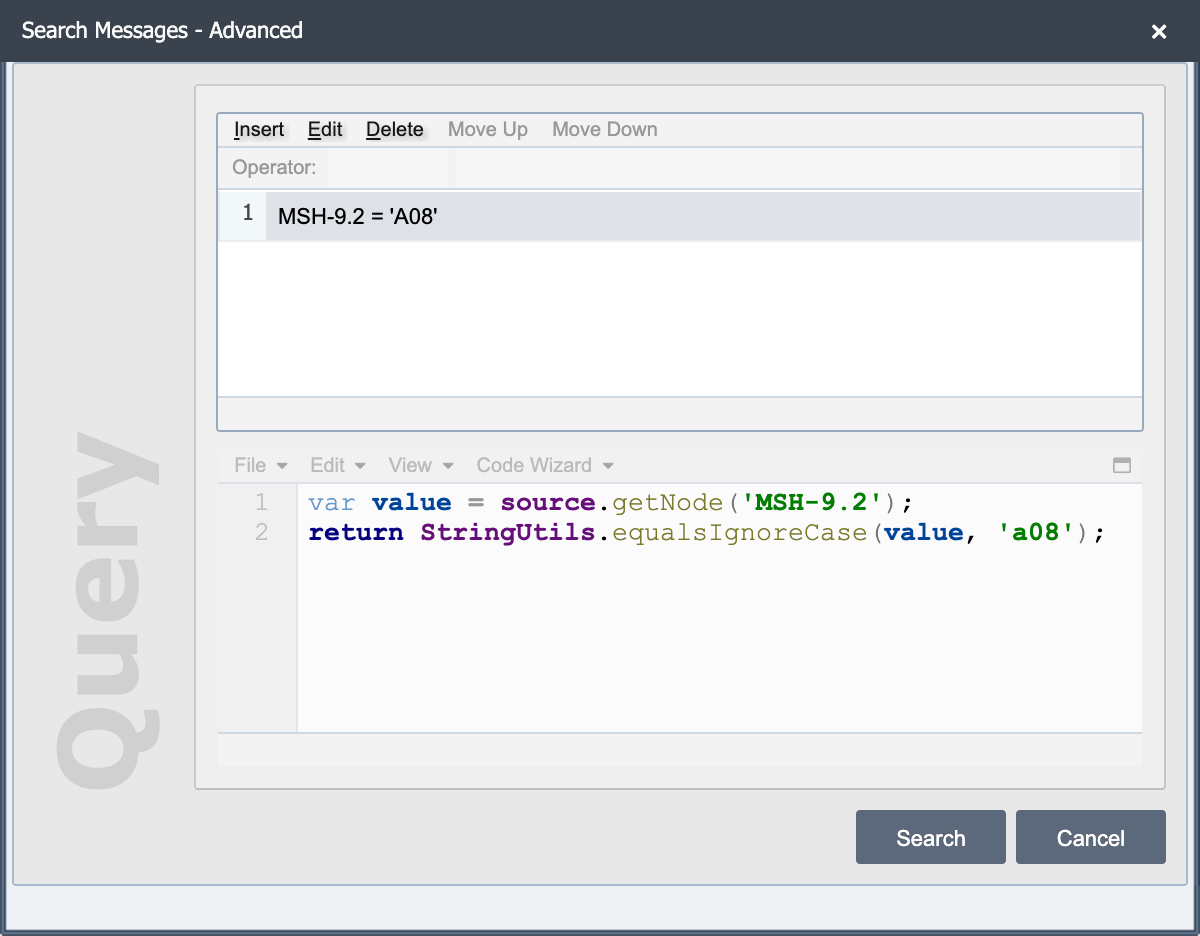
Clicking the Advanced button opens the Add/Edit Condition dialog box. See Condition Nodes for more information.
Views
Views are used to store regularly used search criteria. For example, if you often search for A08 Messages a view can be created that returns a list of A08 messages. One advantage of creating a view is that once created QIE indexes the messages making the search for that given criteria quicker.
The view drop-down list contains all defined views for the channel. Selecting a view from the drop-down list returns a list of messages that match the criteria. In addition, when a view is selected the view name displays next to the View drop-down button. If no view is selected, then "All" displays next to the view drop-down button indicating that all messages are shown.
To create a new view, select New View from the View menu. This opens the Message History Filter dialog. Click insert and the Add/Edit Condition dialog opens. See Condition Nodes for more information.
To edit or delete a saved view, hover the view's entry in the View drop-down. A submenu appears with Edit (re-opens the Message History Filter dialog) and Delete (removes the view after confirmation).
Exporting Messages
The Export All button on the toolbar exports the current search results (or the entire view, if no search is active) to a text file. The export dialog offers several options:
- Separate files: write each message to its own file (default: one combined file).
- Original filename: use the message's original source filename in the export (file sources only).
- Additional details: include metadata such as message ID, source ID, and timestamps alongside the message body.
- User access logs: include the user-activity log entries associated with the messages.
- Entire Source / Entire Message include the original source body or the processed message body in the export.
- Custom data: apply a node-tag template to each message and emit only the resolved string. For example,
{MSH-9}|{PID-3}|{PID-5.1},{PID-5.2}produces a|-delimited row per message of message type, MRN, last name, and first name, which is useful for ad-hoc reporting.
Combined with the channel's Message Data to Display template (which controls what the messages list shows on screen), Custom data is the typical way to produce a quick spreadsheet-ready extract without writing a script.
Opening the Message Detail Dialog
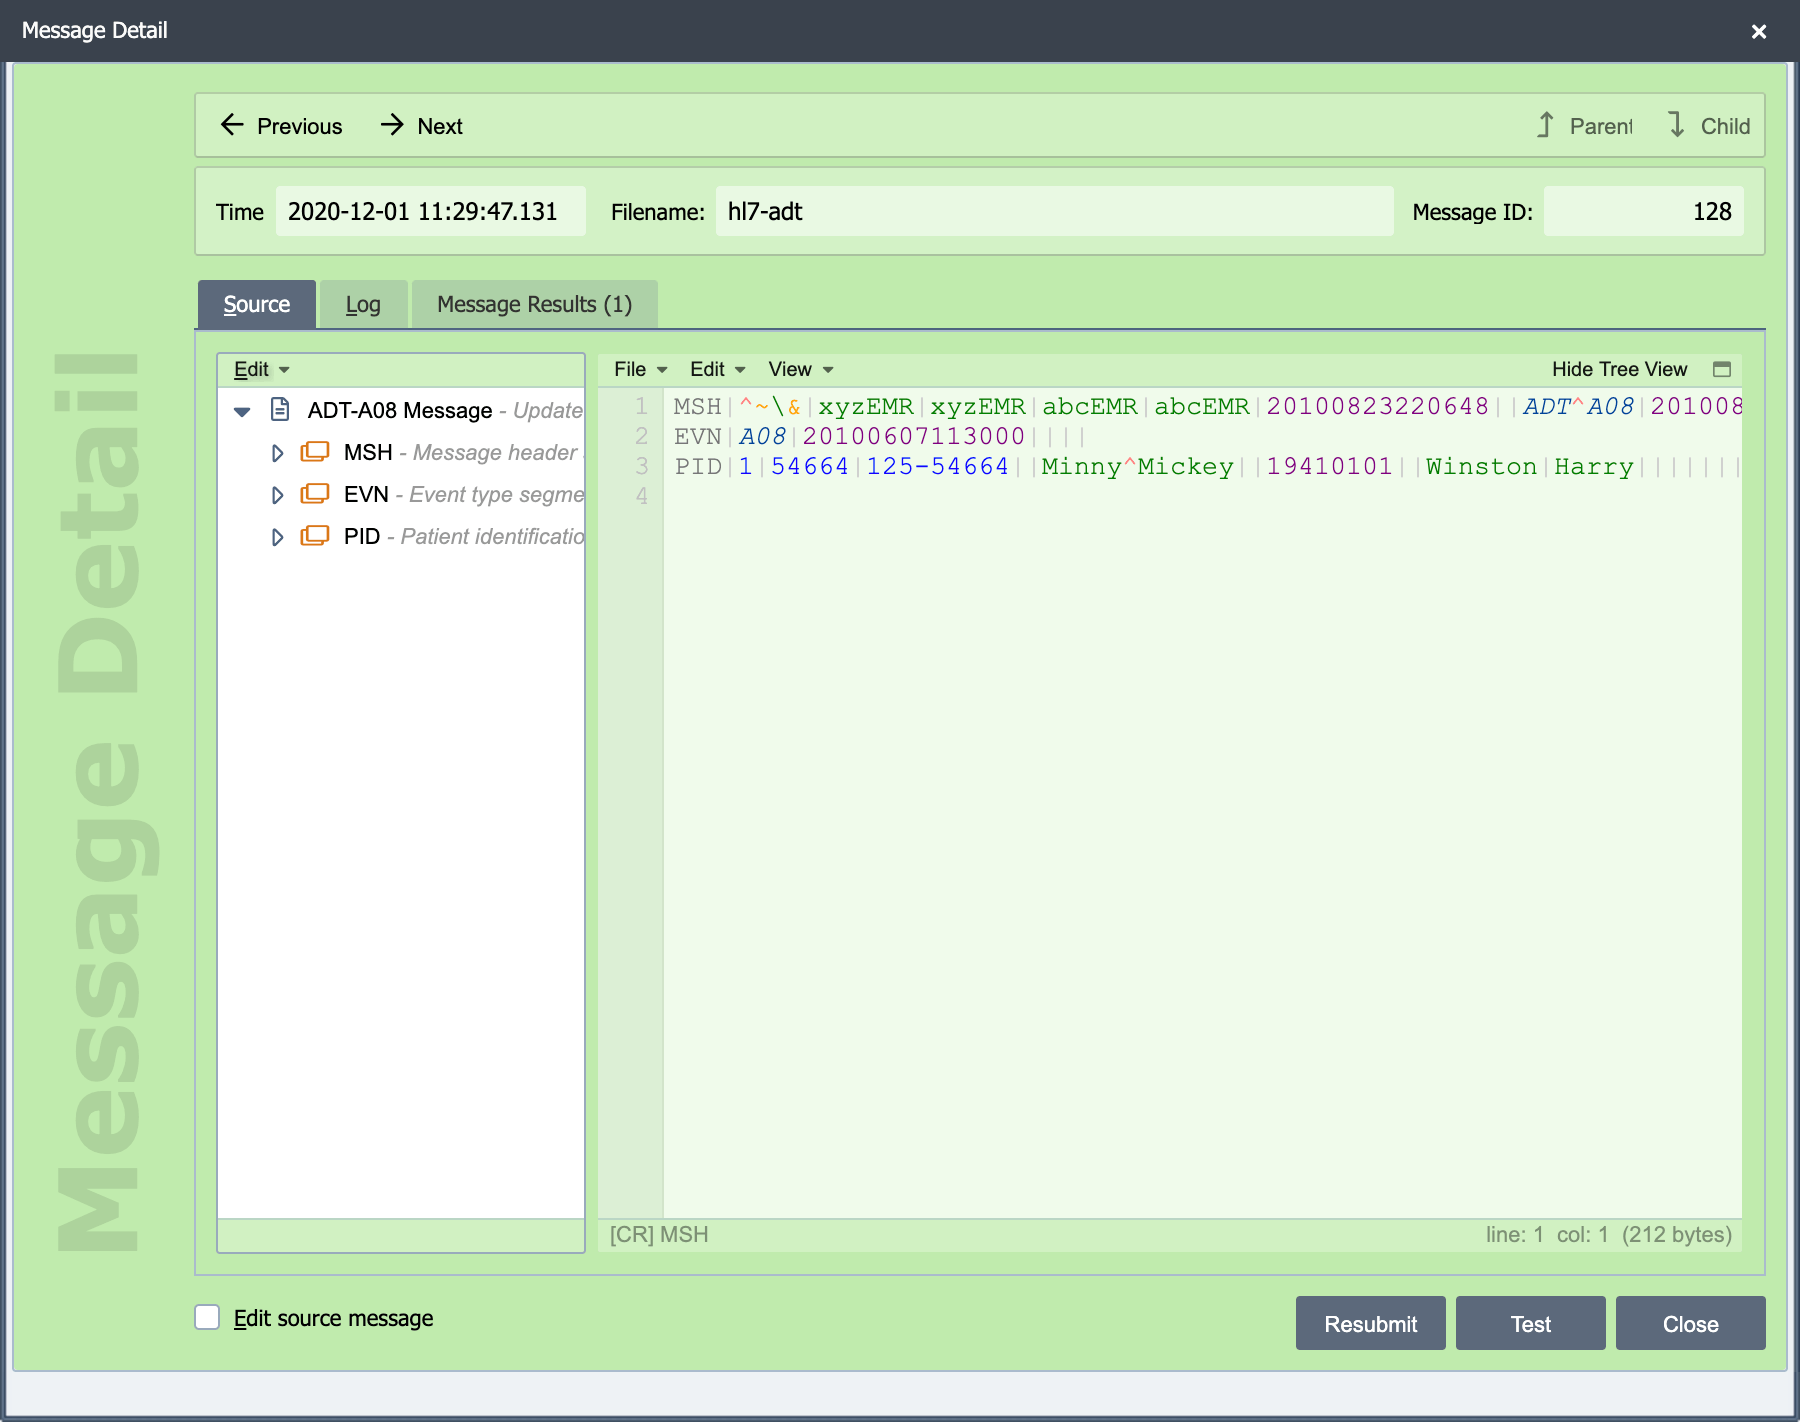
Double-click a message in the list (or select it and click Edit) to open the Message Detail Dialog. Opened from the Message History tab, the dialog has a green background, defaults to the Source view, and exposes the Resubmit, Test, Edit source message, and Close action buttons. Resolve and Discard are not shown here; they appear only on the Error tab.
See Message Detail Dialog for the header fields, view drop-down, and full button reference.