Using Condition Nodes
This chapter shows how to route messages using condition nodes. Condition nodes are used to route messages to different mapping, condition, and destination nodes. By using condition nodes in this way, you can perform different sets of mappings on different types of messages or route messages to different destination nodes.
Routing Messages with Condition Nodes
Step 1: Add a Condition Node to the Channel
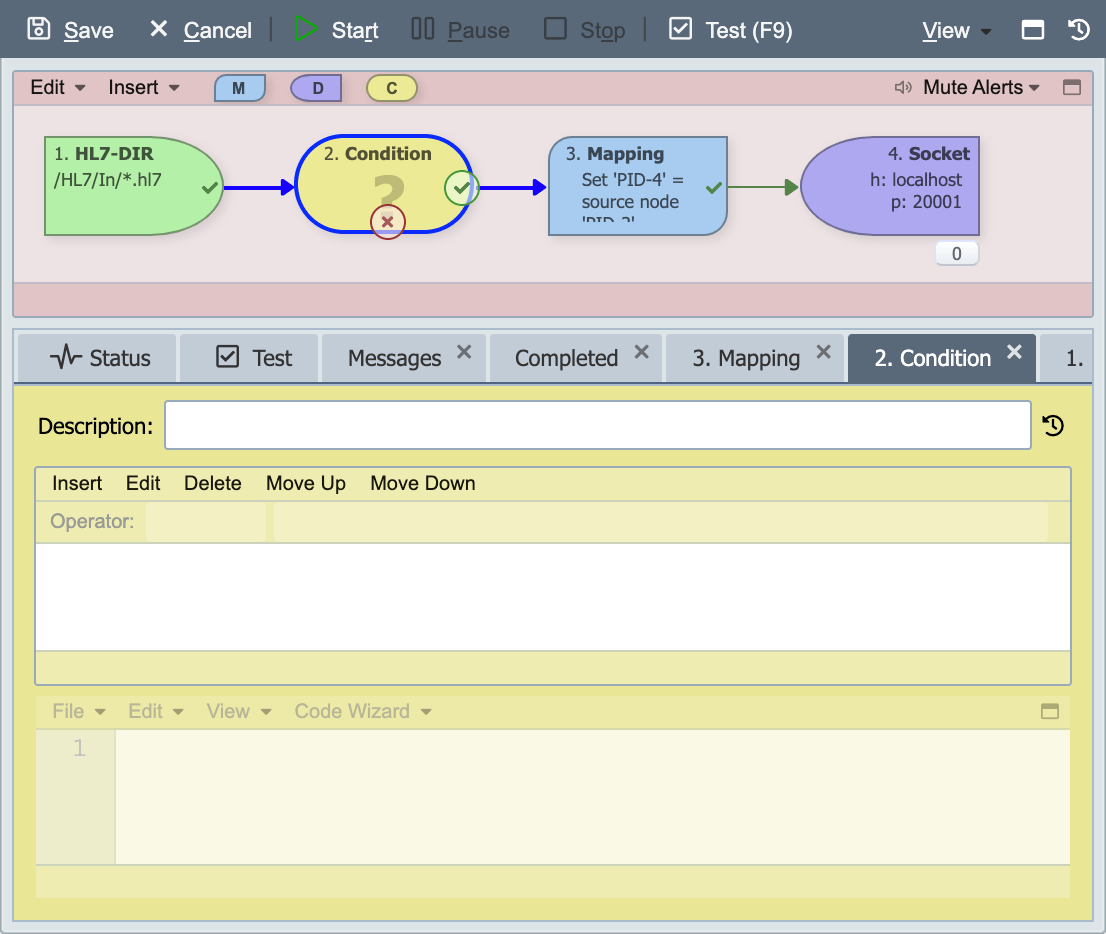
Select the Test Channel channel and highlight both the Mapping node and Destination node. Then drag the nodes to the right to allow room to add a condition node between the Source node and the Mapping node.
Now highlight the connecting line between the Source node and Mapping node and delete the line using the keyboard delete key.
Now drag and drop the yellow condition node from the menu onto the Visual Channel Editor, and reconnect the Source node and Mappings nodes to the Condition node.
Step 2: Configure the Condition
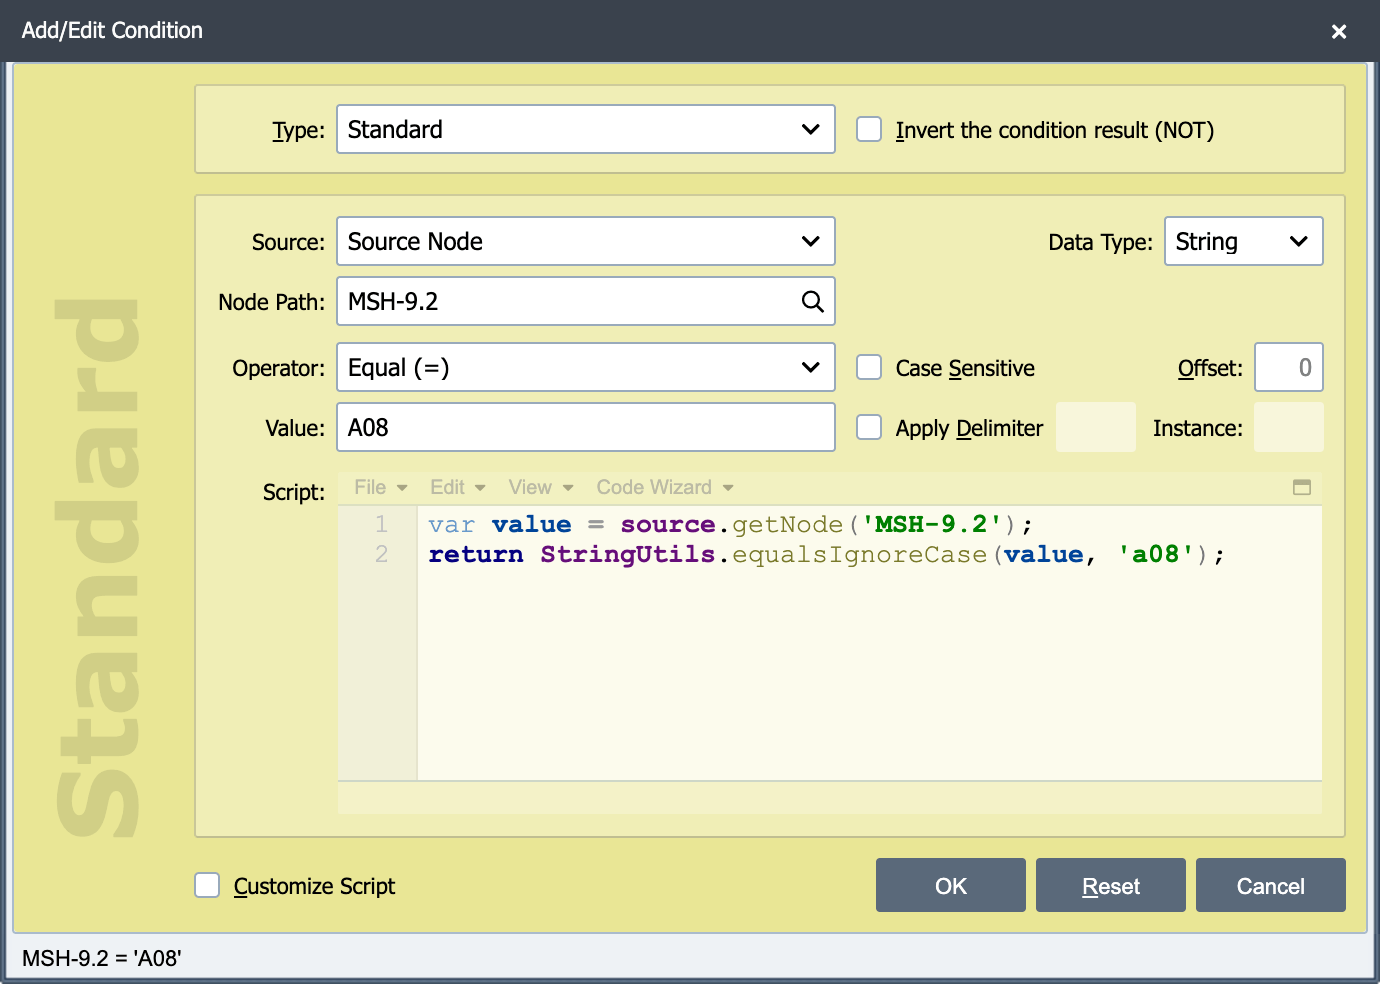
For this condition, check whether the ADT message is of type A08 or A04, and route each type through different mappings. Click on the condition node and select Standard as the Type of condition from the drop down menu. Then set the other values as follows: Source = Source Node, Data Type = String, Node Path = MSH-9.2, Operator = Equal (=), Value = A08.
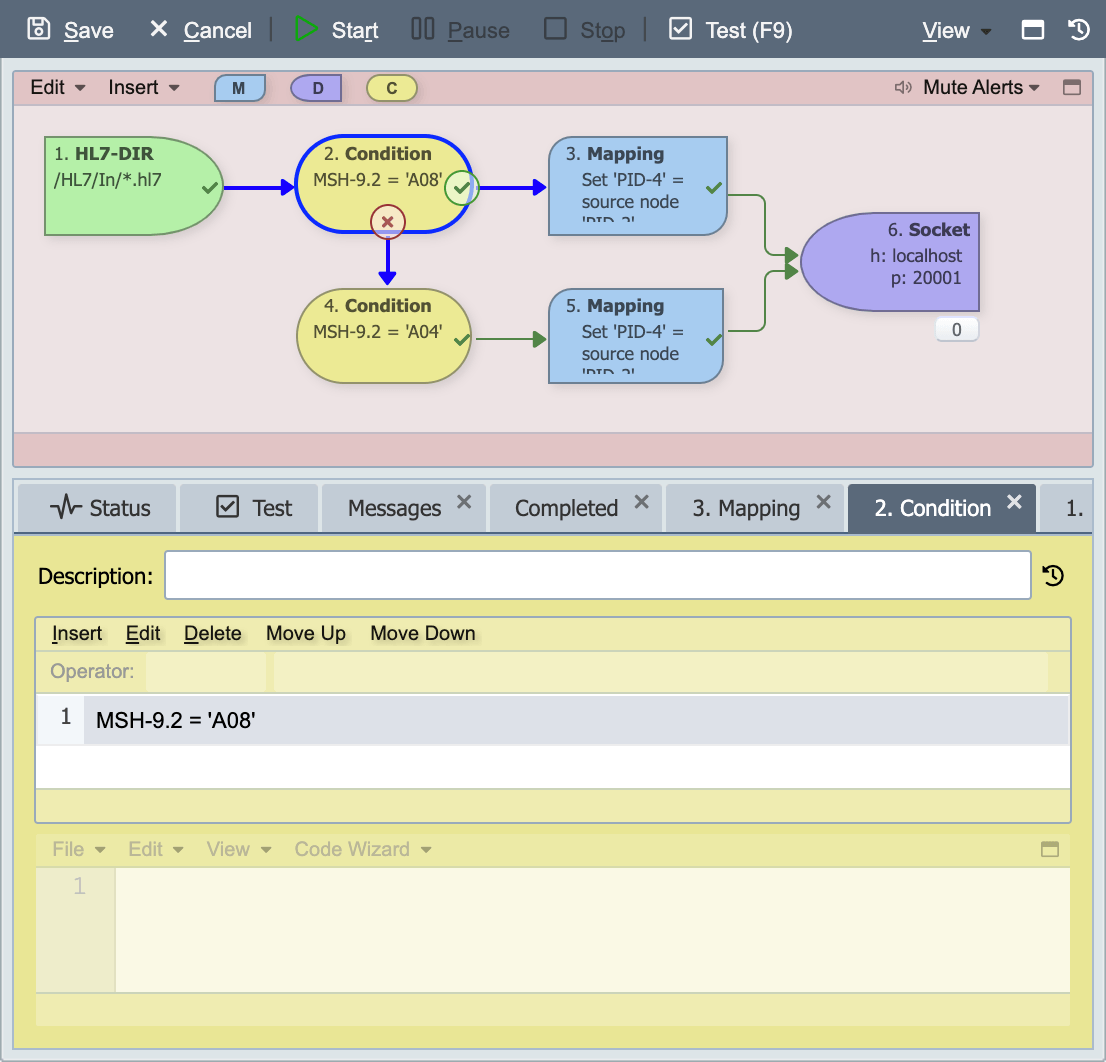
Now add another condition node right below the one you just added and connect the red X from the first condition node to the second condition node. Then repeat step 2 except change the Value to A04 instead of A08. Then add another mapping node with a mapping of your choice.
Now connect the two mapping nodes to the same destination node. The last step is to test your condition and verify that the messages follow the desired path.