Thank you for choosing QIE as your AWS healthcare interoperability solution. The following instructions will walk you, step-by-step, through the process of configuring your new QIE EC2 instance, launching QIE from the new instance, activating your QIE license, and getting started with developing your first QIE interface.
Step 1 – Subscribe to the Qvera Interface Engine
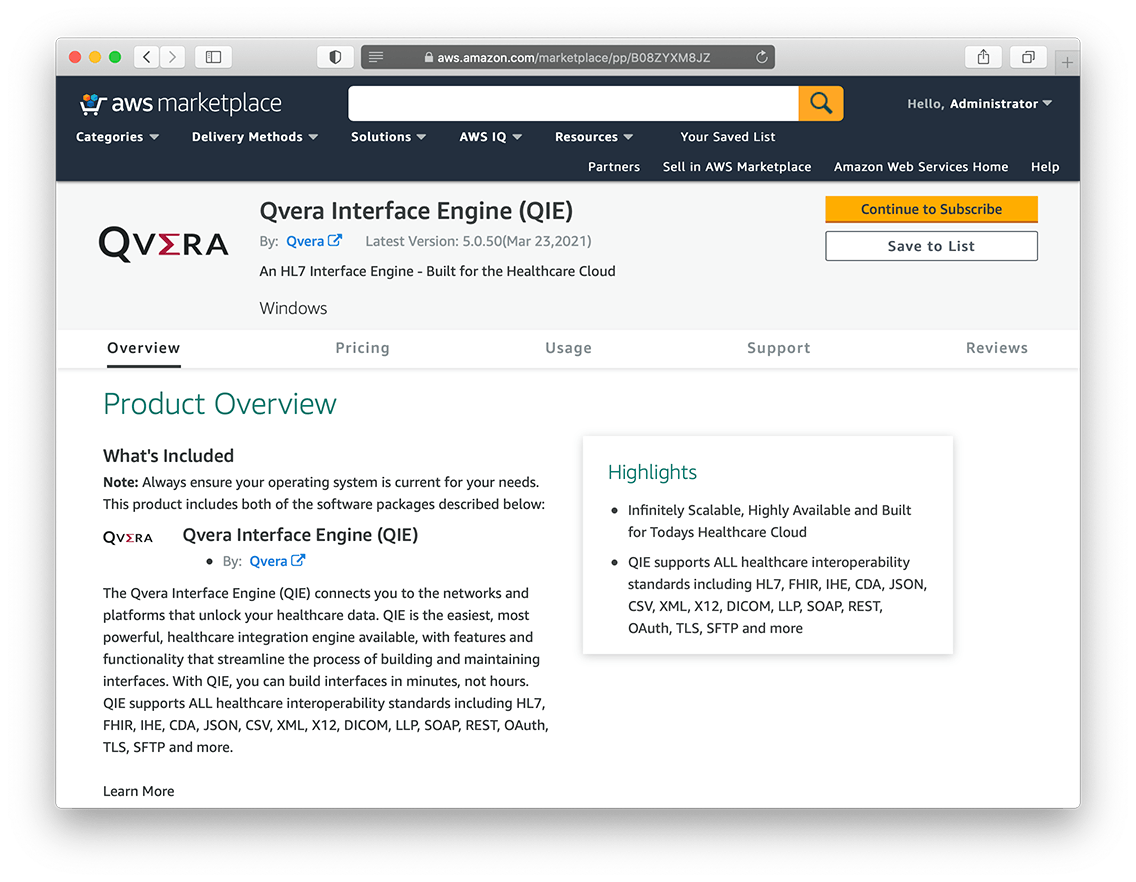
- Subscribe to QIE: Click here to access the AWS EC2 Marketplace – QIE Product Page, then click the Continue to Subscribe button to start the subscription process.
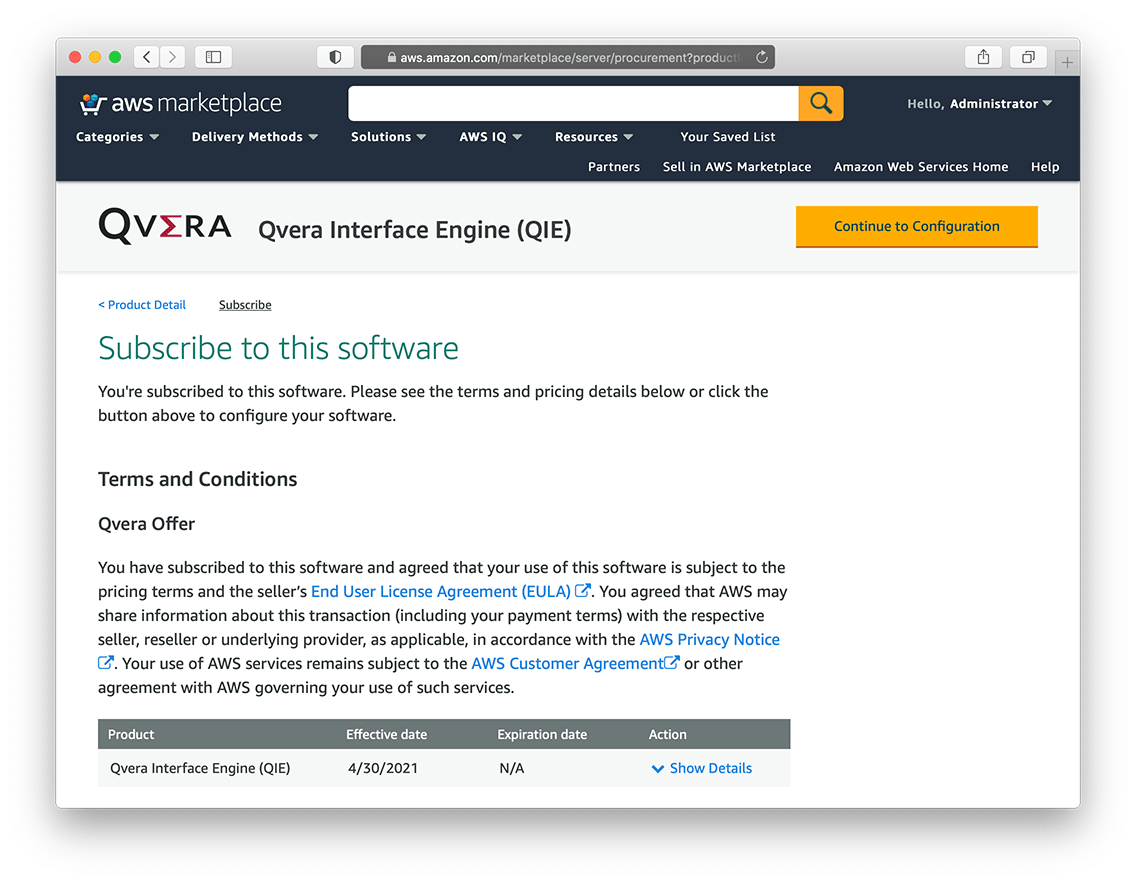
- Review the Terms & Conditions: Review the terms and conditions, including the end user license agreement (EULA), then click the Continue to Configuration button to configure your QIE deployment.
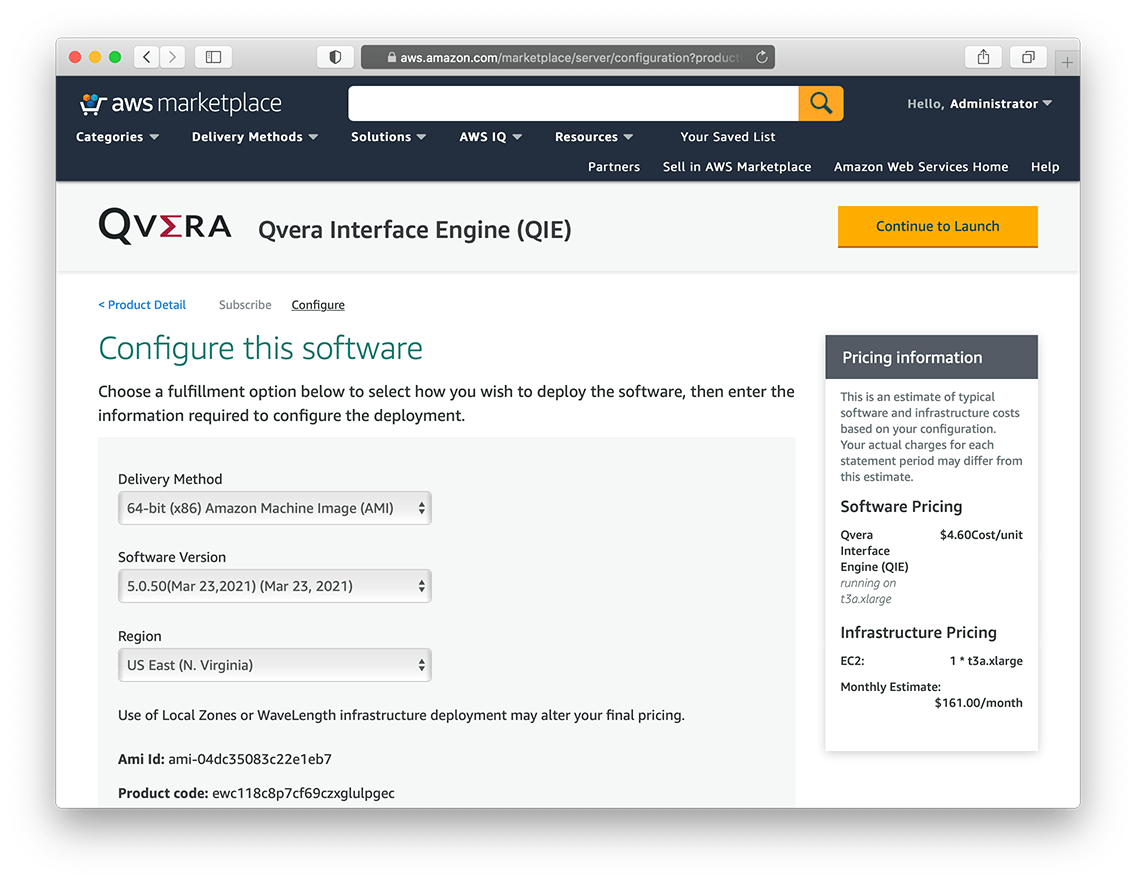
- Fulfillment Options: Configure the fulfillment options below to select how you wish to deploy the QIE software.
- Delivery Method: Select the 64-bit (x86) Amazon Machine Image (AMI) option from the ‘Delivery Method’ dropdown list.
- Software Version: Select the QIE version you wish to deploy from the ‘Software Version’ dropdown list.
- Region: Select the AWS region you wish to deploy QIE in from the ‘Region’ dropdown list.
- Launch the QIE Image: Once you have finished configuring your QIE deployment options, click the Continue to Launch button to continue.
AWS EC2 – QIE Product Page
AWS EC2 – QIE Subscription Page
Delivery Method, Software Version, & Region
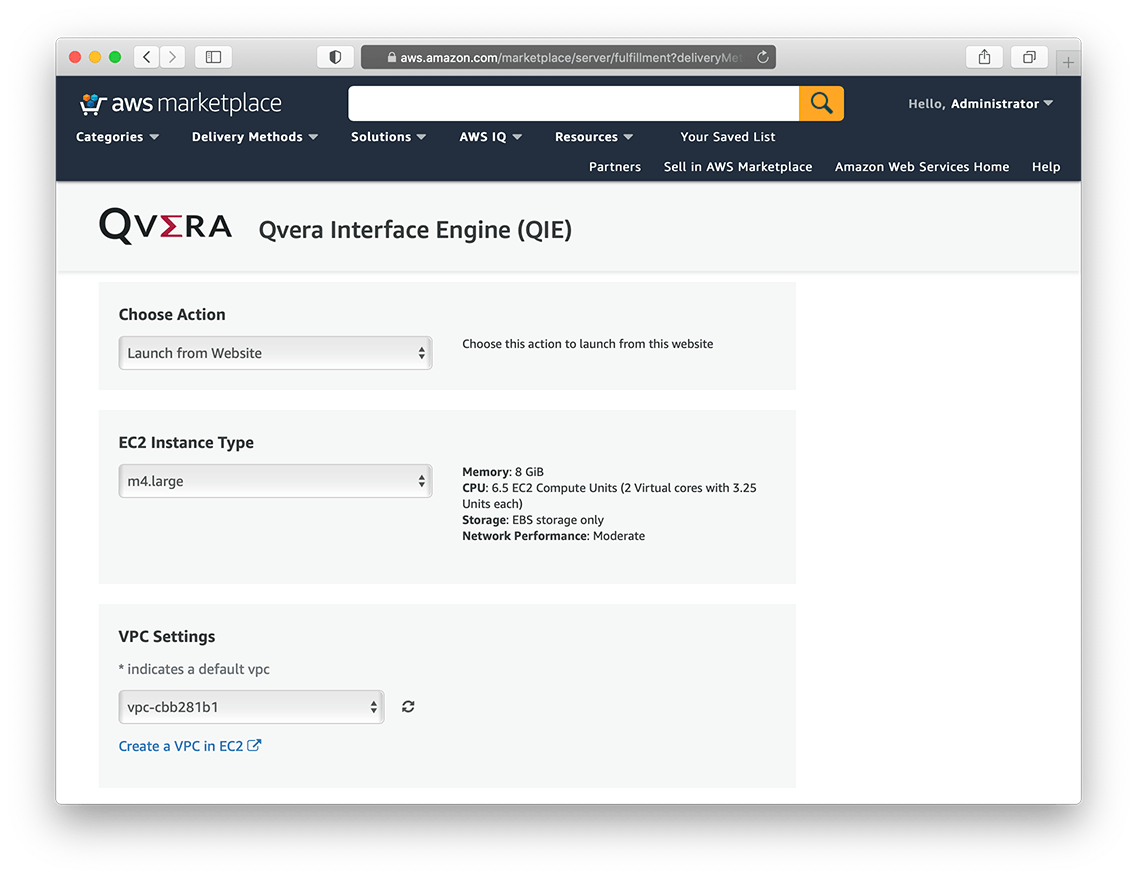
Action, Instance Type, & VPC Settings
Subnet & Security Group Settings
Key Pair Settings
Step 2 – Configure the AMI instance
From the ‘Launch this software’ page, configure the following options:
- Action: Select the Launch from Website option from the ‘Choose Action’ dropdown list
- EC2 Instance Type: Use the table below to choose the appropriate instance type based on your anticipated QIE message volume.
EC2 Instance Types Table
| QIE Deployment Size | Low Cost | Performance |
|---|---|---|
| Small Deployment: Less than 5,000 small messages/day (hl7, x12, etc.), and less than 100 large messages/day (CDA, DICOM, etc.) |
t3a.large 2 CPUs (shared) 8 GB RAM |
m4.large 2 CPUs (dedicated) 8 GB RAM |
| Medium Deployment: Less than 250,000 small messages/day (hl7, x12, etc.), and less than 1,000 large messages/day (CDA, DICOM, etc.) |
t3a.xlarge 4 CPUs (shared) 16 GB RAM |
m4.xlarge 4 CPUs (dedicated) 16 GB RAM |
| Large Deployment: Less than 5,000,000 small messages/day (hl7, x12, etc.), and less than 500,000 large messages/day (CDA, DICOM, etc.) |
t3a.2xlarge 8 CPUs (shared) 32 GB RAM |
m4.2xlarge 8 CPUs (dedicated) 32 GB RAM |
| Enterprise Deployment: More than 5,000,000 small messages/day (hl7, x12, etc.), or more than 500,000 large messages/day (CDA, DICOM, etc.) |
n/a | m4.4xlarge 16 CPUs 64 GB RAM |
- VPC Settings: Select the “Virtual Private Cloud” in your AWS environment you would like to deploy this image too. Use the Create a VPC in EC2 link to create a new VPC for this deployment if needed.
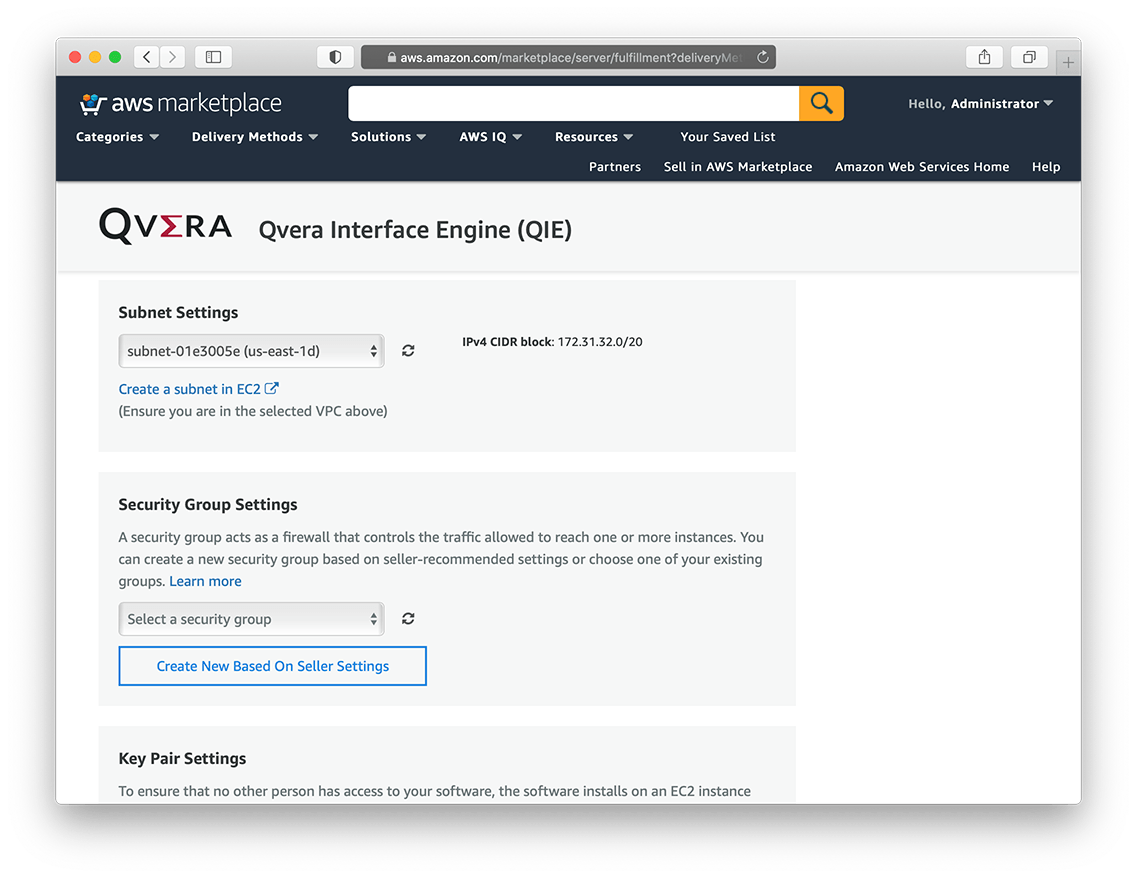
- Subnet Settings: Select the TCP/IP subnet to use with this instance. You can use the default subnet associated with VPC selected above, or create a new one using the Create a subnet in EC2 link.
- Security Group Settings: You will need RDP access on port 3389 to access the instance. Select an existing security group from the dropdown that has this access, or use the Create New Based On Seller Settings button to create a new group with the required access.
NOTE: Your security group will also need to allow inbound routing rules for each interface that will be receiving messages from outside systems. These rules can be modified at any time as needed.
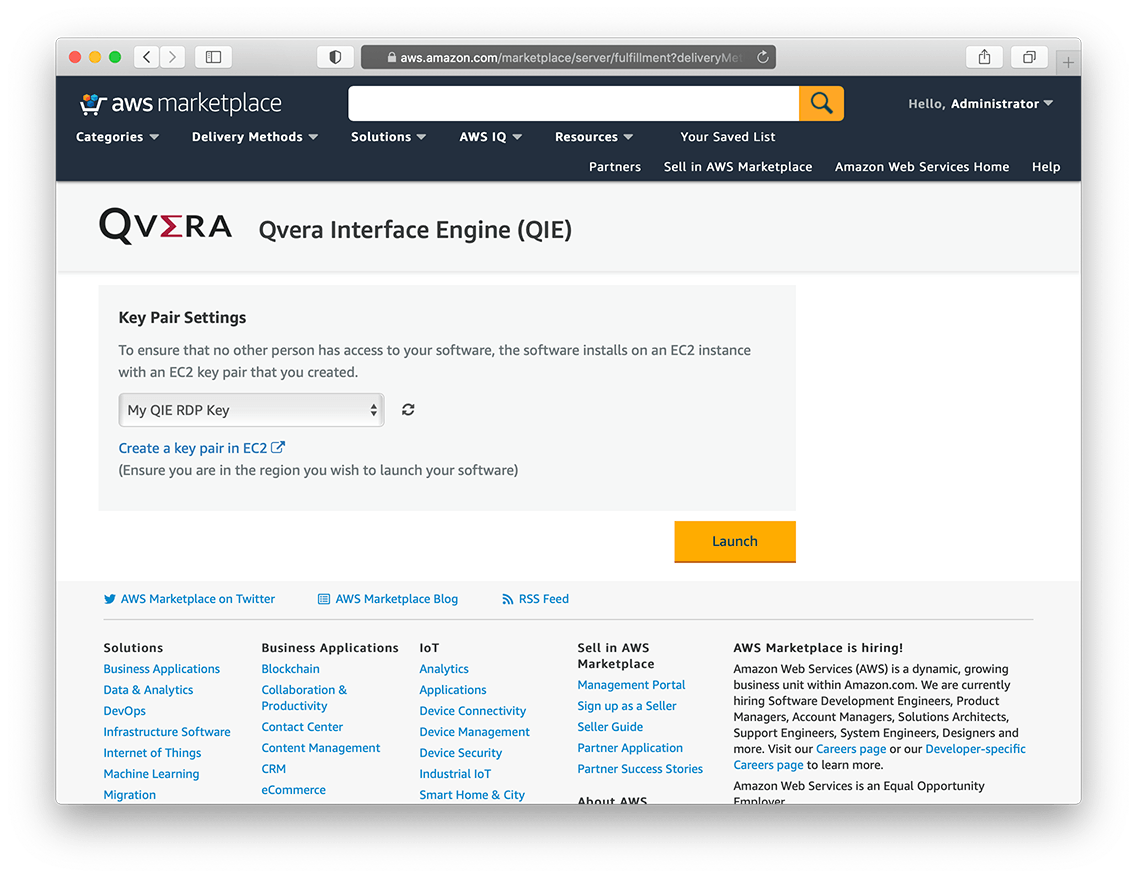
- Key Pair Setting: A private key is used to encrypt/decrypt the default “Administrator” password for each AMI instance. Select an existing key pair from the drop-down, or use the Create new key pair in EC2 link to create a new key pair for this instance.
NOTE: If you do not have access to the key (.pem or .ppk file) for an existing key pair, you will need to create and download a new one. The key file is used in a later step to decrypt the instance password.
Step 3 – Deploy the AMI instance on EC2
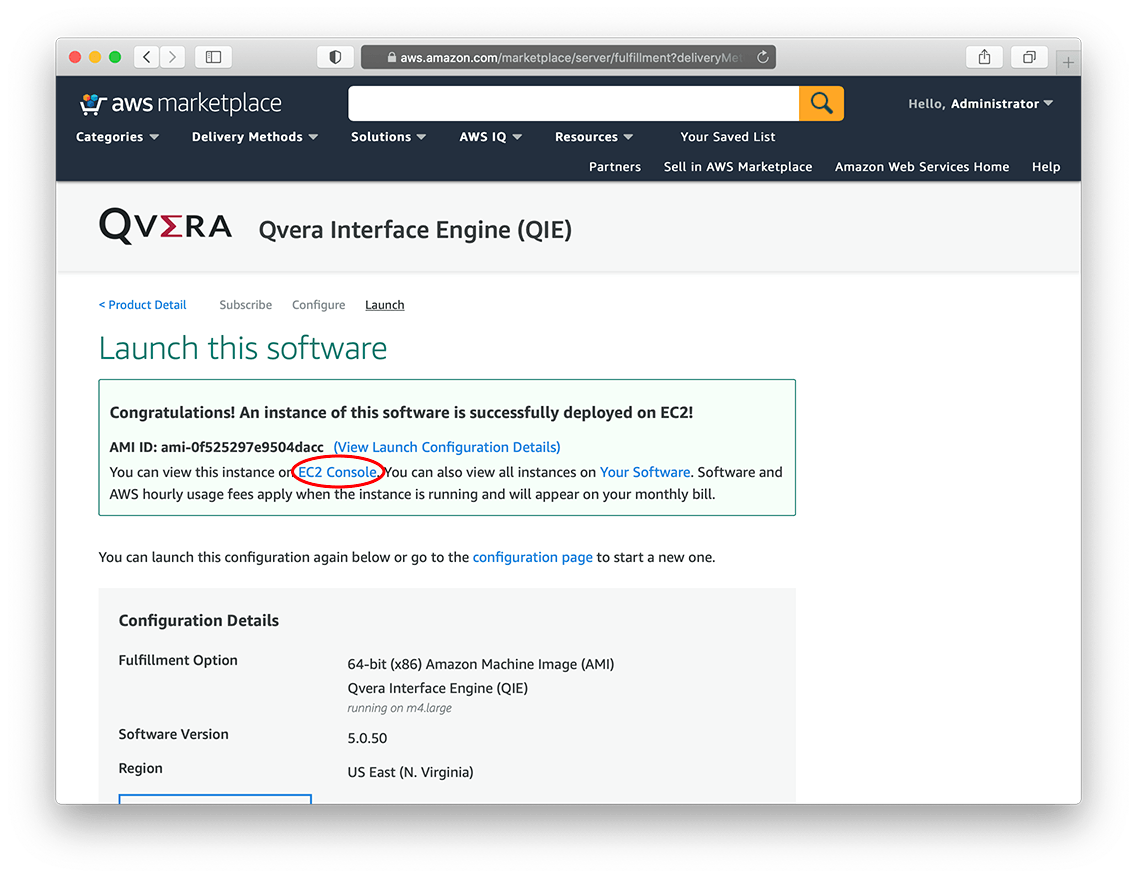
- Deploy the new instance: Once you have finished Step 2 above, click the Launch button at the bottom of the page to deploy the new instance on EC2. After clicking the launch button, you will see confirmation message indicating that the instance was successfully deployed.
- Open the EC2 console: From the confirmation message on the launch page, select the EC2 Console link and navigate to the EC2 console page
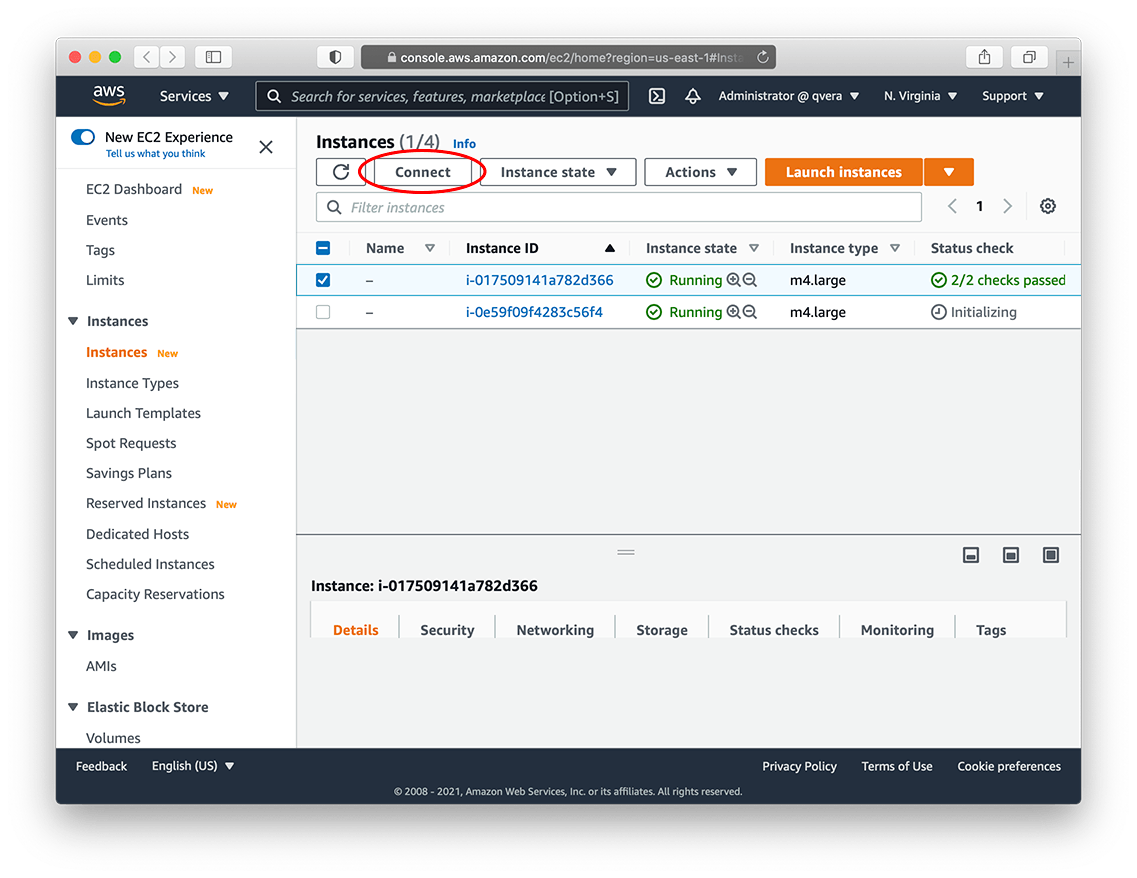
- Wait for the instance to initialize: It takes a few minutes for a new instance to initialize. While the instance is initializing, the ‘Status Check’ column in the instance table will display a grey timer icon with an Initializing message. Once initialization is complete, the column icon will change to a green checkmark with a checks passed message.
NOTE: EC2 requires that you wait for at least 4 minutes after initialization is complete before connecting to a new instance. Grab some popcorn, take a coffee break, or just be patient… 🙂
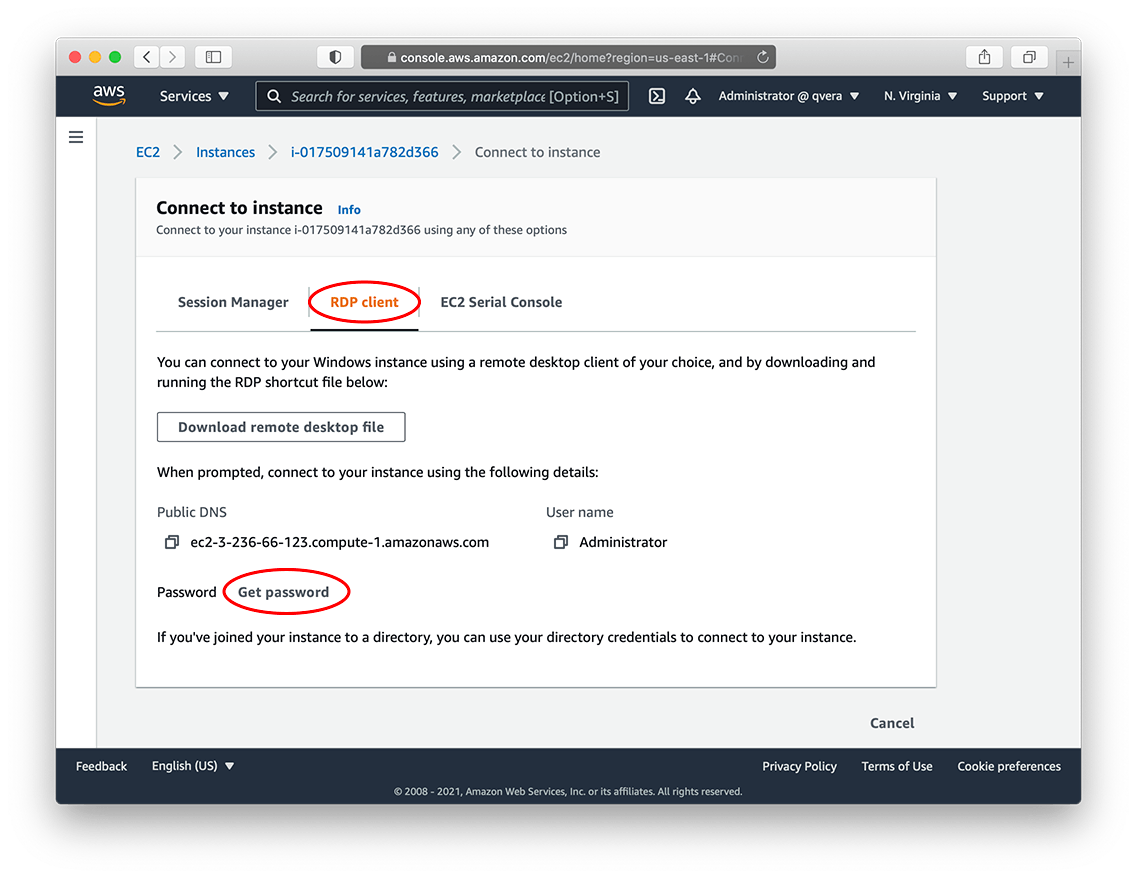
- Connect to the instance: After 4 minutes, select the checkbox next to the newly initialized instance and click the Connect button. Once connected, select the RDP Client tab.
- Get the instance password: Click the Get Password link and then the Browse button to open the key file (.pem) that was generated in Step 2 above. Once the RSA private key has been selected, click the Decrypt Password button to display the Administrator password.
- Connect using an RDP client: With the Public DNS, User name, and Password that are now displayed, connect to the instance using the remote desktop (RDP) client of your choice.
Instance Deployment Confirmation
Instance Initialization & Connection
RDP Client Tab & Password
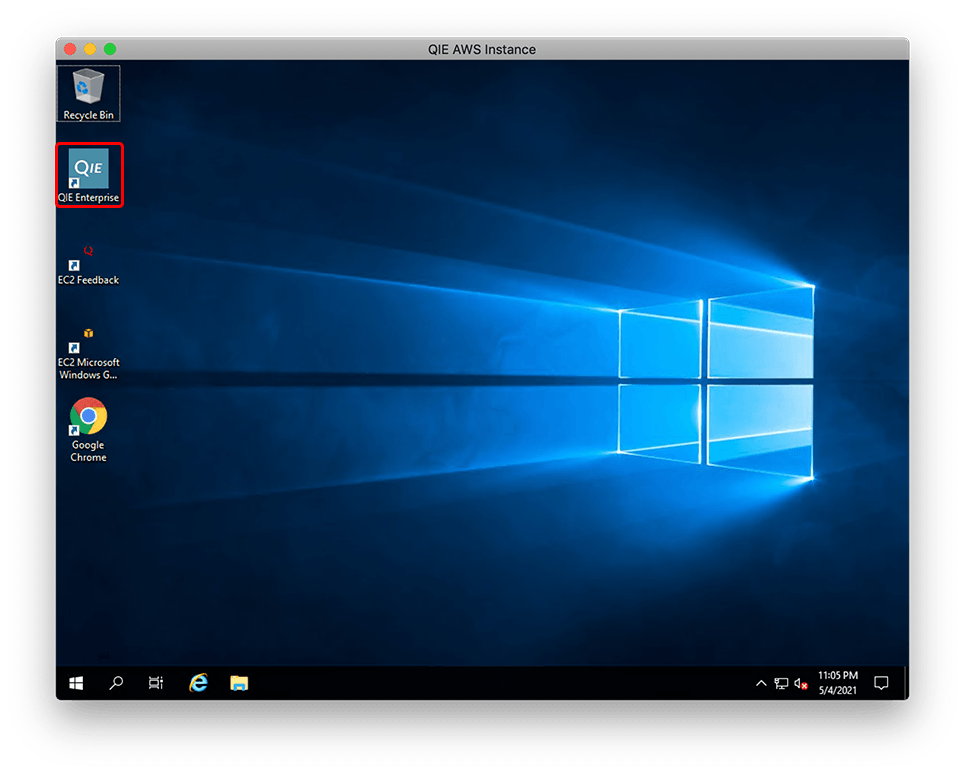
QIE Enterprise Desktop Icon
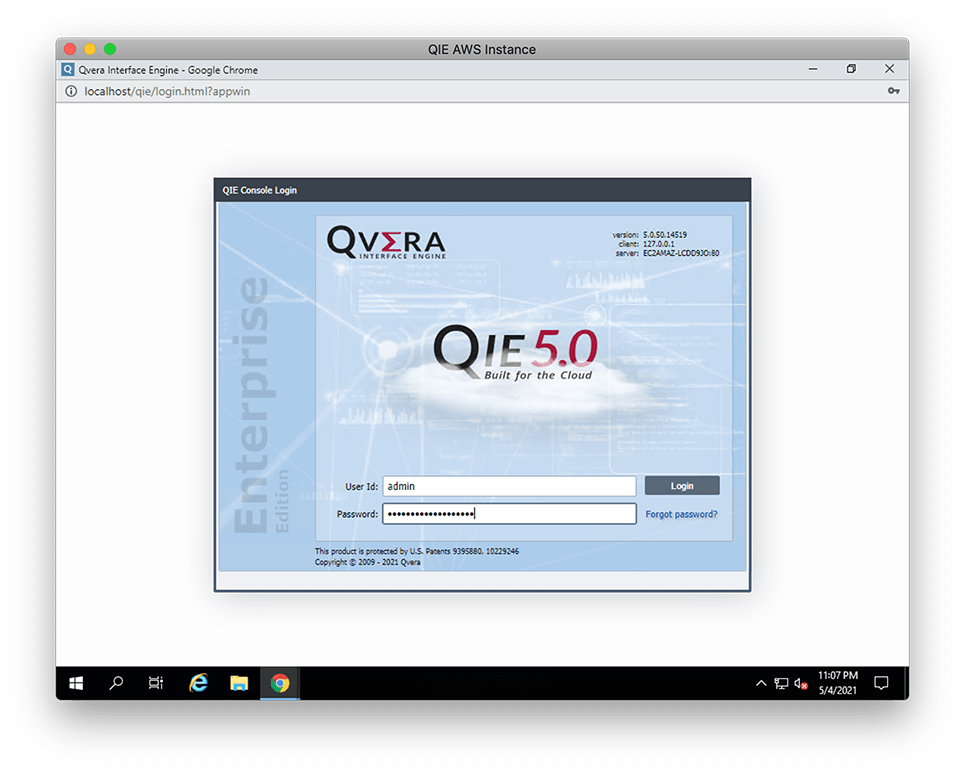
QIE Login Window
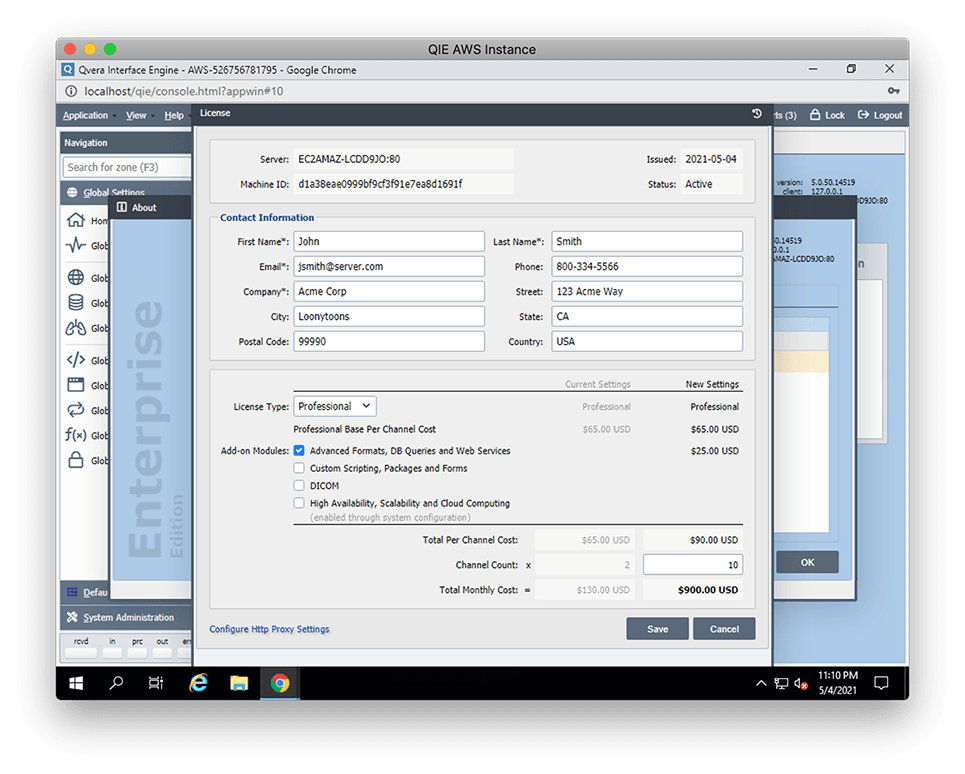
QIE License Configuration
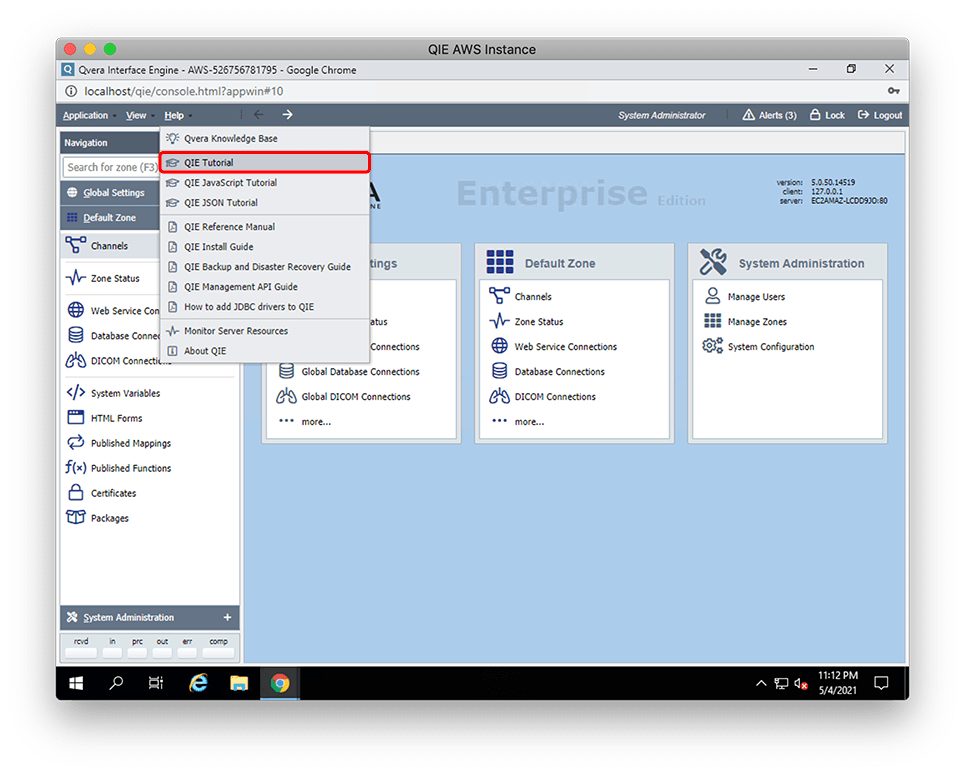
QIE Getting Started Tutorial
Step 4 – Activate QIE and start building interfaces
- Launch the QIE Console: Click on the QIE Enterprise icon on the Windows desktop to launch the QIE Console.
- Login to QIE: The default username is admin. The default password is the EC2 Instance ID.
NOTE: The EC2 Instance ID is a unique ID that identifies each EC2 AMI instance. It can be found on most EC2 console screens. It starts with ‘i-‘ followed by a series of numbers and letters (e.g. i-0e59fd091456c3)
- Set a New Password: After logging in, you will be prompted to set a new password for the admin account. This new password will replace the instance id password that you used in the previous step to log into QIE for the first time.
- Activate your QIE License: After logging in and setting your new password, you will be prompted to complete the license registration. Contact information is optional but highly recommended as it ensures a timely response in the event you need customer support services while using the software. Expanded descriptions for the Add-on Modules can be accessed by hovering over the module checkbox or description.
NOTE: License configuration, including add-on modules and channel counts, can be changed at anytime. To change the license configuration, select Help -> About QIE from the main menu, then double-click on the license listed in the grid to open the license configuration dialog.
- Build your first interface: From the main menu select Help -> QIE Tutorial to open the ‘Getting Started with Qvera Interface Engine’ PDF document. This tutorial will walk you, step-by-step, through the process of building your first interface in QIE. Alternatively, you can watch one of the following videos which help you get started using QIE.
