Thank you for choosing QIE as your AWS healthcare interoperability solution. The following instructions will walk you, step-by-step, through the process of deploying a new pre-configured QIE AMI server in the Amazon EC2 virtual server environment.
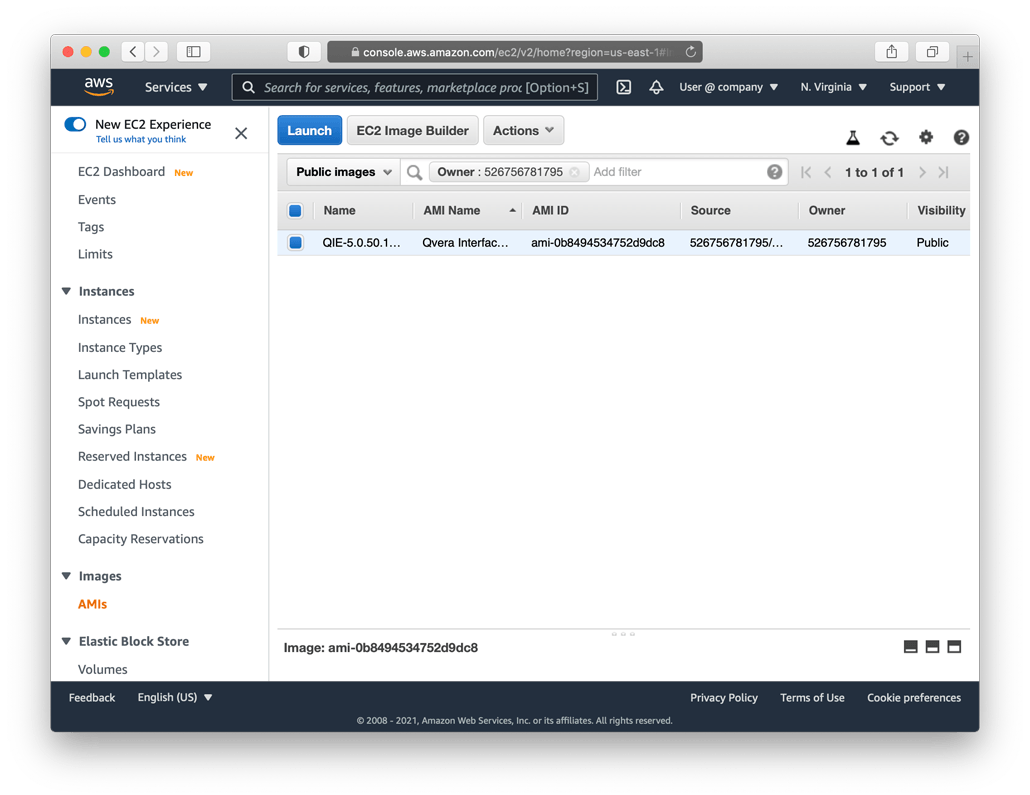
QIE EC2 AMI Image Page
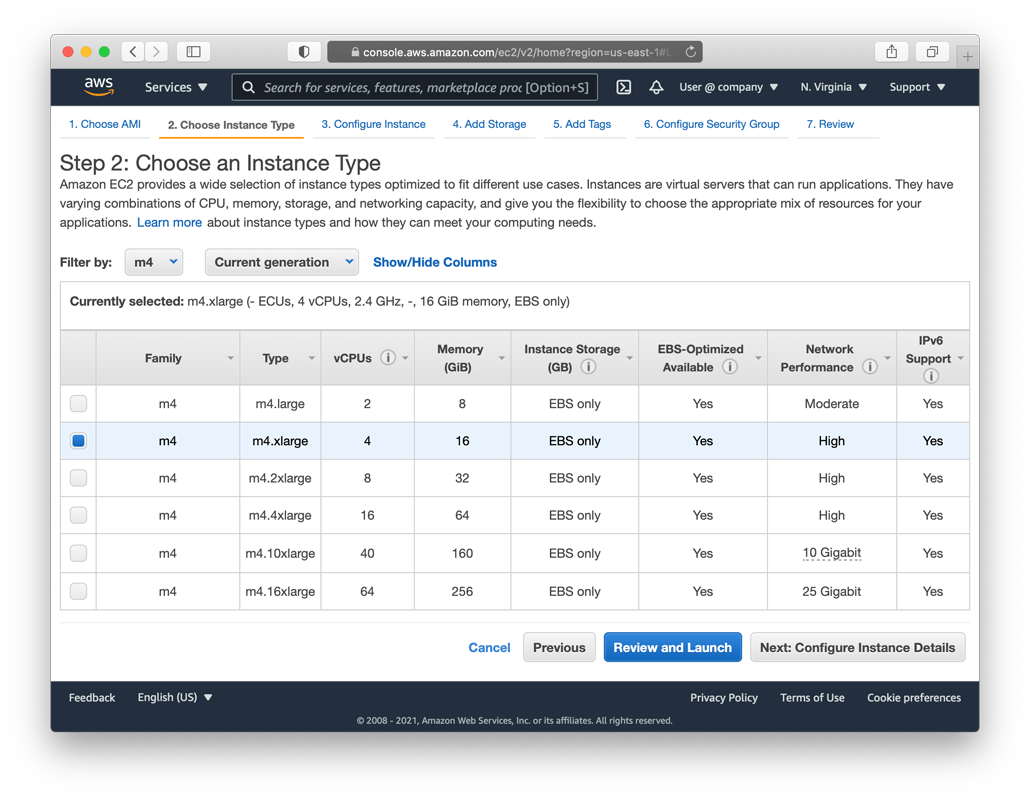
EC2 AMI Instance Type
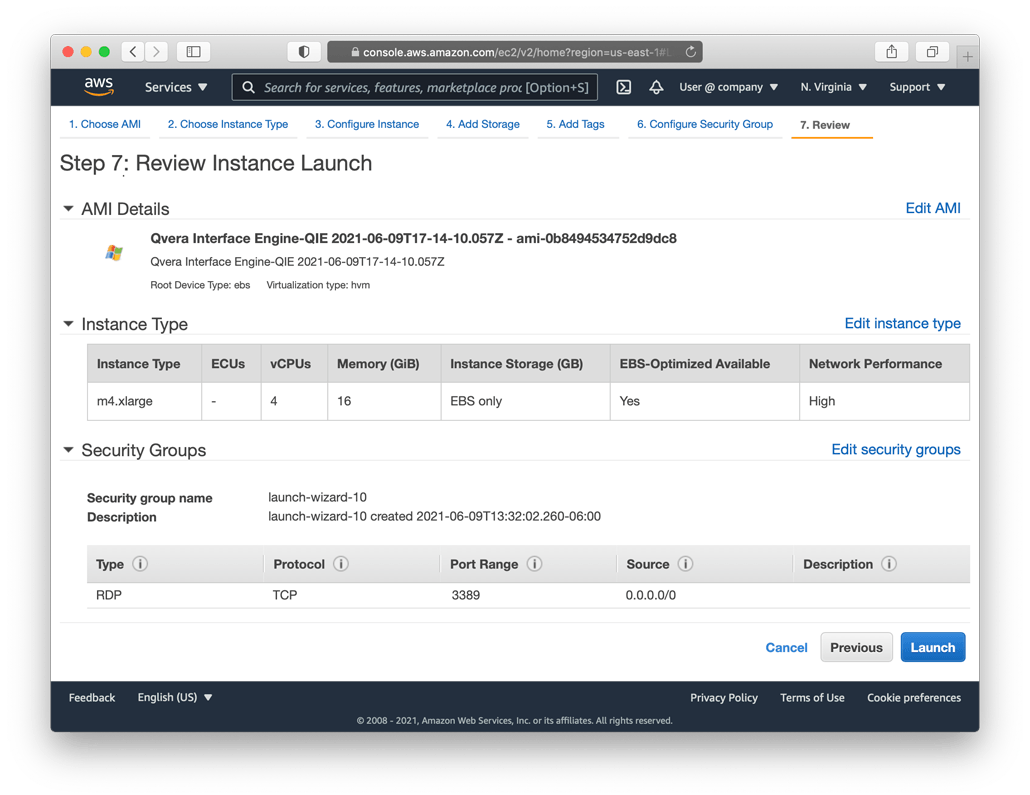
EC2 AMI Instance Review
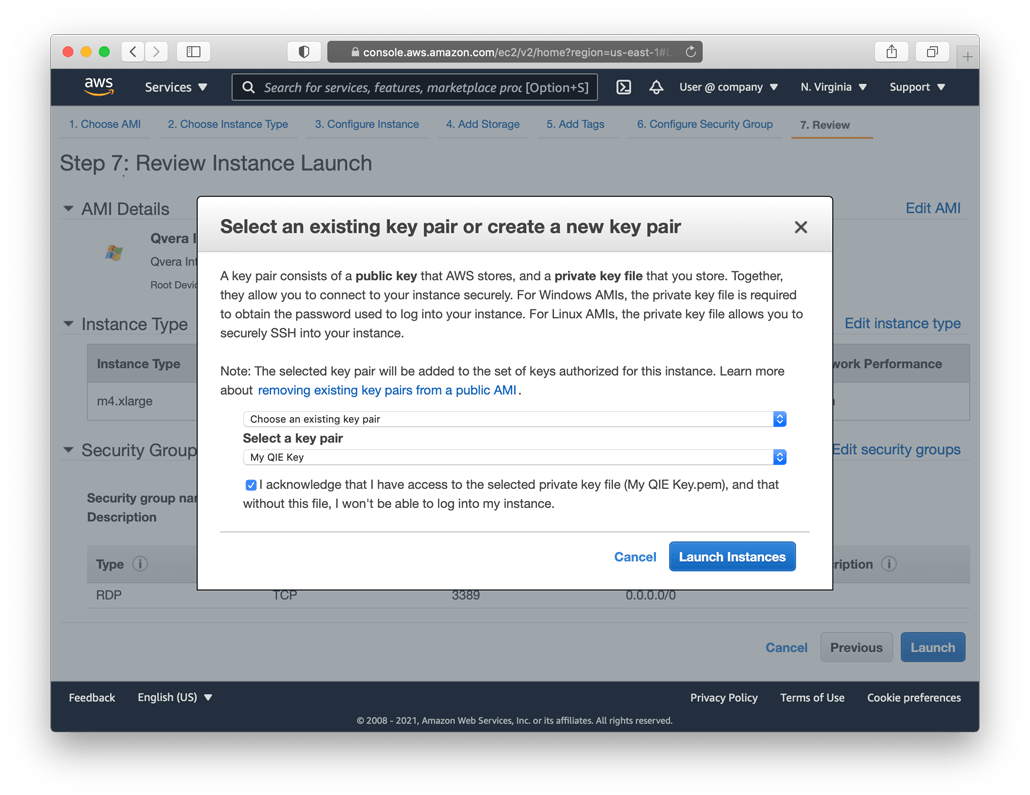
Select Key Pair
Step 1 – Configure a new QIE AMI instance
- Browse to the QIE AMI Image Page: Click here to access the QIE AMI image page
- Launch the QIE AMI Image: Select the QIE image from the list and click the Launch button
- EC2 Instance Type: Use the table below to choose the appropriate QIE instance type
QIE Deployment Size Low Cost Performance Small Deployment:
Less than 5,000 small messages/day (hl7, x12, etc.), and
less than 100 large messages/day (CDA, DICOM, etc.)t3a.large
2 CPUs (shared)
8 GB RAMm4.large
2 CPUs (dedicated)
8 GB RAMMedium Deployment:
Less than 250,000 small messages/day (hl7, x12, etc.), and
less than 1,000 large messages/day (CDA, DICOM, etc.)t3a.xlarge
4 CPUs (shared)
16 GB RAMm4.xlarge
4 CPUs (dedicated)
16 GB RAMLarge Deployment:
Less than 5,000,000 small messages/day (hl7, x12, etc.), and
less than 500,000 large messages/day (CDA, DICOM, etc.)t3a.2xlarge
8 CPUs (shared)
32 GB RAMm4.2xlarge
8 CPUs (dedicated)
32 GB RAMEnterprise Deployment:
More than 5,000,000 small messages/day (hl7, x12, etc.), or
more than 500,000 large messages/day (CDA, DICOM, etc.)n/a m4.4xlarge
16 CPUs
64 GB RAMthen click the Review and Launch button
- Review Instance Launch: Review the instance settings to ensure they are correct and then click the Launch button to launch the new QIE instance
NOTE: Ensure that you have RDP access on port 3389 configured under the security groups section
- Select Key Pair: Select or create a key pair to use for encrypting/decrypting the administrator password for the QIE AMI instance. Once this is complete, click the Launch Instances button
Step 2 – Launch the AMI instance on EC2
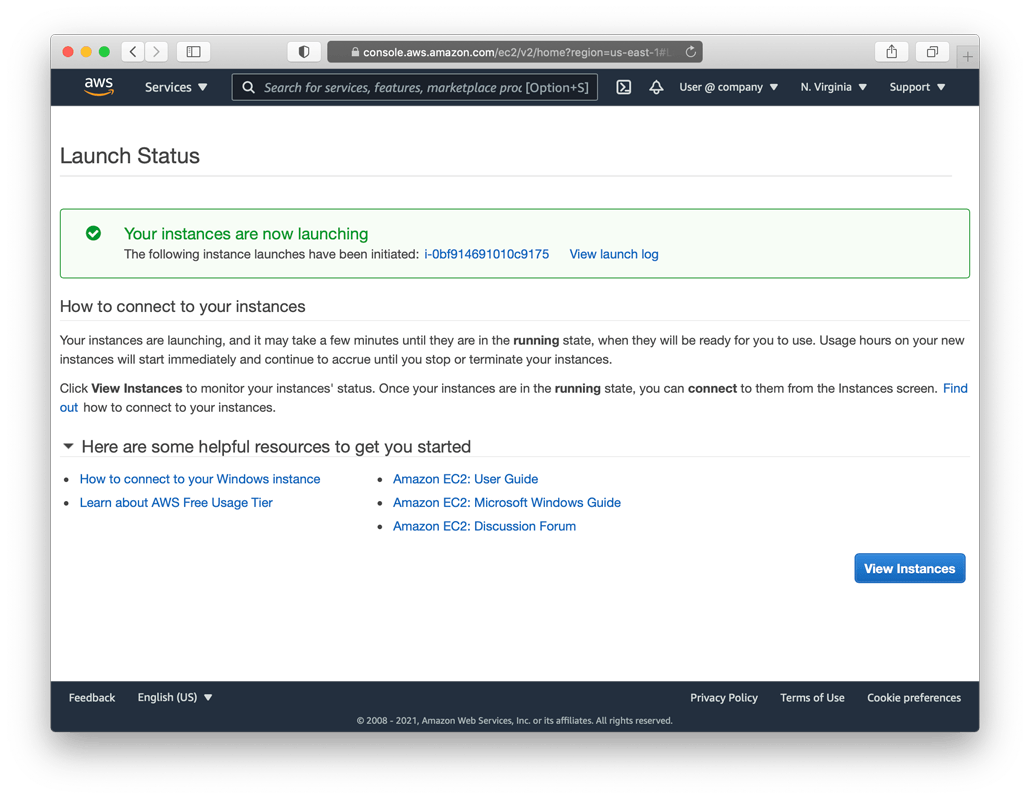
- Open the EC2 Console Instance Management Page: After launching the instance, you will be taken to the Launch Status page. From this page, click the View Instances button to be taken to the EC2 Console Instance Managment page
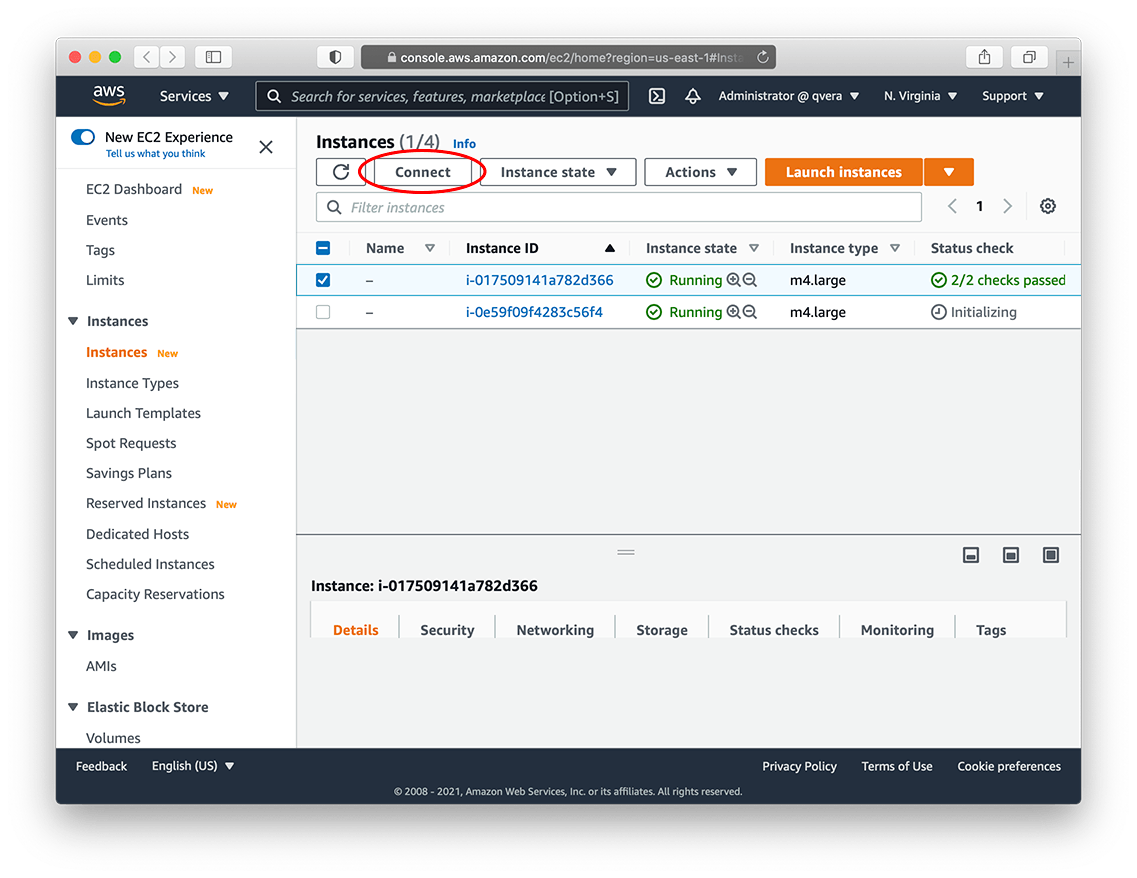
- Wait for the instance to initialize: It takes a few minutes for a new instance to initialize. While the instance is initializing, the ‘Status Check’ column in the instance table will display a grey timer icon with an Initializing message. Once initialization is complete, the column icon will change to a green checkmark with a checks passed message.
NOTE: EC2 requires that you wait for at least 4 minutes after initialization is complete before connecting to a new instance. Grab some popcorn, take a coffee break, or just be patient… 🙂
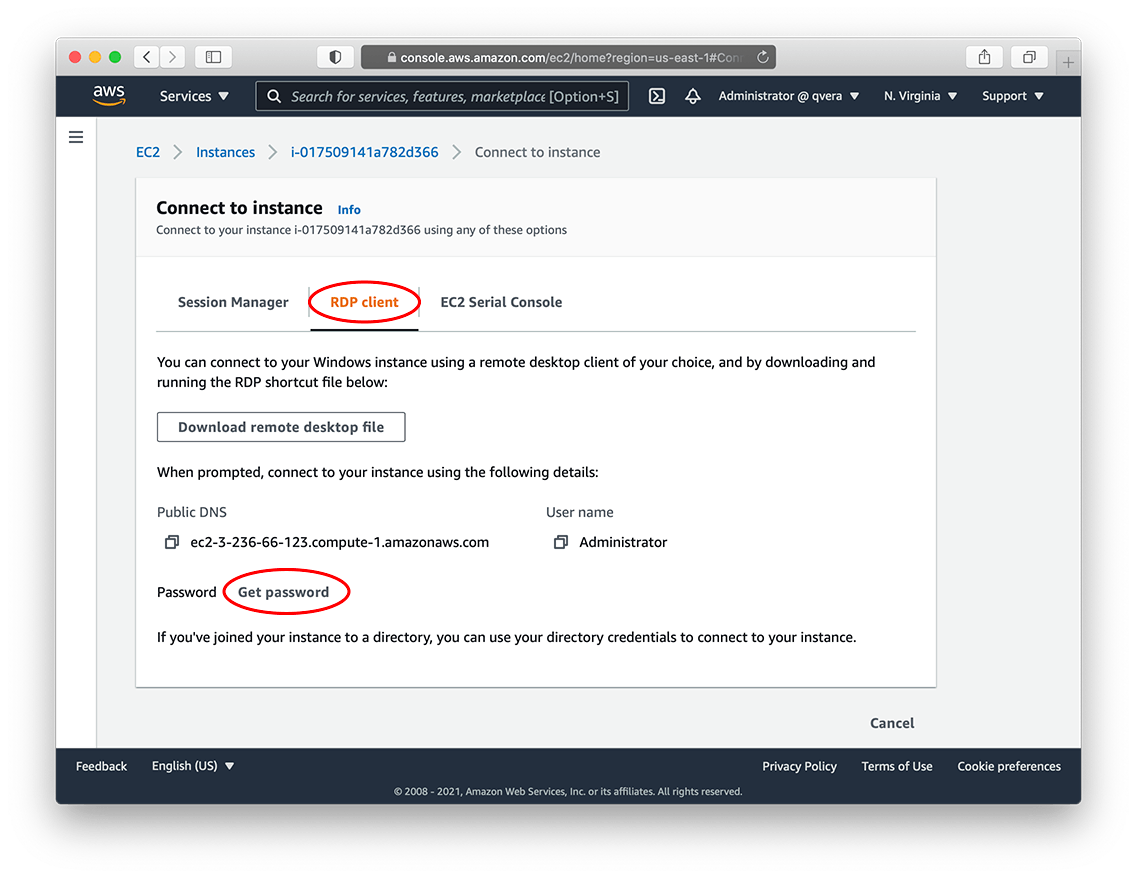
- Connect to the instance: After 4 minutes, select the checkbox next to the newly initialized instance and click the Connect button. Once connected, select the RDP Client tab.
- Get the instance password: Click the Get Password link and then the Browse button to open the key file (.pem) that was selected or created in Step 1 above. Once the RSA private key has been selected, click the Decrypt Password button to display the Administrator password.
- Connect using an RDP client: With the Public DNS, User name, and Password that are now displayed, connect to the instance using the remote desktop (RDP) client of your choice.
EC2 Launch Status
Instance Initialization & Connection
RDP Client Tab & Password
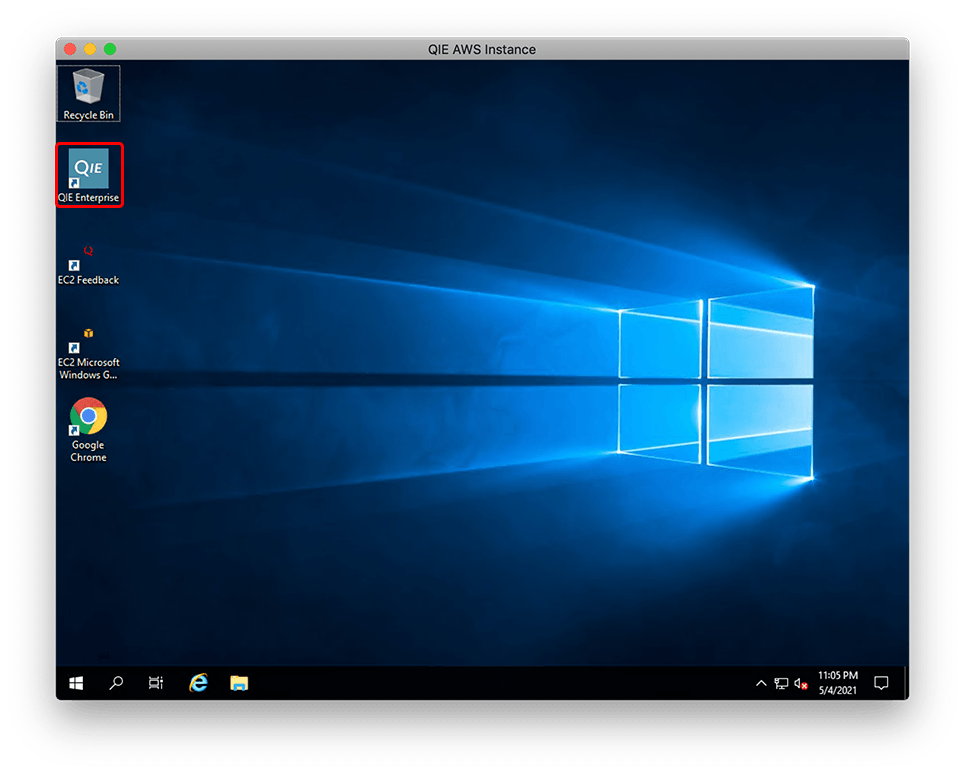
QIE Enterprise Desktop Icon
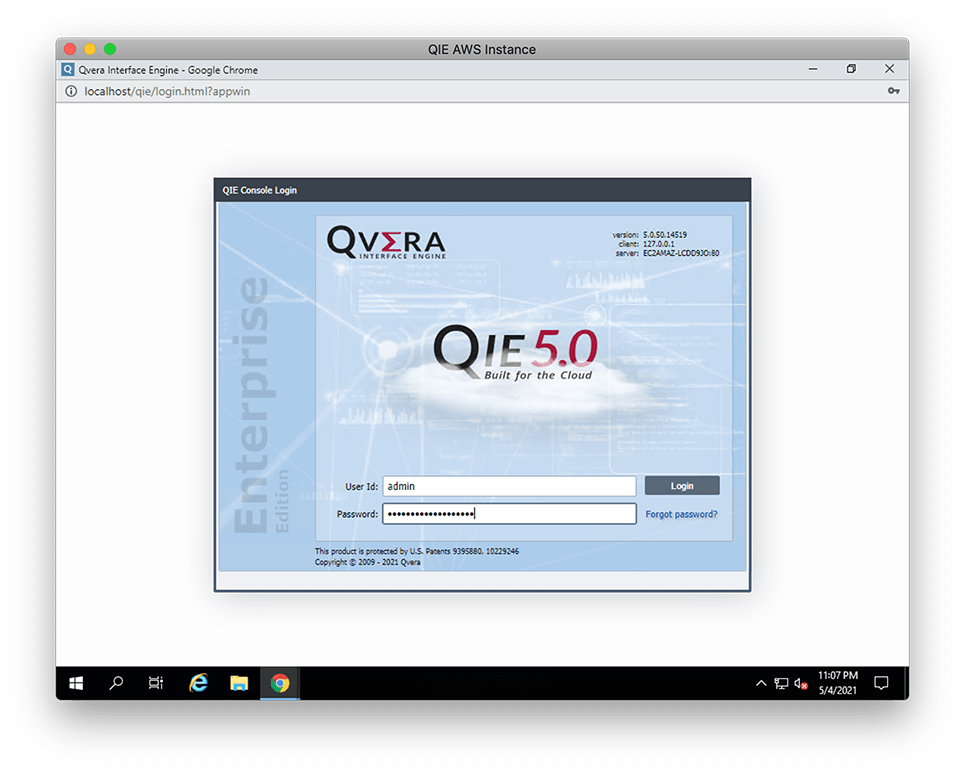
QIE Login Window
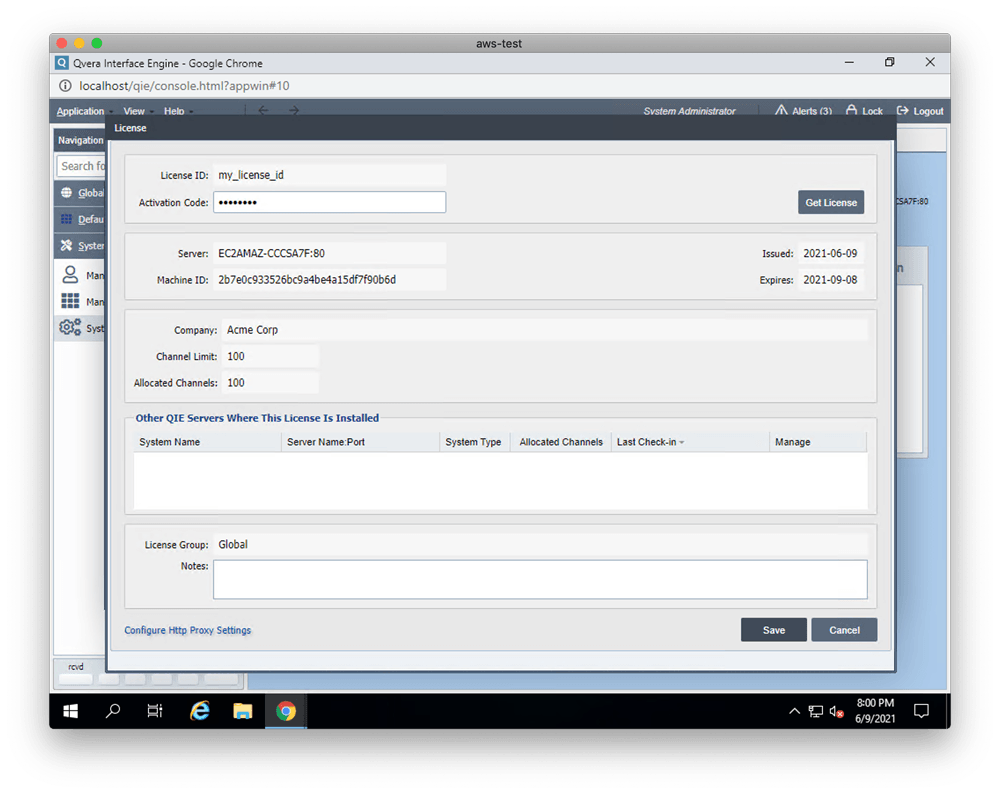
QIE License Configuration
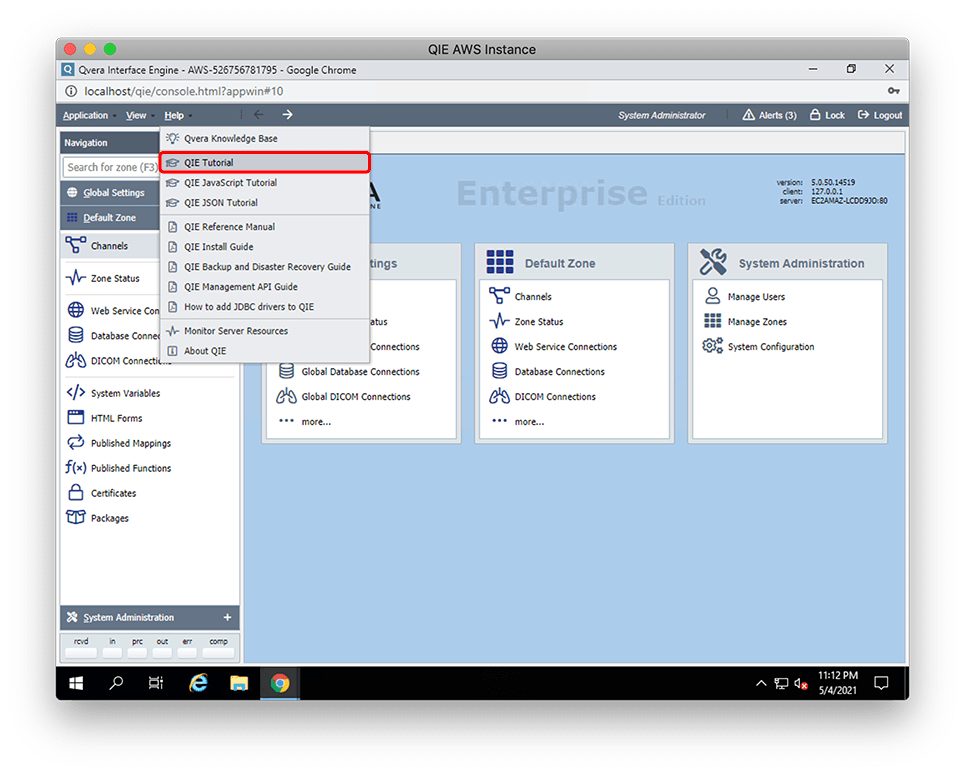
QIE Getting Started Tutorial
Step 3 – Activate QIE and start building interfaces
- Launch the QIE Console: Click on the QIE Enterprise icon on the Windows desktop to launch the QIE Console.
- Login to QIE: The default username is admin. The default password is admin.
- Set a New Password: After logging in, you will be prompted to set a new password for the admin account. This new password will replace the instance id password that you used in the previous step to log into QIE for the first time.
- Activate your QIE License: After logging in and setting your new password, you will be prompted to complete the license registration. This is required to activate the QIE license. Enter your License ID and Activation Code and then click the Get License button to retrieve and activate your QIE license.
- Build your first interface: From the main menu select Help -> QIE Tutorial to open the ‘Getting Started with Qvera Interface Engine’ PDF document. This tutorial will walk you, step-by-step, through the process of building your first interface in QIE. Alternatively, you can watch one of the following videos which help you get started using QIE.


